> For the complete documentation index, see [llms.txt](https://help.eventool.com/llms.txt). Markdown versions of documentation pages are available by appending `.md` to page URLs; this page is available as [Markdown](https://help.eventool.com/en/meeting-planner/register-attendees-and-grant-permissions-for-meetings.md).
# Register attendees and grant permissions for meetings
Once you've enabled the meeting functionality for the event, the next step is to **register attendees** and configure their permissions related to the appointment module. This can be done **manually from the dashboard or automatically using an Excel template**.
***
### Where are the attendees managed?
Go to the "**Assistants**" section in the side menu of the management panel. From here you can:
* Create or edit attendee profiles.
* Assign roles related to meetings.
* Import data from an Excel file.
***
### Manual registration of attendees
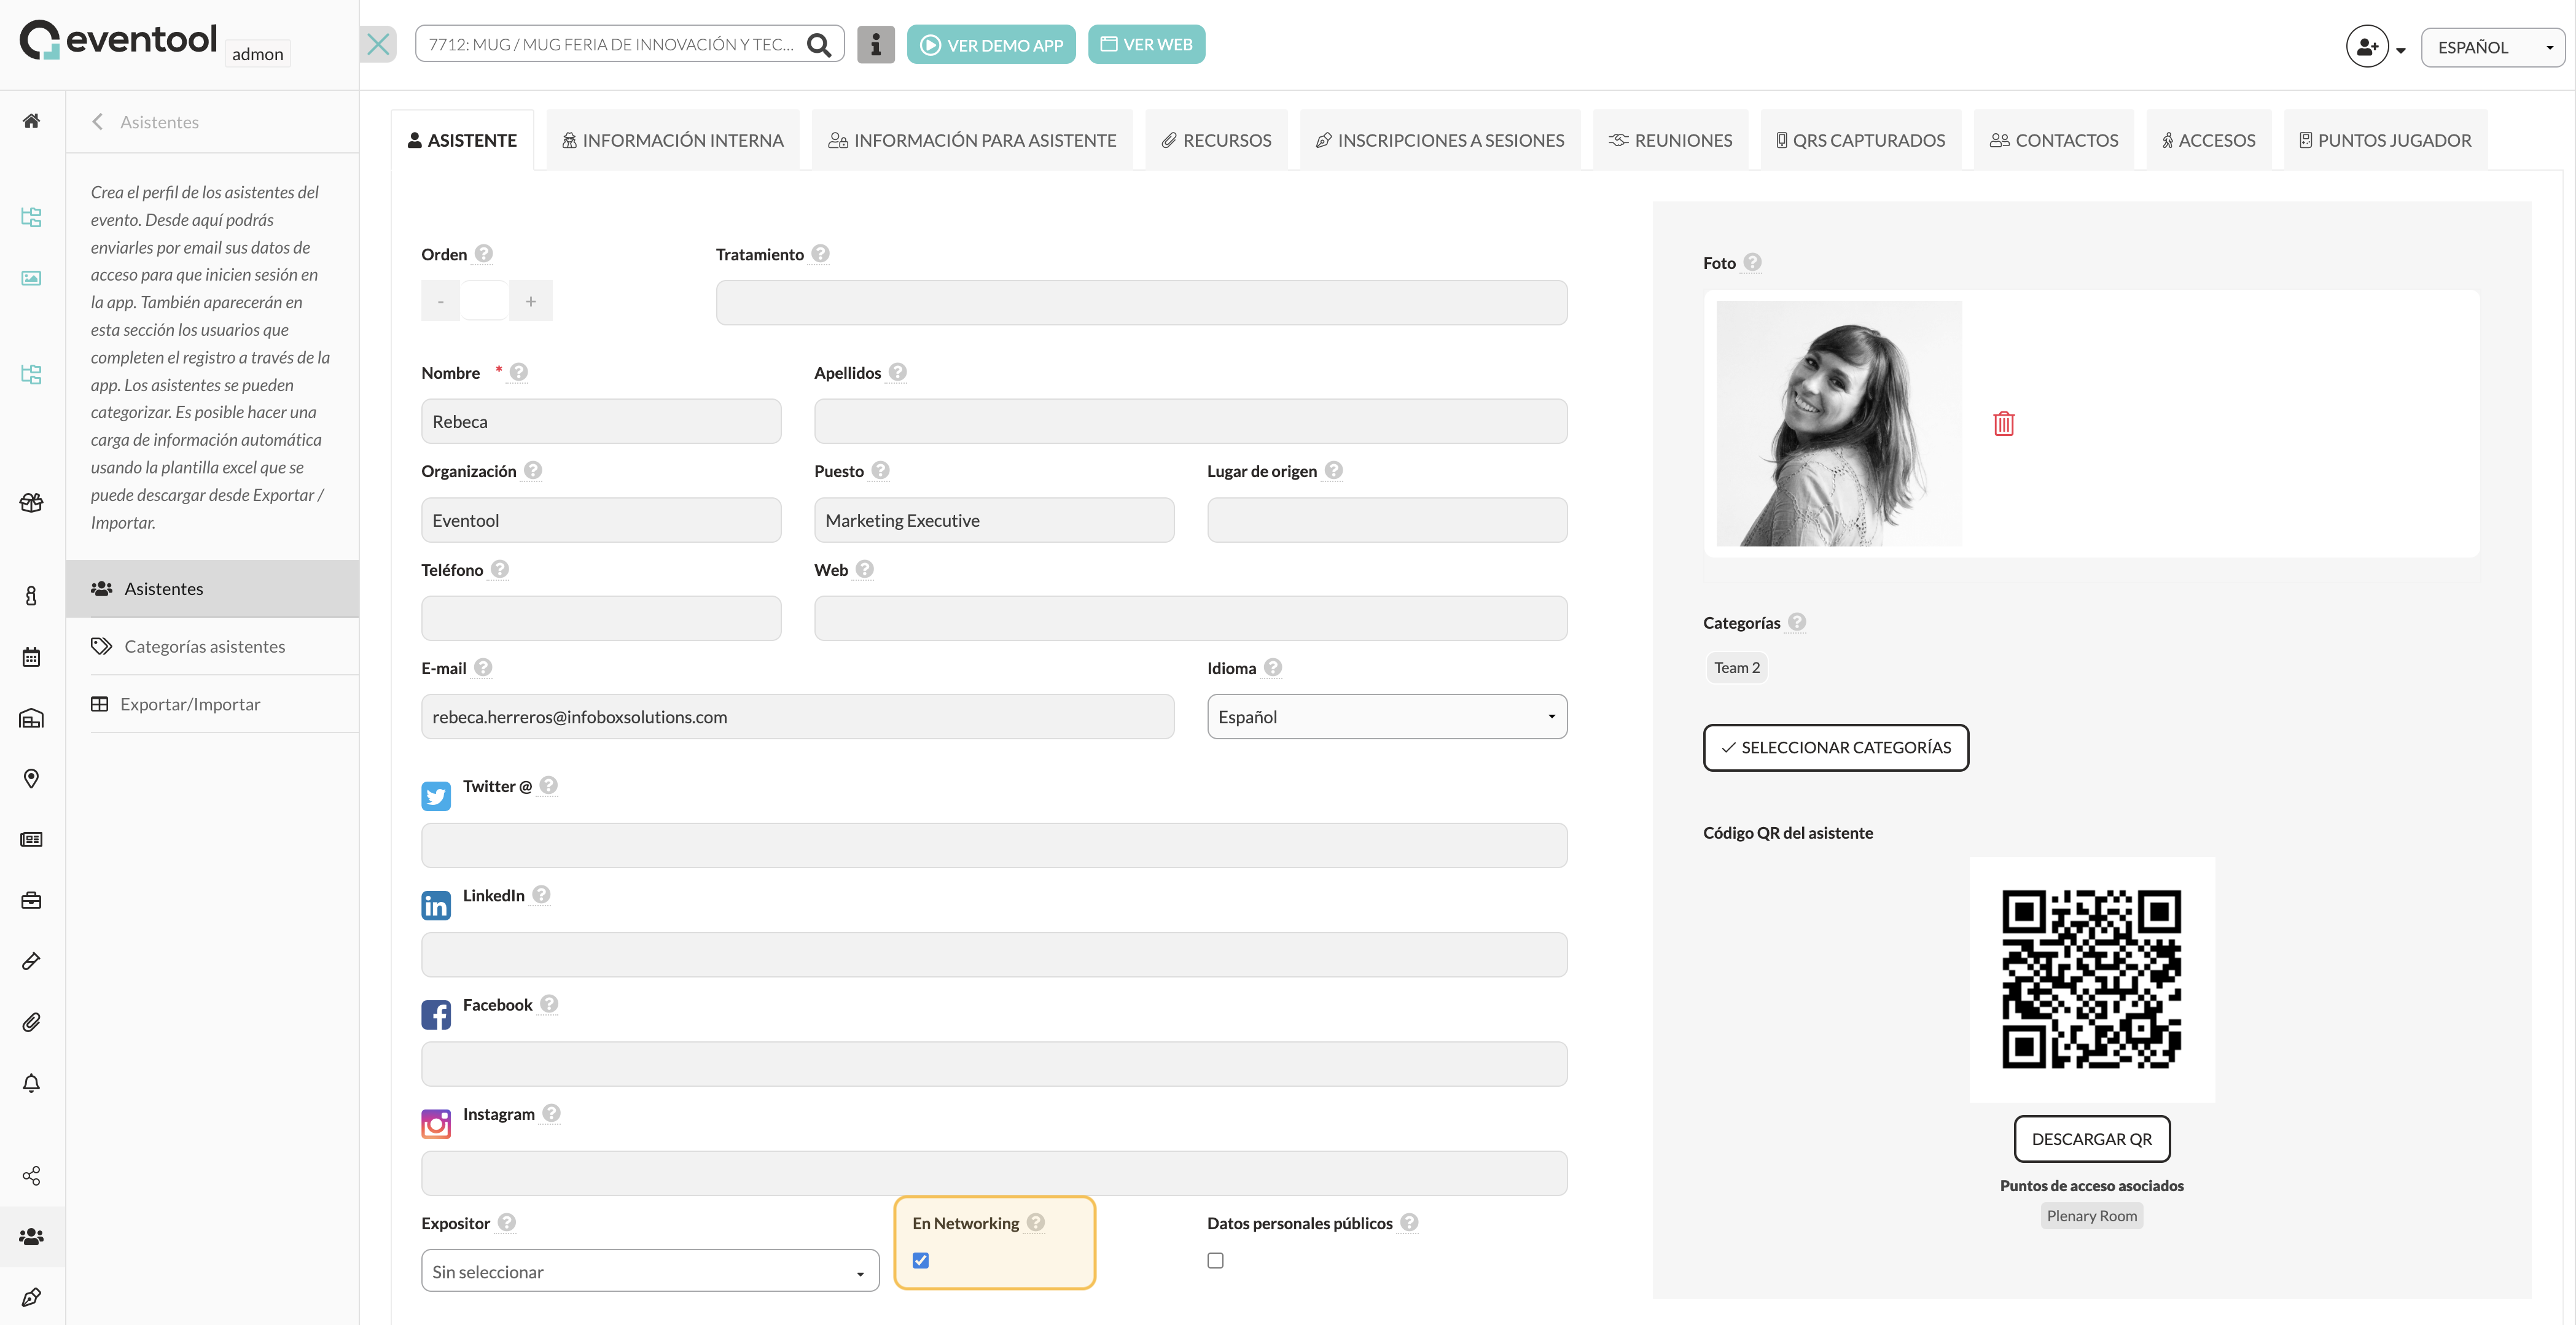
You can register attendees one by one or edit existing ones. For an attendee to participate in the networking and meetings, the following is required:
#### 1. Select the “Networking” option
This option makes the attendee's **profile publicly visible** in the participant list within the app.
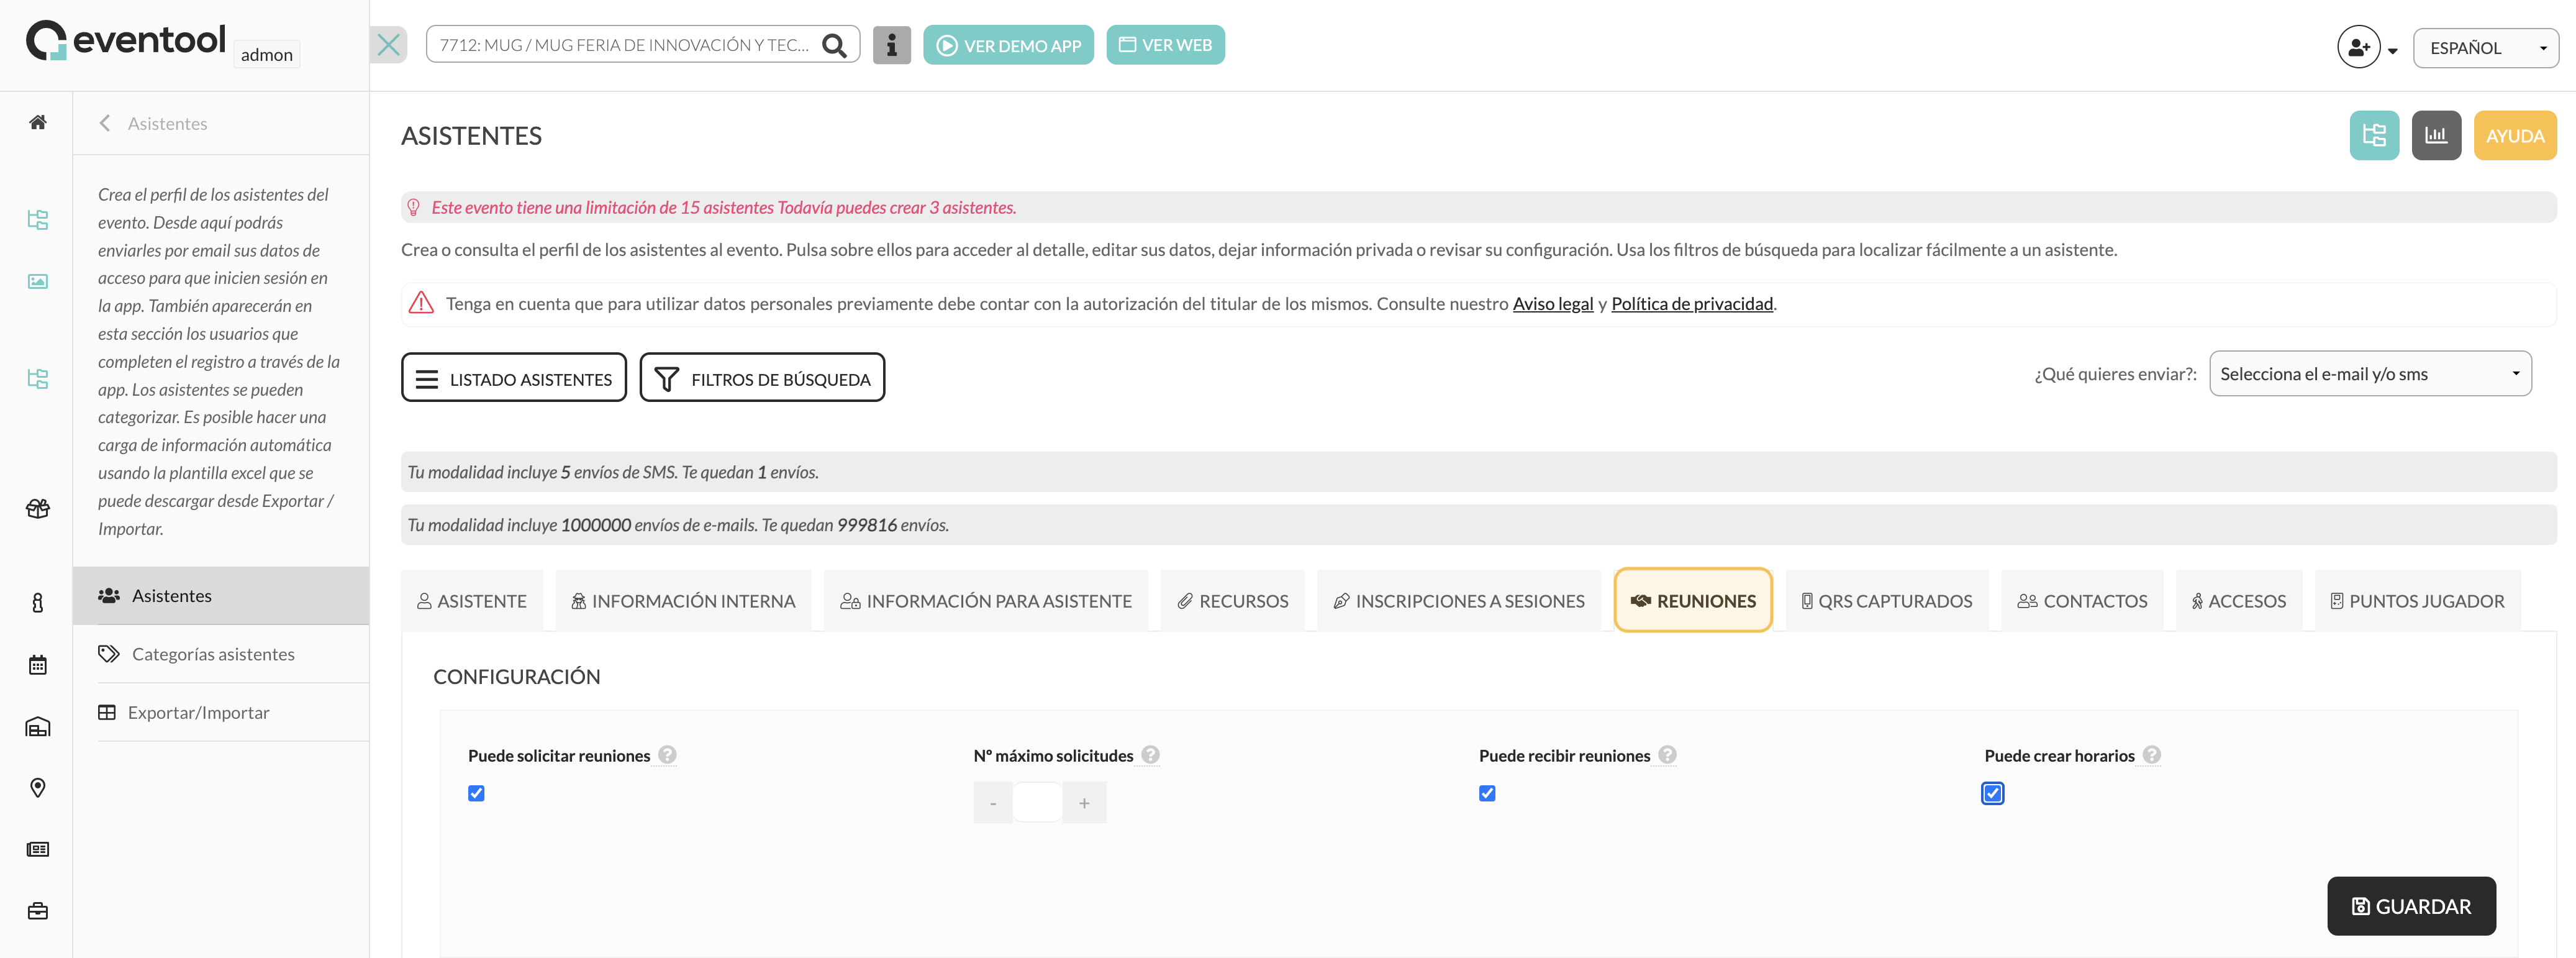
#### 2. Configure permissions in the “Meetings” tab
Access the attendee's profile and open the **Meetings** tab, where you can activate the following options:
* **You can request meetings**: the assistant will be able to send appointment requests from the app.
* **Maximum number of requests**: defines the maximum number of requests this assistant can send. If not configured here, it will use the event's default value.
* **Can receive meetings**: allows this assistant to receive requests from others.
* **You can create schedules**: if you can receive meetings, you can also set your own available slots from the app.
{% hint style="info" %}
💡If you prefer to create schedules for a specific attendee from the panel, you can also do so from this same tab.
{% endhint %}
***
### Add attendees from Excel
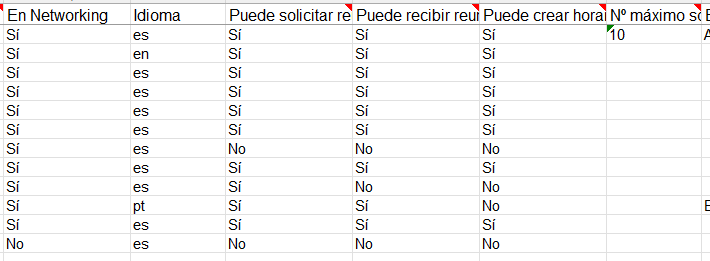
You can also upload attendees or edit existing ones in bulk using an Excel template:
#### Steps:
1. Go to the **Export / Import** section of the panel.
2. Download the attendee template.
3. Fill in the following key columns:
| Columna | Significado |
| ---------------------------------- | --------------------------------------------------- |
| **In Networking** | “Yes” to make the assistant appear in the app. |
| **You can request meetings** | “Yes” if the assistant can send requests. |
| **You can receive meetings** | “Yes” if you can receive quotes from others. |
| **You can create schedules** | “Yes” if you can define your gaps. |
| **Maximum number of applications** | Define the maximum number of requests you can make. |
4. Save the file and **upload it back** to the panel to apply the changes.
***
### What roles can I assign to the attendees?
Depending on the configuration, attendees may have one or more of these roles:
#### ▶ Request issuer
* You can send meeting requests.
* View submitted, accepted, and rejected requests.
* If you reach your maximum number of pending appointments, you will not be able to send any more until one is rejected.
#### ▶ Request Receiver
* You can receive and accept/reject appointments.
* View your meeting schedule in real time.
* You can set your available times (if you have permission).