> For the complete documentation index, see [llms.txt](https://help.eventool.com/llms.txt). Markdown versions of documentation pages are available by appending `.md` to page URLs; this page is available as [Markdown](https://help.eventool.com/en/meeting-planner/meeting-management-and-schedule-creation-in-the-panel.md).
# Meeting management and schedule creation in the panel
Once attendees are registered and their permissions are configured, it's time to manage the meetings and define the available times for each person. From the "**Meetings**" section of the Eventool dashboard, you can do all of this easily and efficiently.
***
### Main section: Meetings between attendees
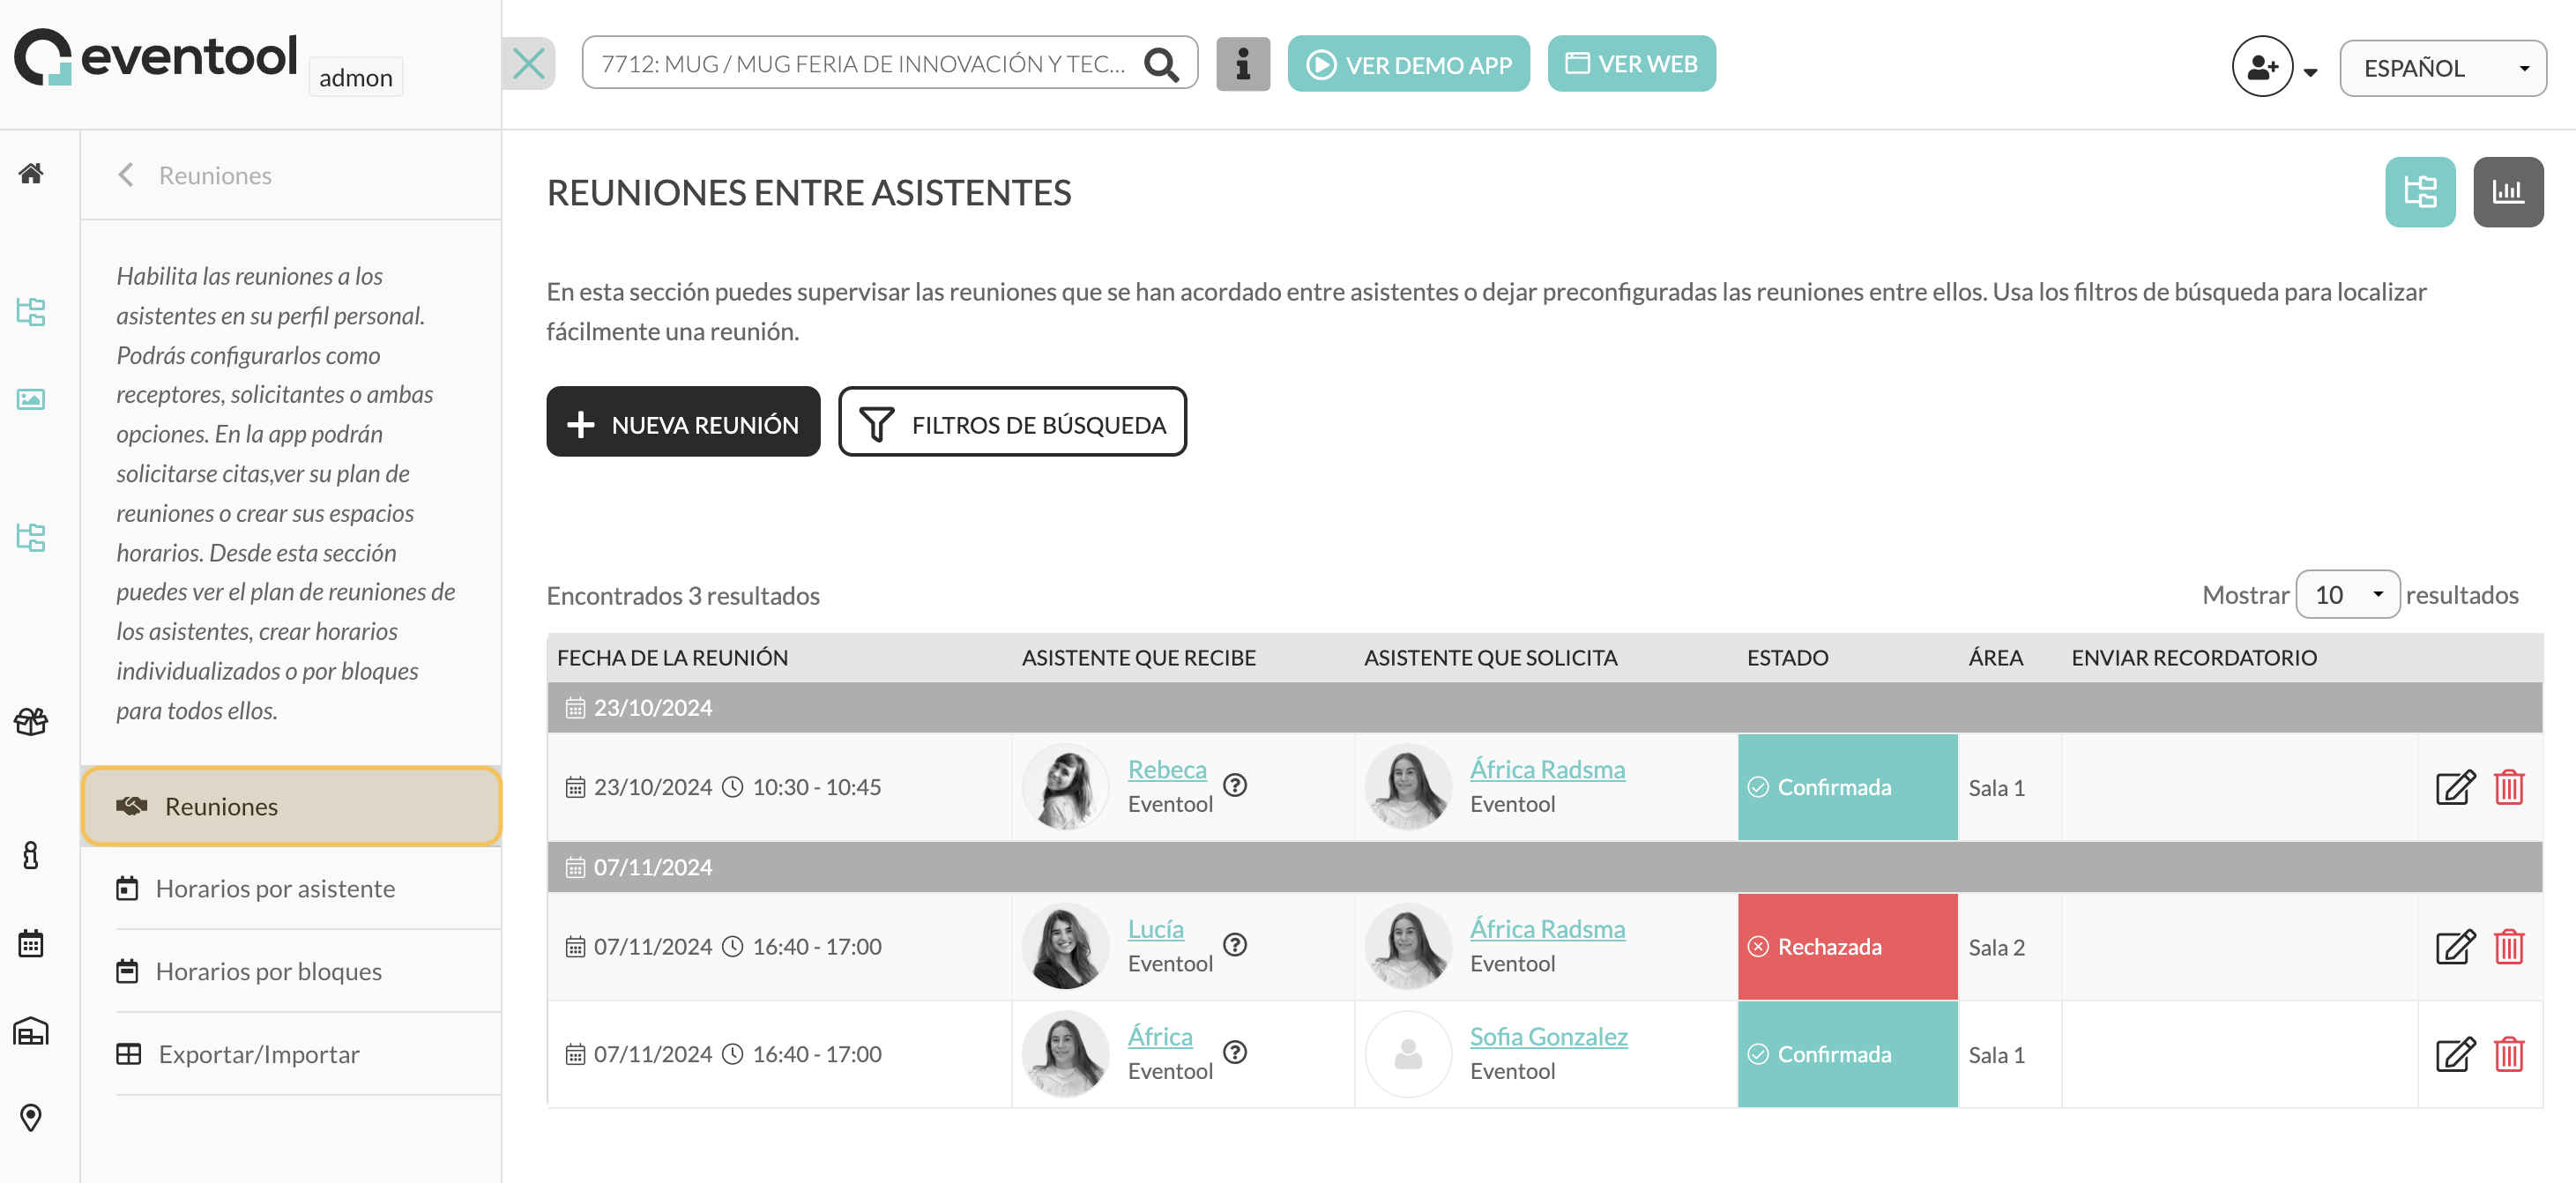
In this section you can:
* **View all meetings**: confirmed, pending, or rejected.
* **Filter meetings** to find specific results.
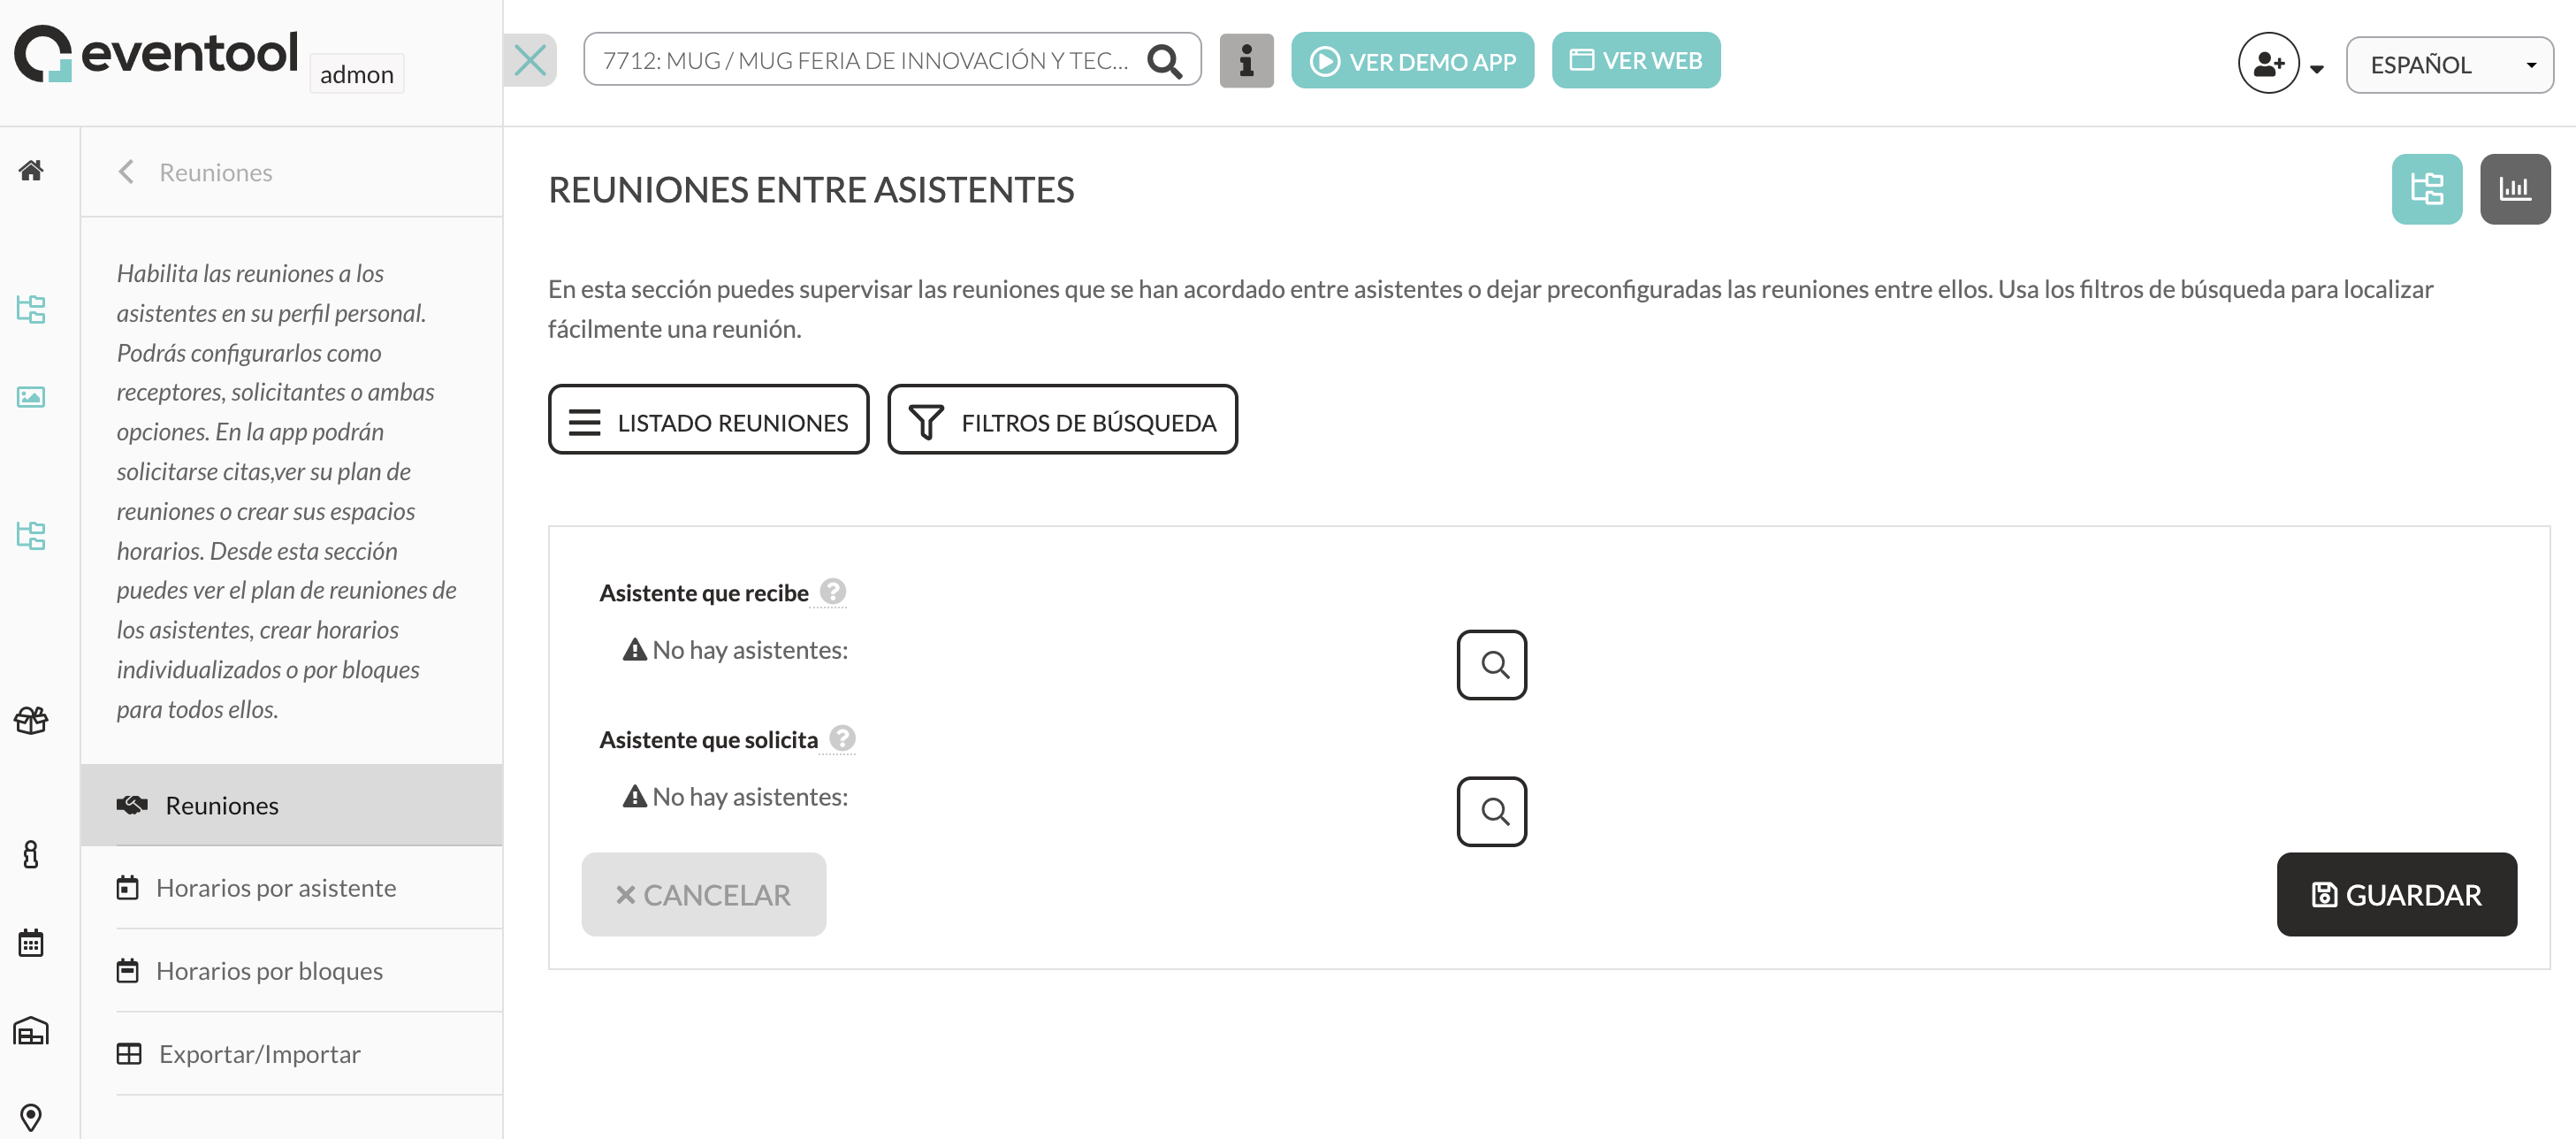
* **Create new meetings manually**, selecting the attendee who receives and the one who requests.
Clicking the **+ New meeting** button opens a form where you can search for attendees using the magnifying glass icon. Once both profiles are selected, the meeting is **automatically confirmed** and displayed both on the panel and in the attendees' calendars in the app.
***
### Schedules per assistant
From here you can **create individual slots** for each attendee who can receive meetings.
* You can add custom time slots per assistant.
* You will see all the slots it has available and their status (active or not).
* Ideal for precisely customizing your planner.
This is useful if each attendee has a different availability and you need detailed control.
***
### Time Slots
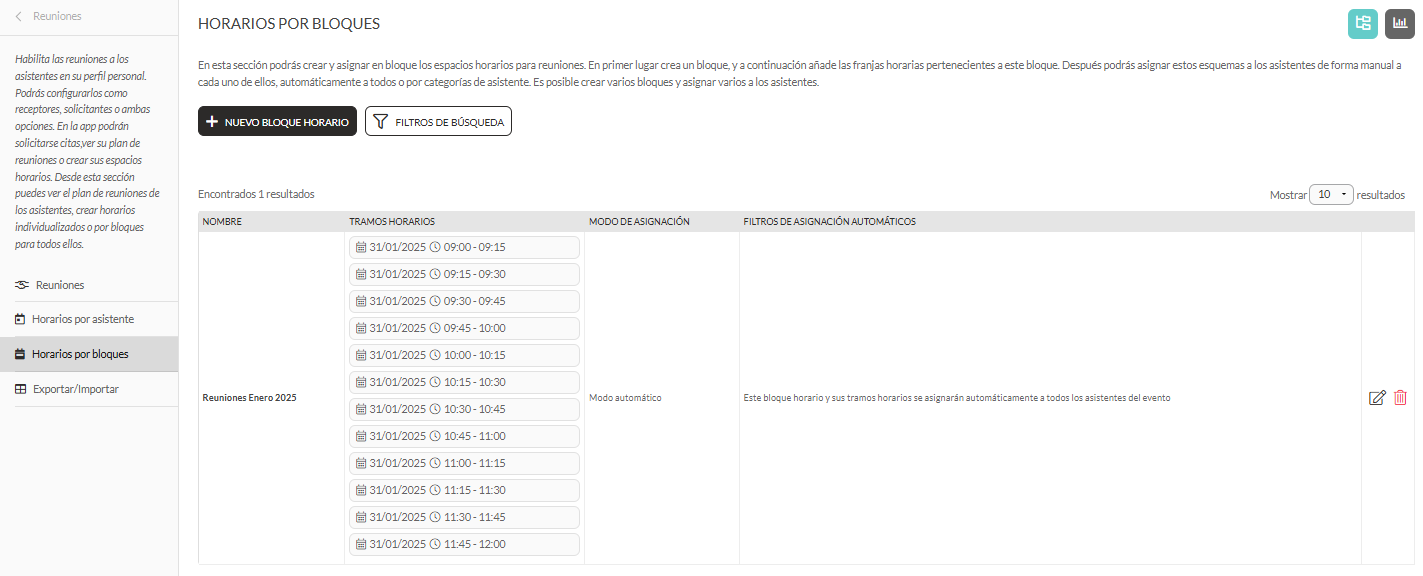
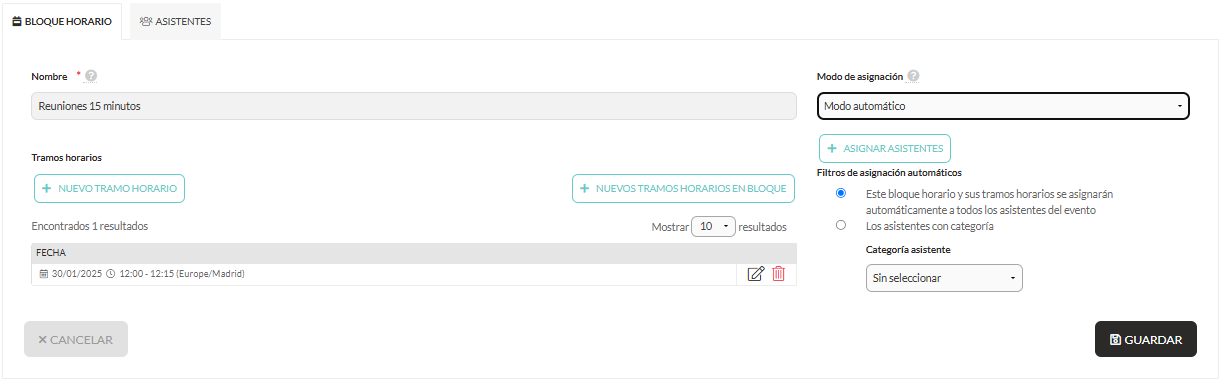
This option is perfect when you want to **organize the availability of several attendees** at the same time using schedules.
#### How is it done?
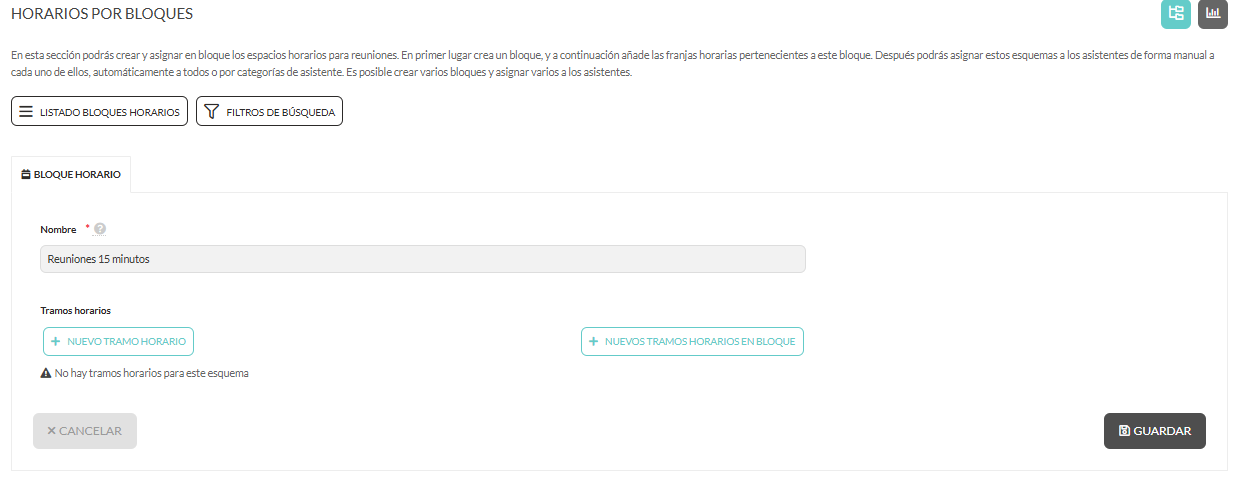
1. Create a **time block** and give it a name.
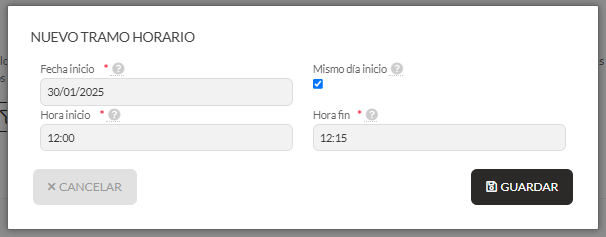
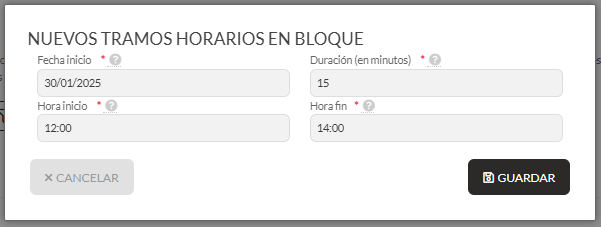
1. Add the time intervals:
* **New time slot**: to add a single slot.
* **New block time slots**: to generate multiple slots at once (e.g., 15-minute meetings between 12:00 and 14:00).
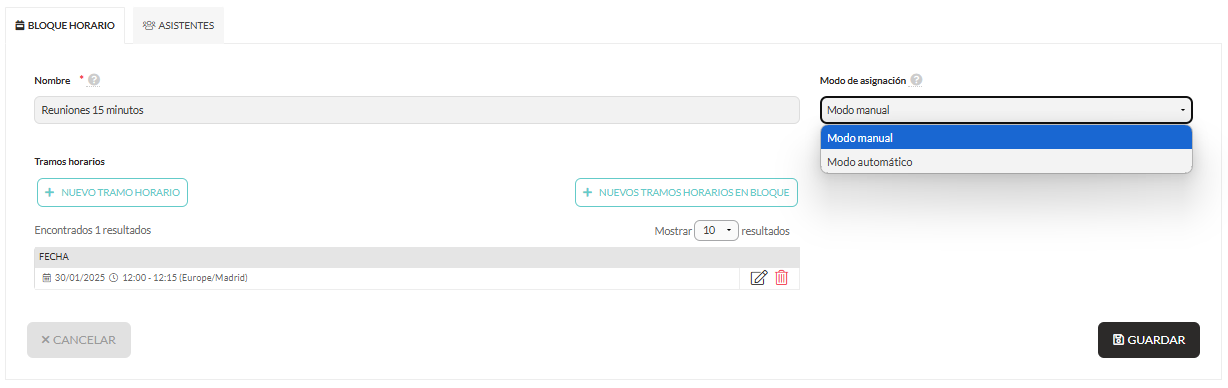
1. Define the **assignment mode**:
* **Manual**: you select the attendees yourself.
* **Automatic:** assigned to all event attendees or to a specific category.
{% hint style="info" %}
💡 **Tip**: If you use automatic mode, make sure you have your attendee categories well organized for accurate assignment.
{% endhint %}
***
### Export / Import
From this section you can **manage meetings using Excel**, which is very useful for controlling large volumes of attendees and appointments.
#### The Excel file has two worksheets:
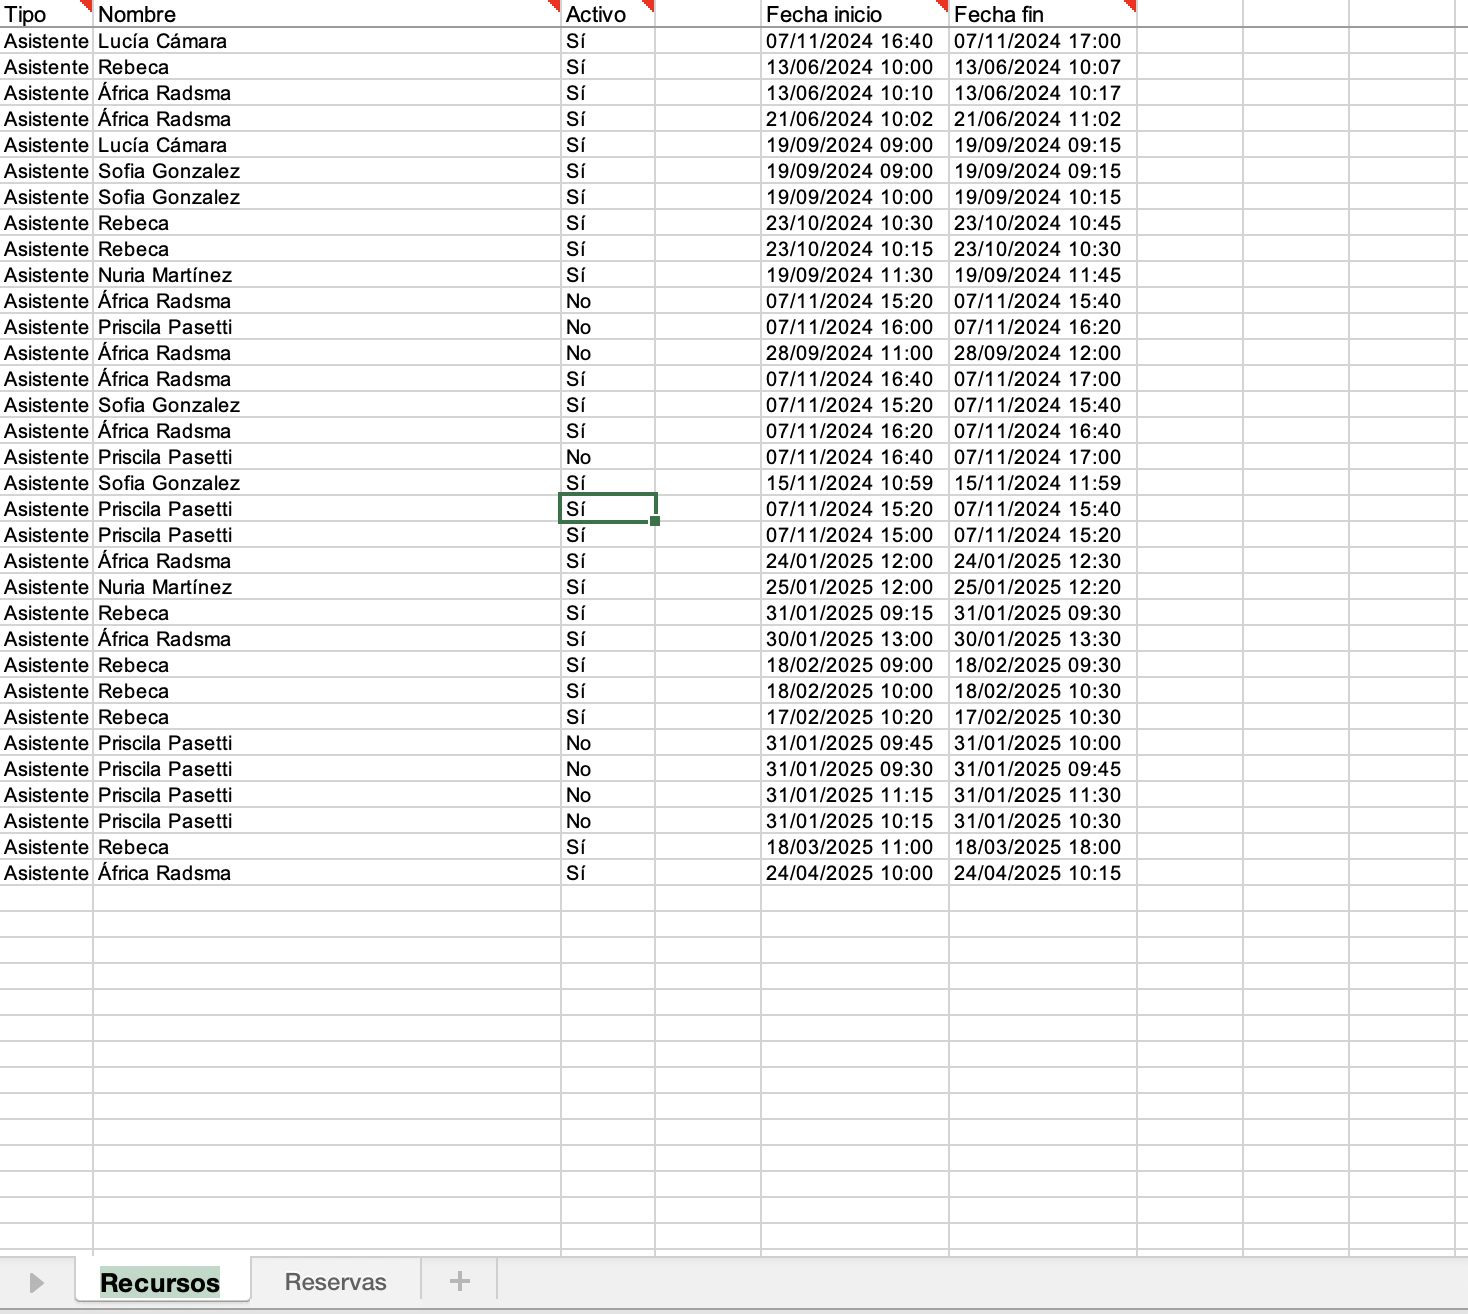
**1. Resources:**
Here are the available slots for each assistant who can receive appointments.
* **Type**: must always be “Assistant”.
* **Name**: must exactly match the name in the Attendees section.
* **Active**: indicates whether that schedule is visible in the app.
* Start/end date: duration of the gap.
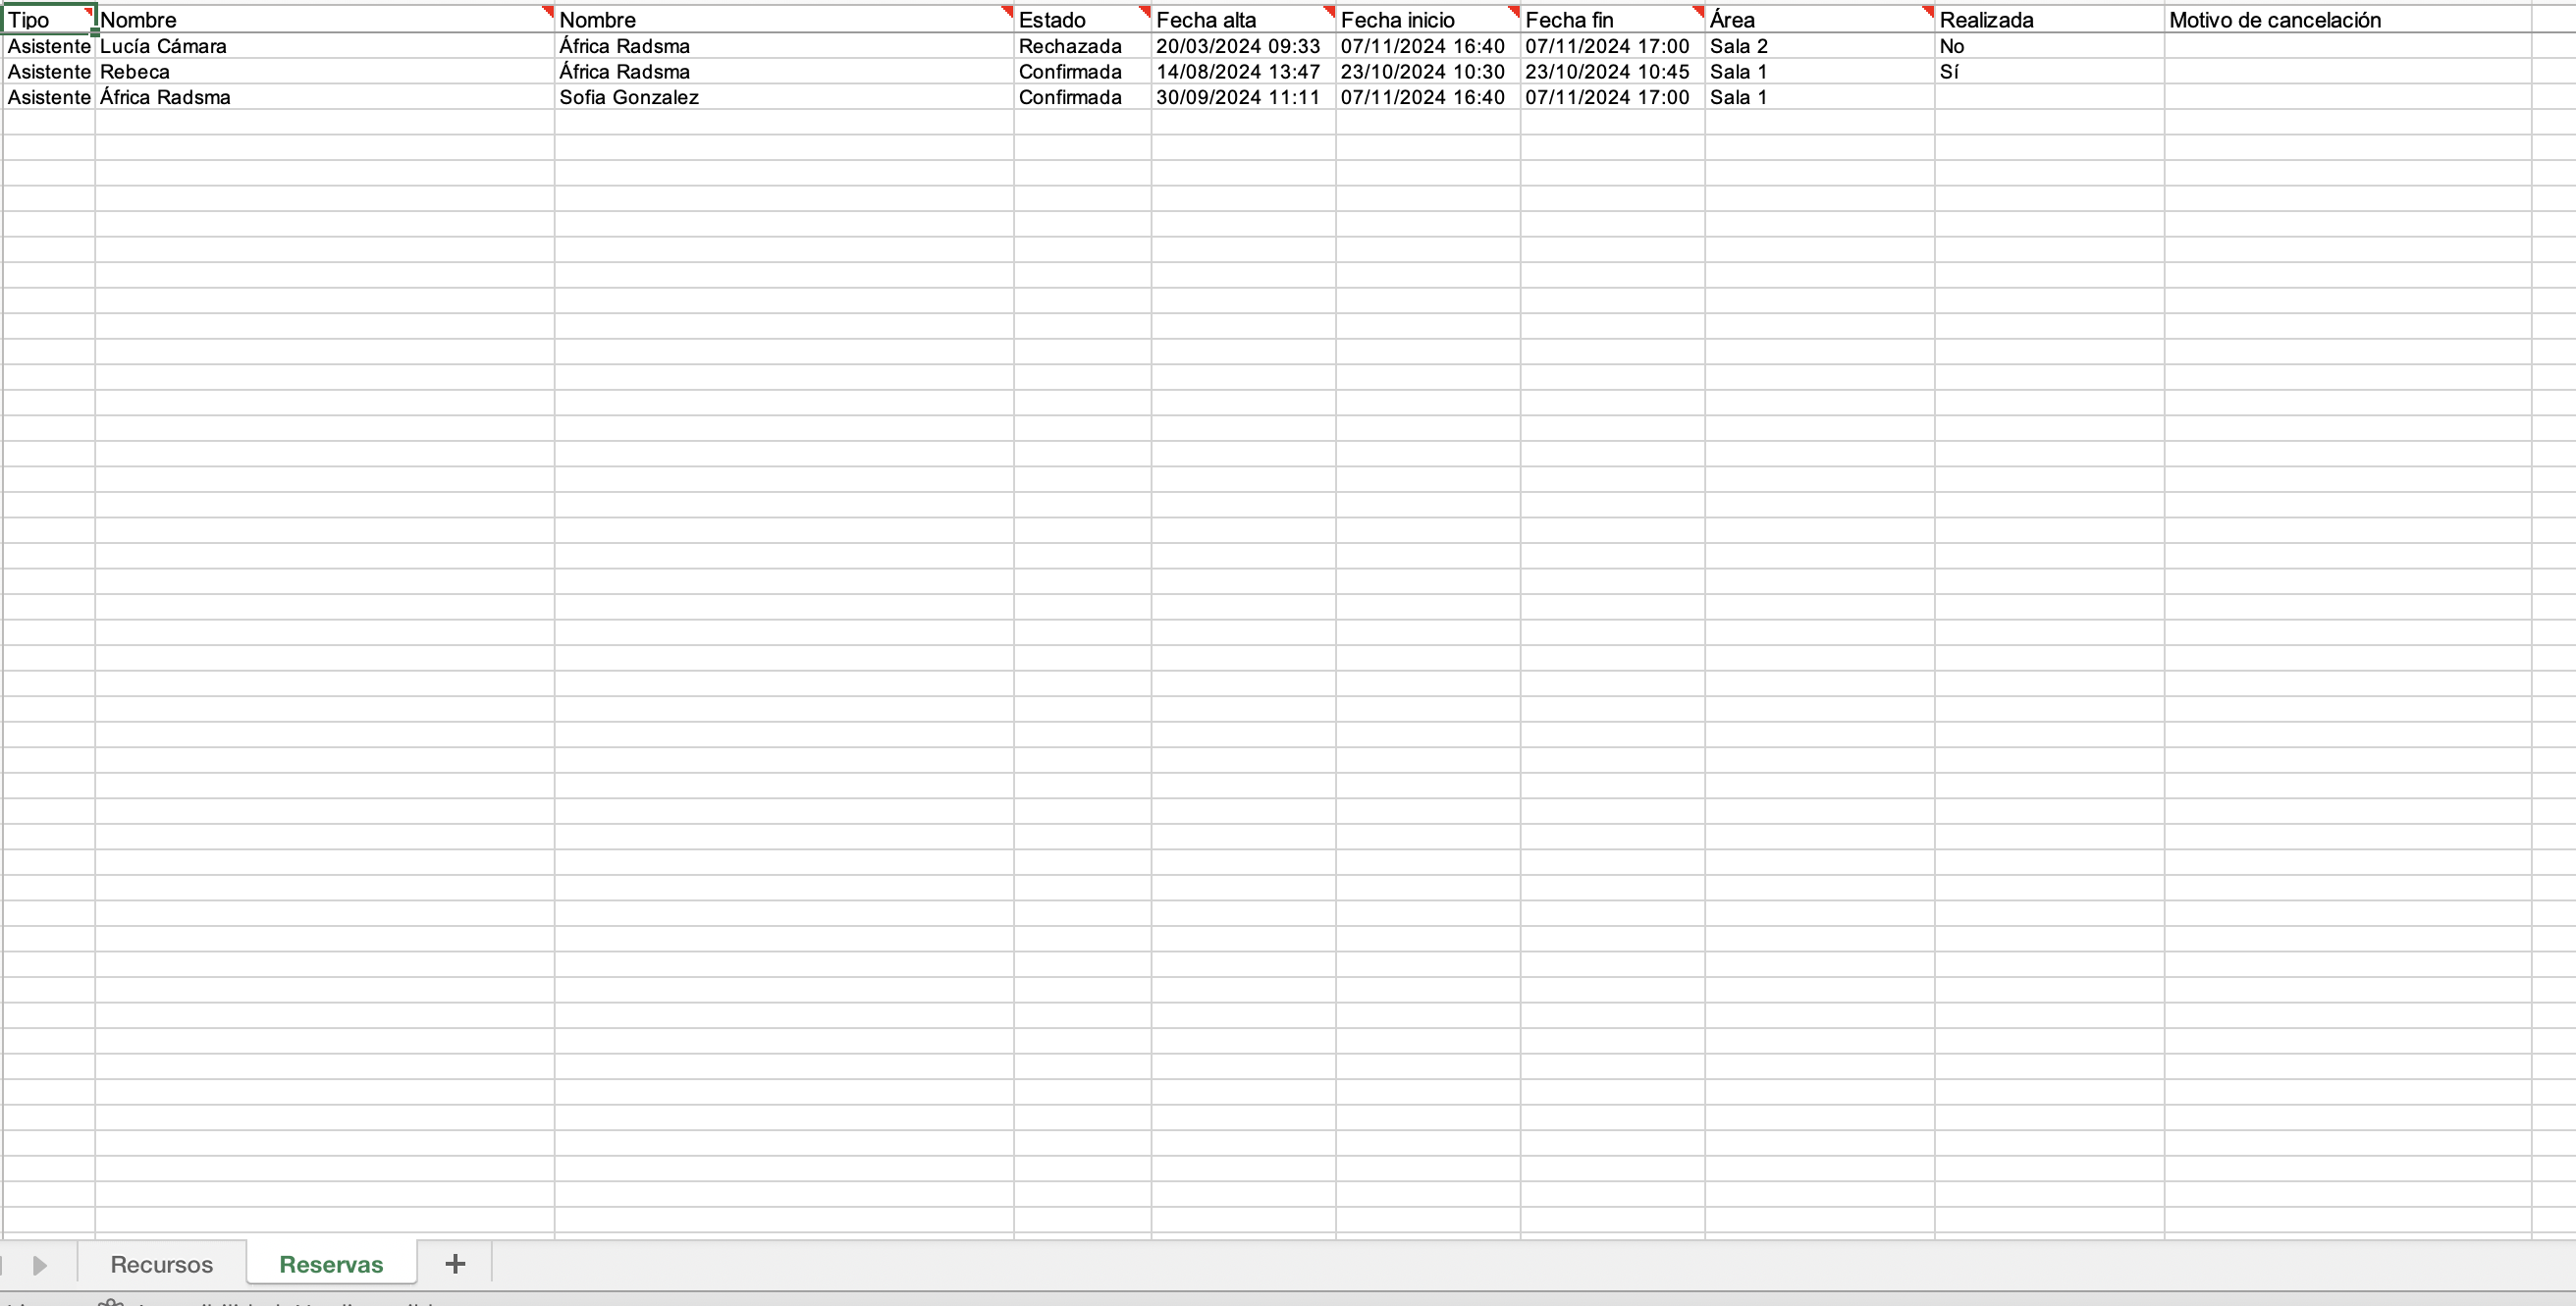
**2. Reservations:**
This sheet records all activity related to meetings.
* **Type**: always “Assistant”.
* **Name** of the recipient and the applicant.
* **Status**: confirmed, rejected, pending...
* **Registration and meeting date.**
* **Area**: space where the meeting will be held (if applicable).
* **Completed**: if it has been marked as completed (requires enabling feedback in bookings).
* **Reason for cancellation**: if this option is enabled.
{% hint style="info" %}
📌**Important**: the names must match exactly between both sheets and with the names on the attendee list.
{% endhint %}