> For the complete documentation index, see [llms.txt](https://help.eventool.com/llms.txt). Markdown versions of documentation pages are available by appending `.md` to page URLs; this page is available as [Markdown](https://help.eventool.com/en/meeting-planner/automatic-allocation-of-rooms-or-tables-for-meetings.md).
# Automatic allocation of rooms or tables for meetings
Does your event include specific physical spaces for meetings? With Eventool, you can automatically assign a **room or table** to attendees based on availability when they confirm an appointment.
This option simplifies resource management and ensures that every appointment has an assigned location… without any manual effort!
***
### How does automatic allocation work?
When you configure an **area category** for meetings from the management panel, the system takes care of:
* Find a free space (room, table, etc.) that belongs to that category.
* Assign it automatically when confirming the appointment.
* Avoid overlaps: if there are no spaces available, the meeting is still confirmed, but **without an assigned space.**
***
### Steps to activate this feature
#### 1. Create a category for meeting areas
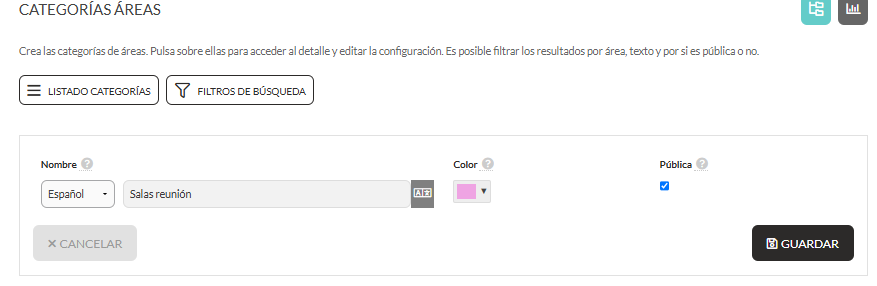
Go to **Areas > Area Categories** and create a new, specific category, for example:\
🔹 “Meeting rooms”.
#### 2. Create the areas (tables or rooms)
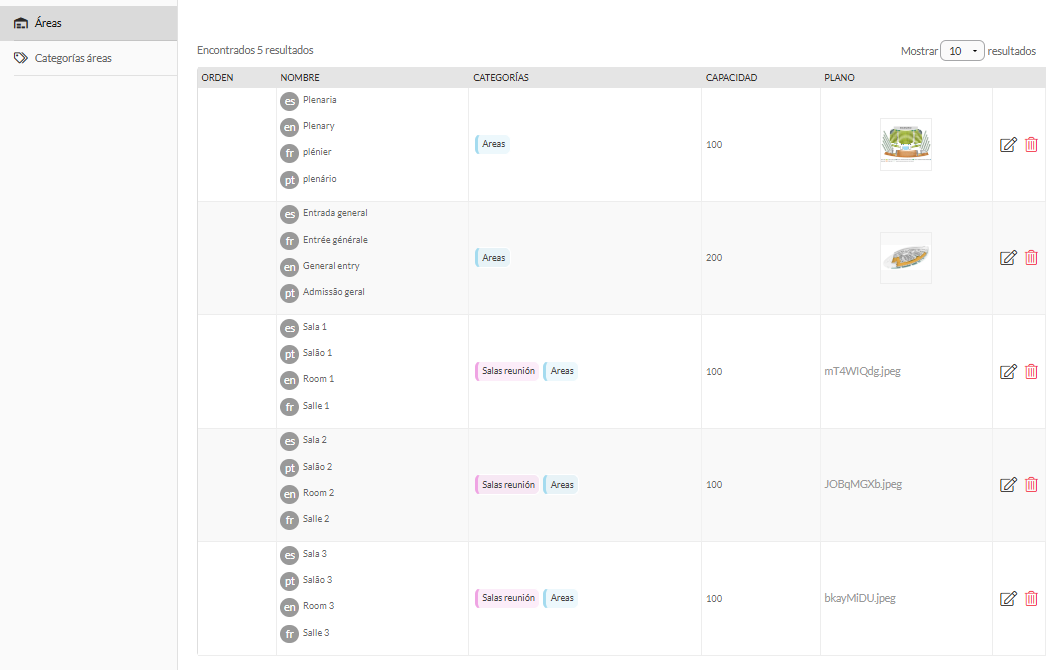
From **Areas > New area**, add each of the available physical spaces:
* Specify a name (Room 1, Table A…).
* Add translations if necessary.
* Assign the category you just created (Meeting Rooms).
* Indicate its capacity (optional).
* You can add an image or map to make it easier to find.
{% hint style="info" %}
💡 Make sure you create the same number of areas as the number of simultaneous meetings you expect to have in each time slot.
{% endhint %}
#### 3. Link the category to the meetings
Now it's time to activate the link from the panel:
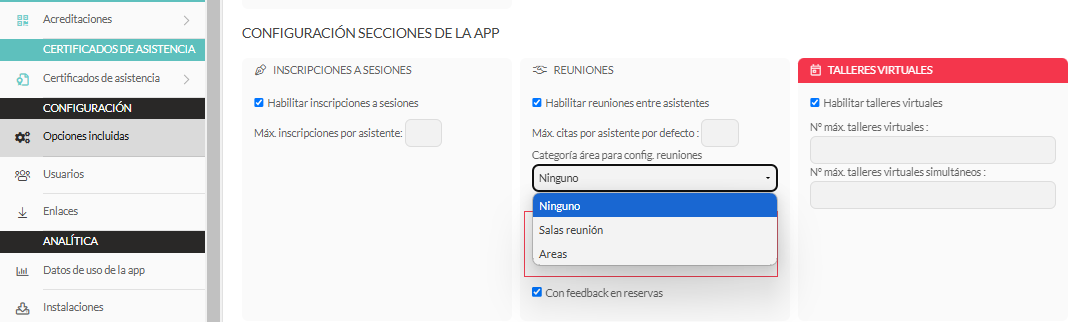
* Go to **Settings > Included options**.
* In the **Meetings** section, select the category created in the "**Category area for meeting configuration**" field.
* Done!
***
### What happens when a meeting is confirmed?
Each time a date is accepted between two attendees:
✅ The system checks which slots are free for that time slot.\
✅ Automatically assign one of those spaces.\
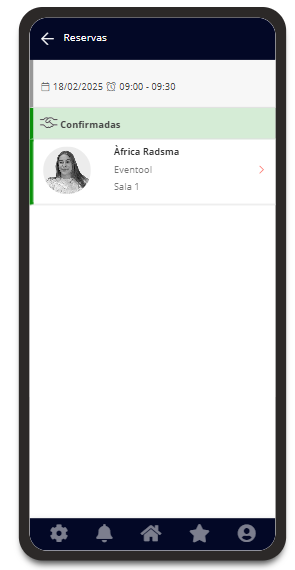
✅ The room name appears in both participants' calendars (as you can see in the app).\
❌ If there is no availability, **the meeting is still confirmed, but without an assigned room**.