> For the complete documentation index, see [llms.txt](https://help.eventool.com/llms.txt). Markdown versions of documentation pages are available by appending `.md` to page URLs; this page is available as [Markdown](https://help.eventool.com/en/general-content/general-content/agenda-speakers/how-to-create-different-agendas-in-the-app-with-segmented-content.md).

# How to create different agendas in the app with segmented content?

At some events, it is common for there to be more than one agenda, with content divided by topic or audience type. For example, the general programme may be displayed on one side, and the workshop sessions on the other. This can be done easily from the Eventool administration panel, organising the information by **category** and creating different **agenda sections** within the event structure.

Below, we explain step by step how to do it.

***

### 1. Loading the content of the sessions

<div align="left"><figure><img src="https://content.gitbook.com/content/8g1s4Beg4BZdw3Dp6hLd/blobs/UlnksM6m2Nl8UDN5CcoU/agendas%201.png" alt=""><figcaption></figcaption></figure></div>

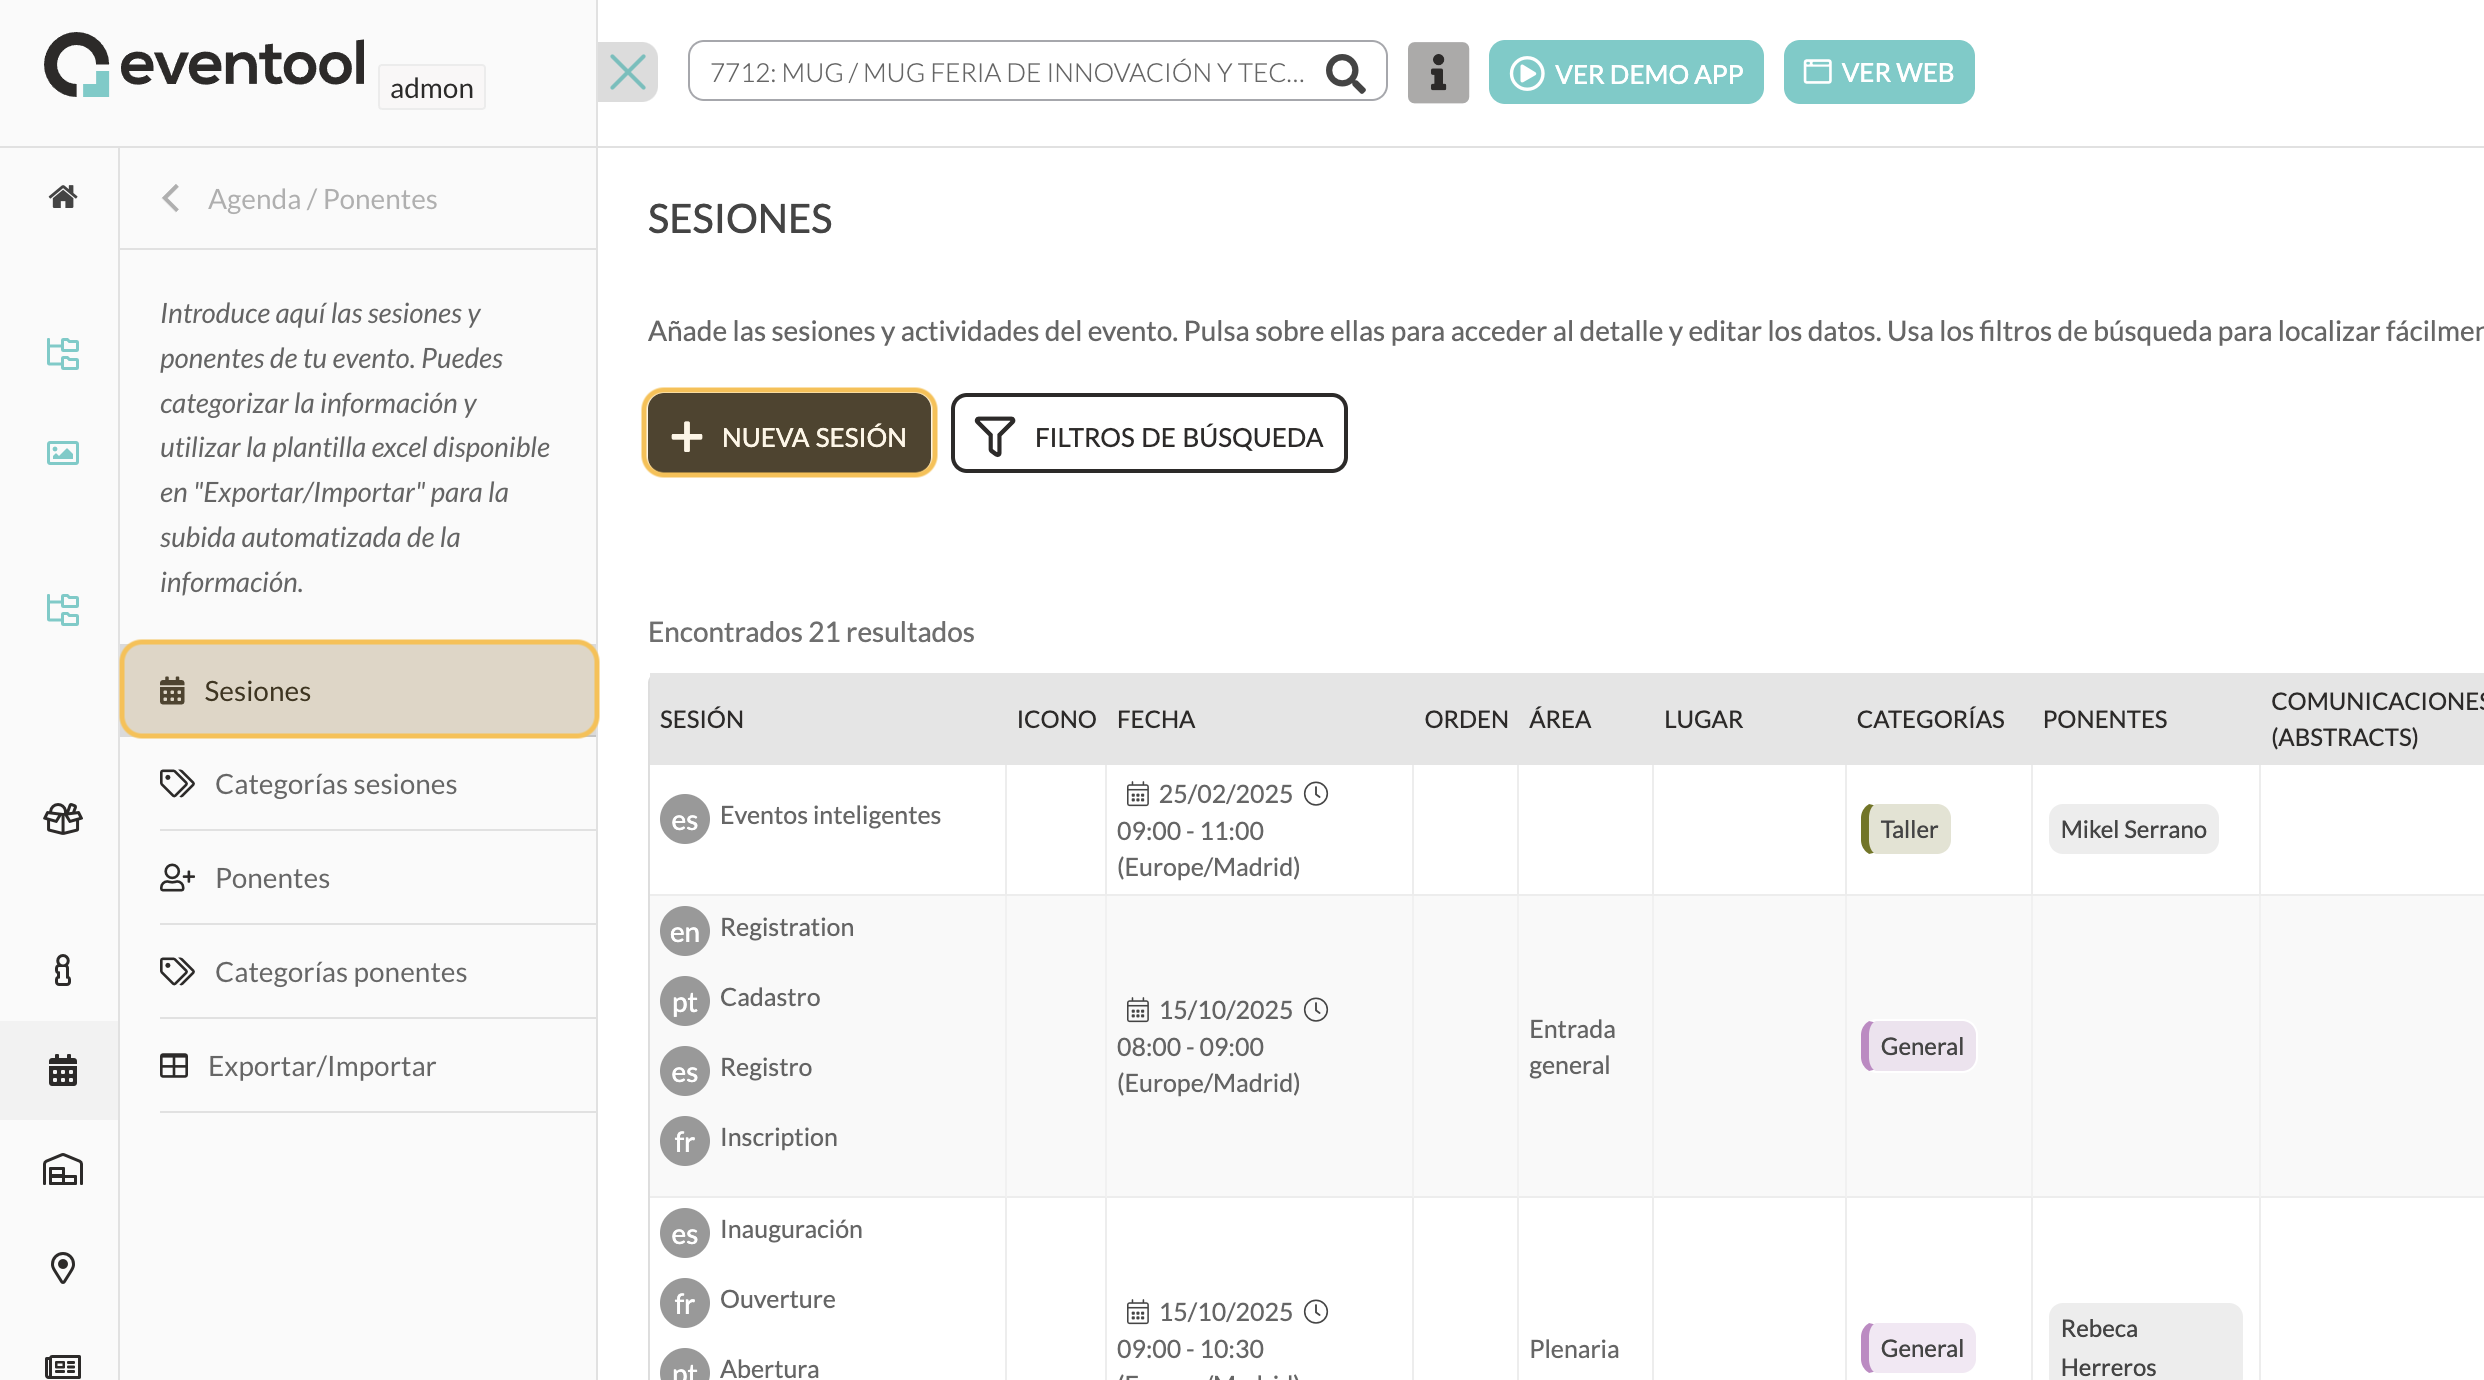
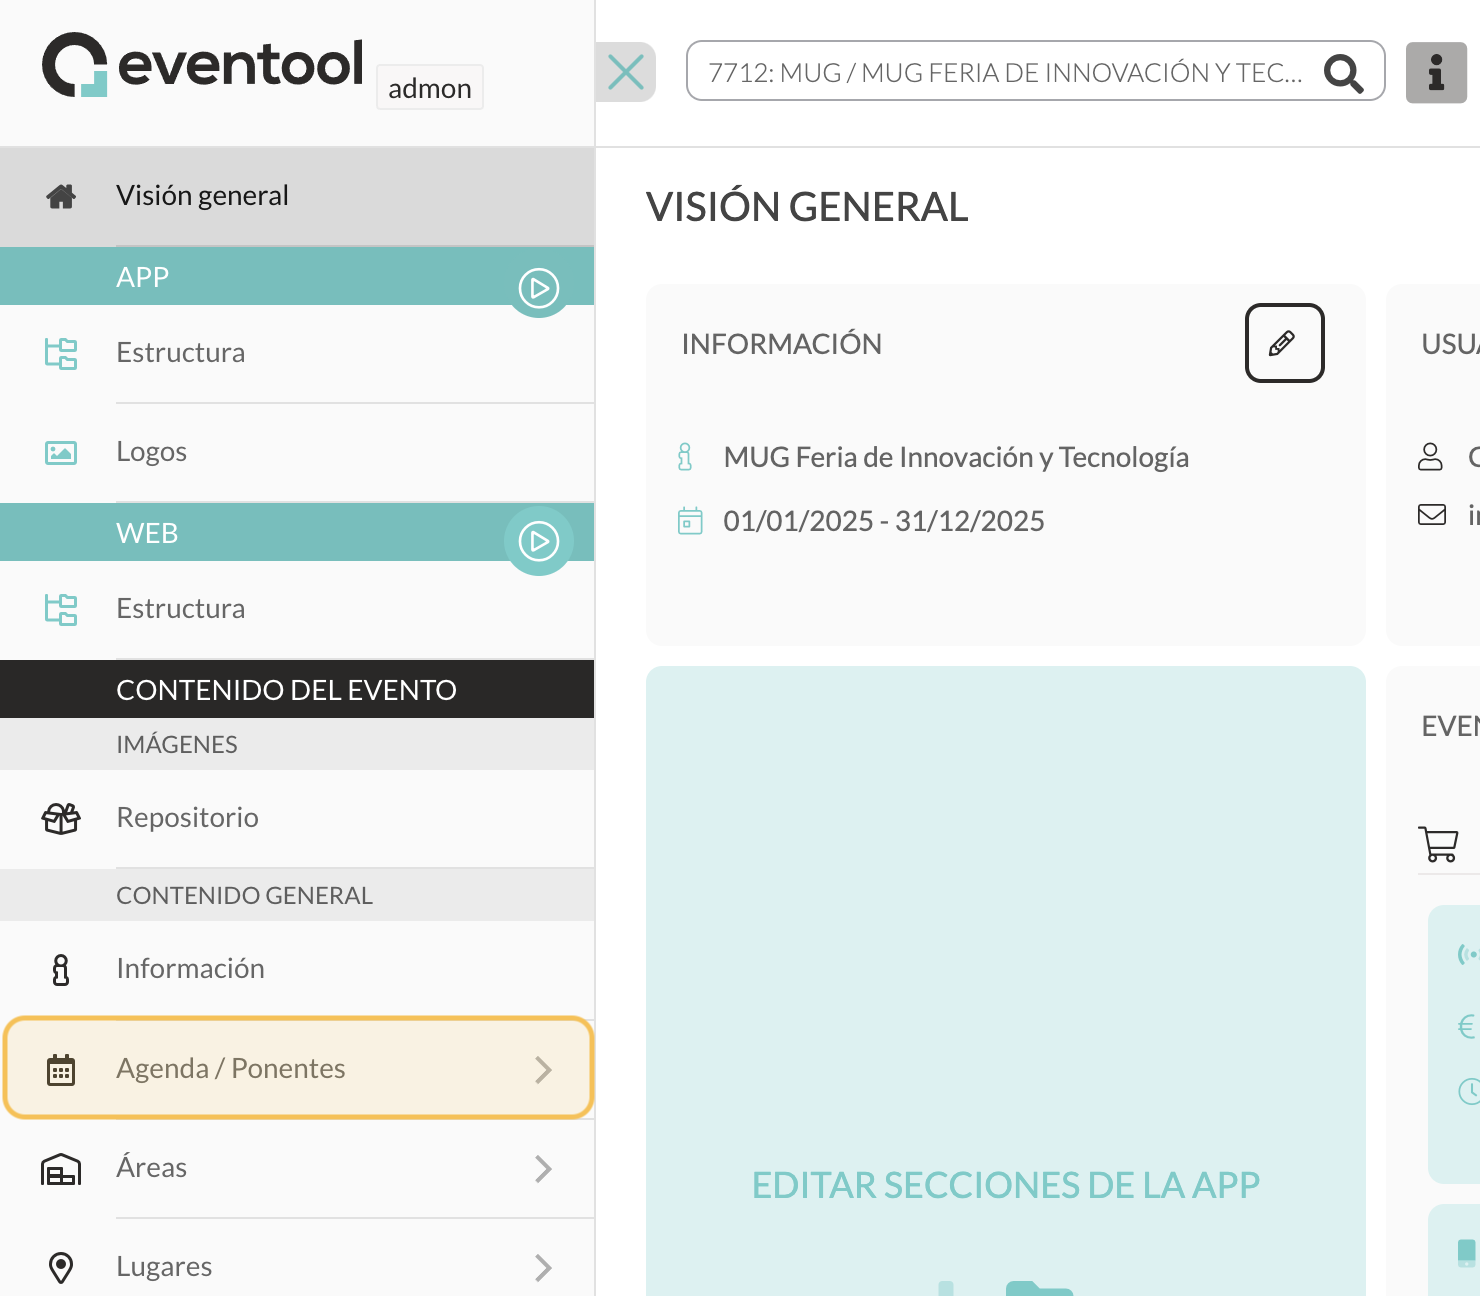
The first step is to add all the sessions for the event. You can do this from:

**Panel > Event content > Agenda/Speakers**

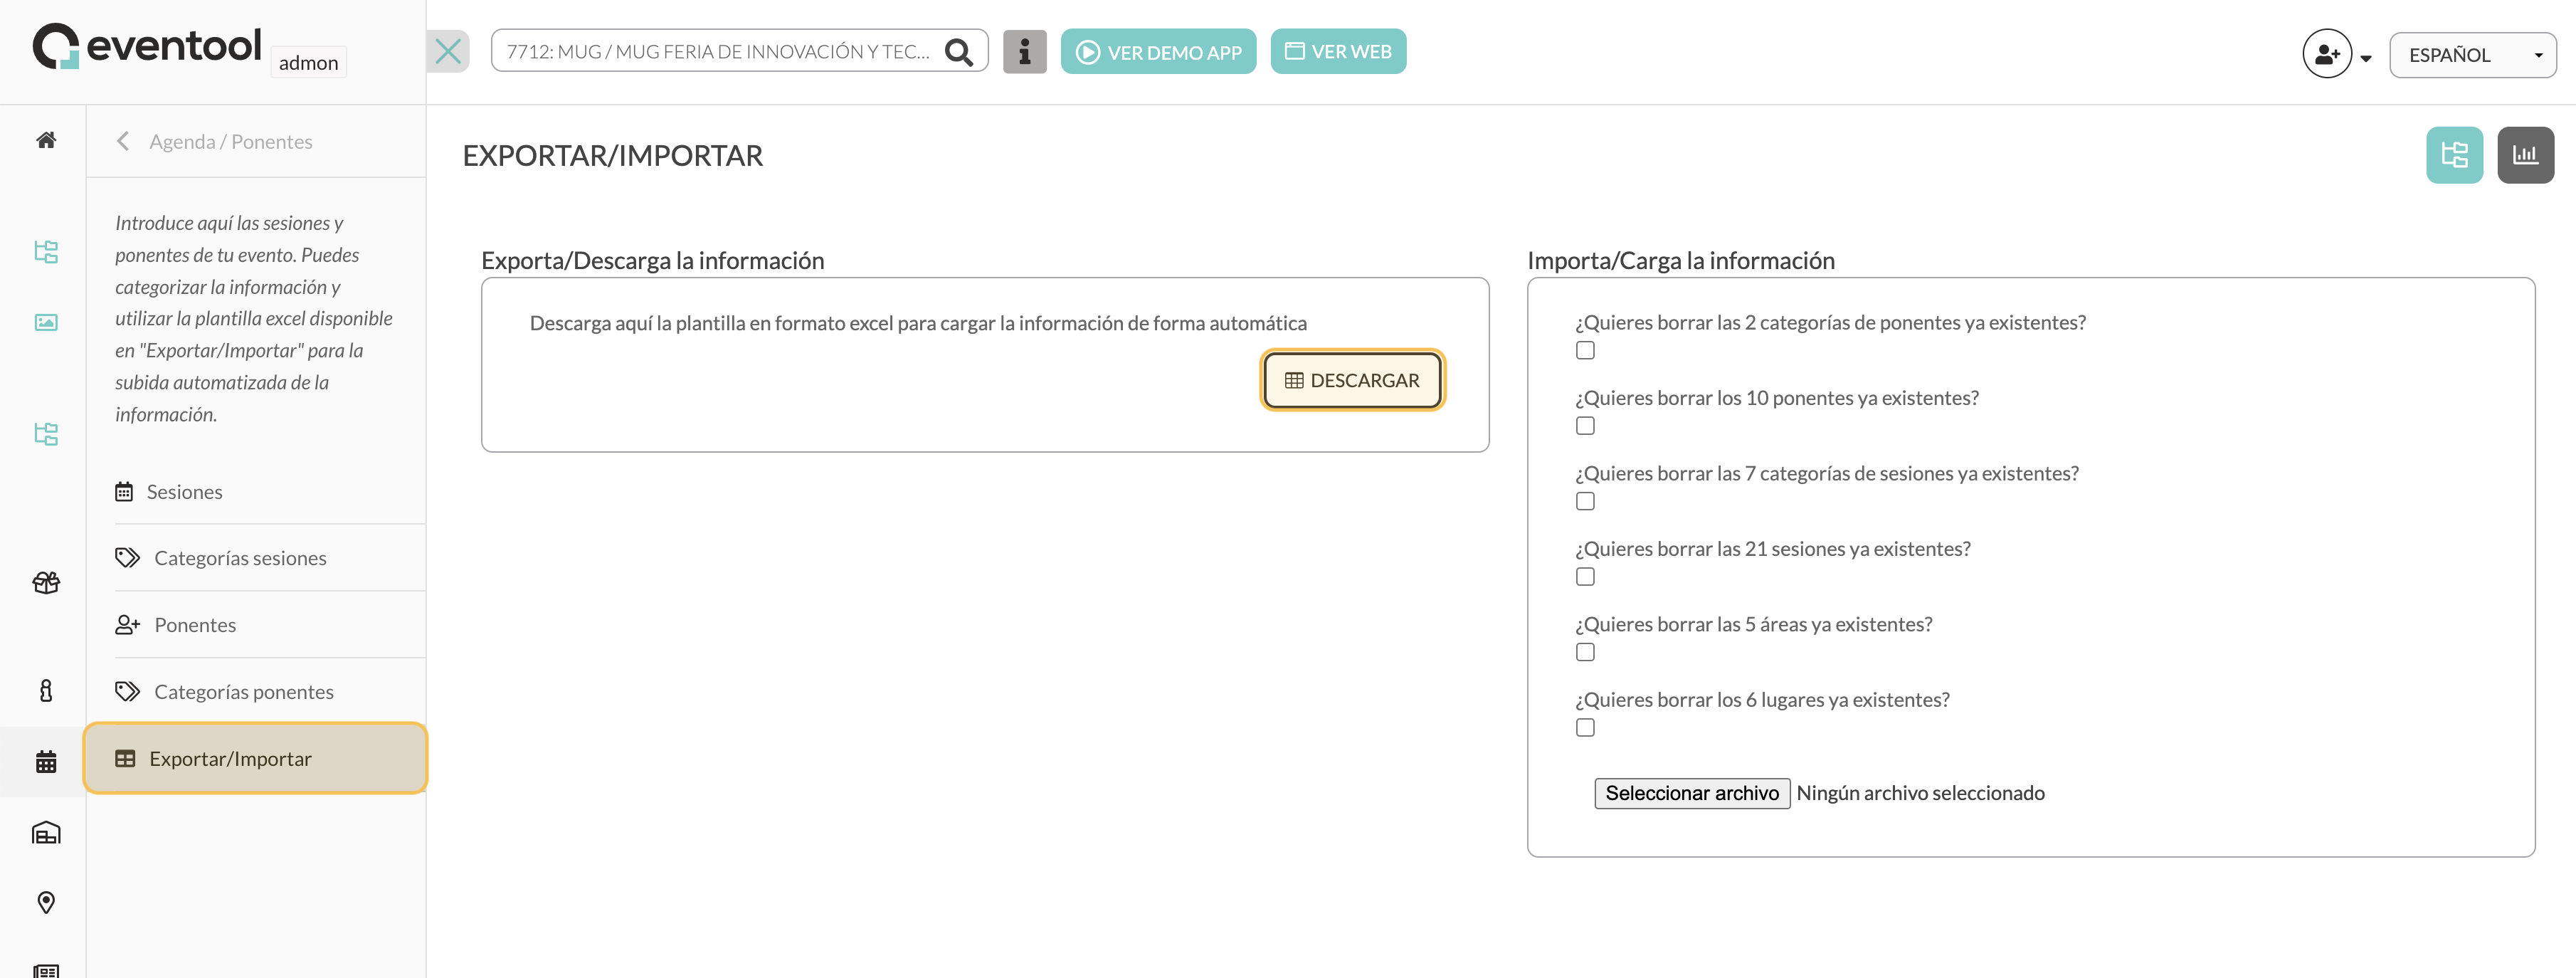
You have two options for adding sessions:

* Manually, from the *Sessions* section.

<div align="left"><figure><img src="https://content.gitbook.com/content/8g1s4Beg4BZdw3Dp6hLd/blobs/LhTh4ilFhxtHzWo7yexh/agendas%202.png" alt=""><figcaption></figcaption></figure></div>

* Using an Excel template, from the *Export/Import* option.

<div align="left"><figure><img src="https://content.gitbook.com/content/8g1s4Beg4BZdw3Dp6hLd/blobs/lGtgYKNULVcF4xZK0b2H/agendas%203.png" alt=""><figcaption></figcaption></figure></div>

***

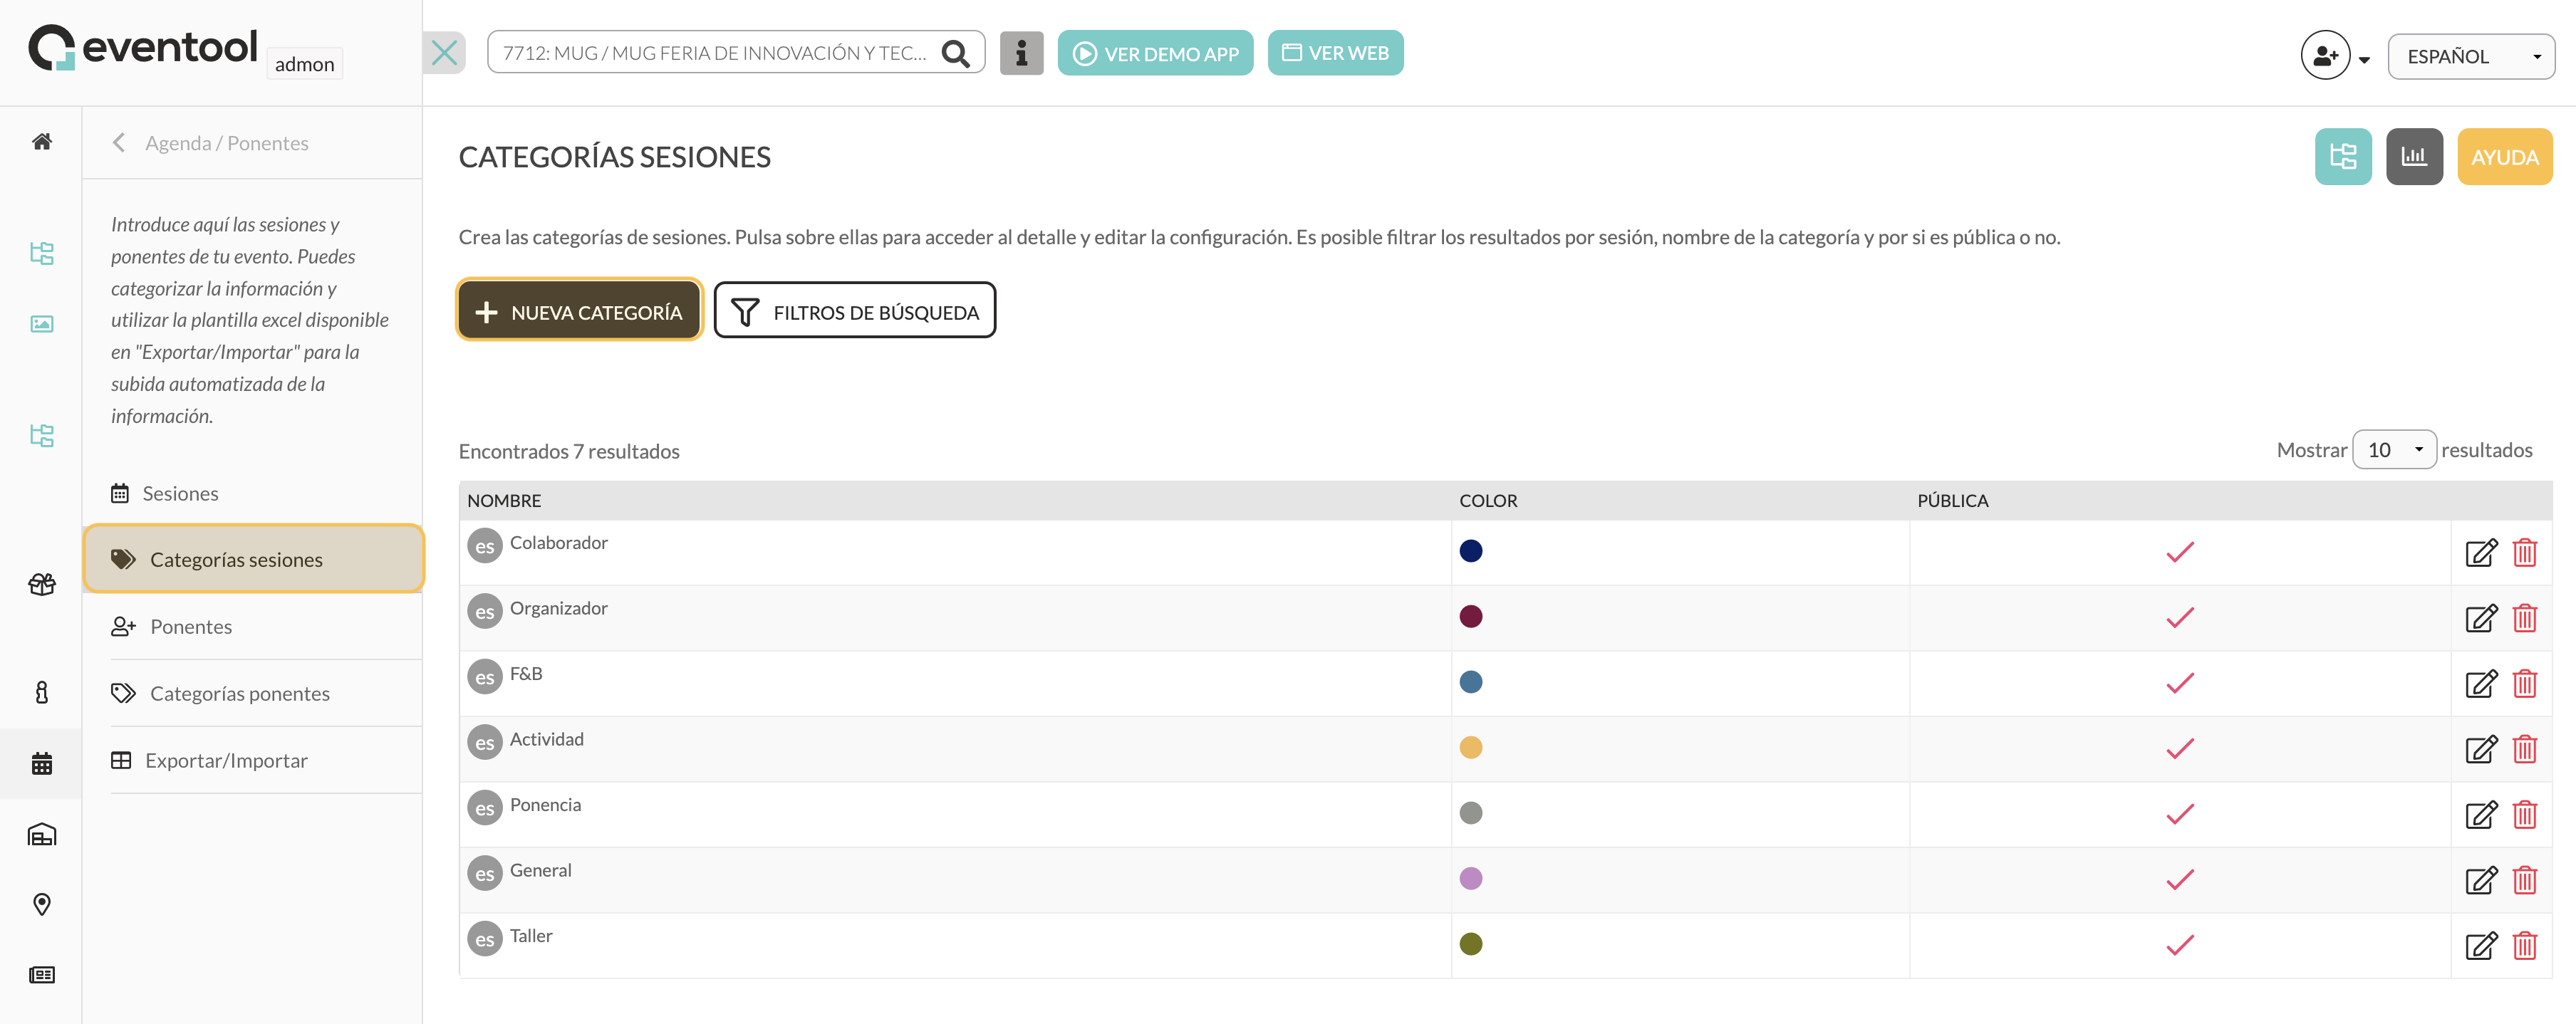
### 2. Creation of categories

Once the sessions have been added, it is very important to **create categories** that will allow you to segment them. For example, you can have a ‘General’ category and a ‘Workshop’ category.

This is done from:

**Panel > Agenda > Session categories**

<div align="left"><figure><img src="https://content.gitbook.com/content/8g1s4Beg4BZdw3Dp6hLd/blobs/f2bKDzg4H1D6s2CHbDSL/agendas%204.png" alt=""><figcaption></figcaption></figure></div>

There you can:

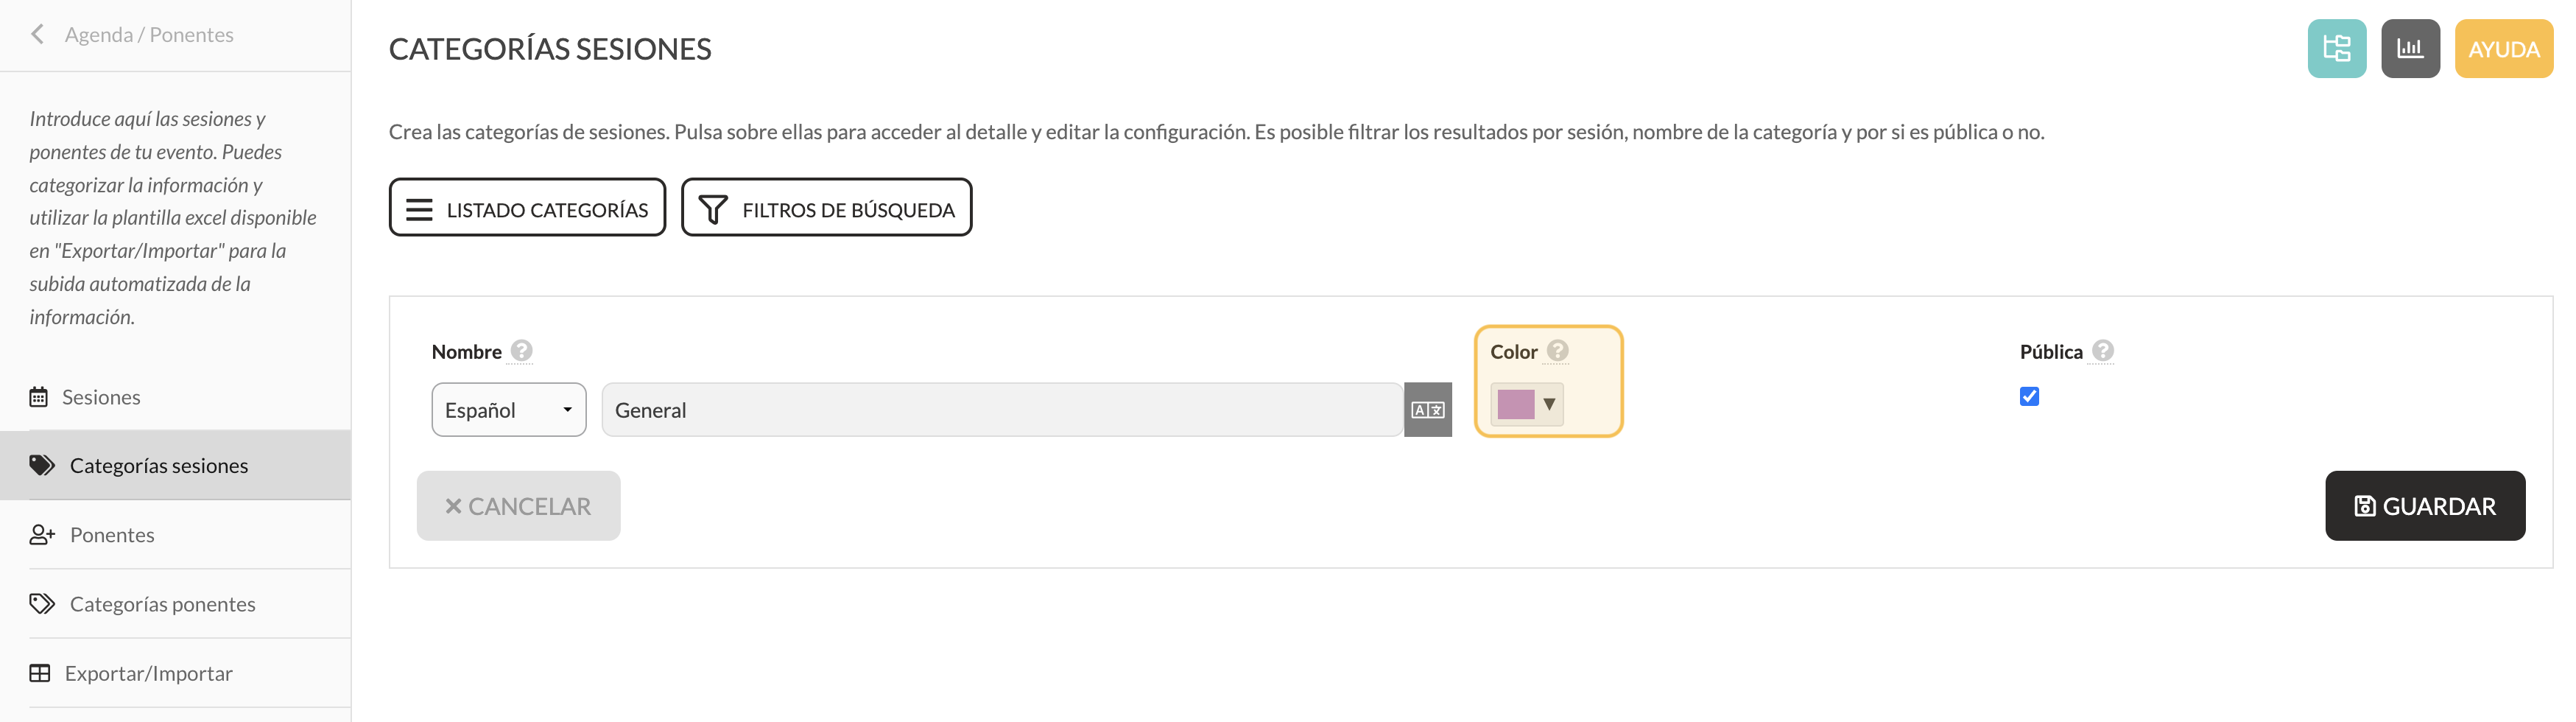
* Create the categories manually.
* Assign them a colour (this is displayed in the app).

<div align="left"><figure><img src="https://content.gitbook.com/content/8g1s4Beg4BZdw3Dp6hLd/blobs/hnTbXx6Xudt754w2ItUL/agendas%205.png" alt=""><figcaption></figcaption></figure></div>

<div align="left"><figure><img src="https://content.gitbook.com/content/8g1s4Beg4BZdw3Dp6hLd/blobs/L1vggckGp4NlPbdv65bt/agendas%206.png" alt=""><figcaption></figcaption></figure> <figure><img src="https://content.gitbook.com/content/8g1s4Beg4BZdw3Dp6hLd/blobs/Qweb1hfbPEBttvCuQaTx/agendas%207.png" alt=""><figcaption></figcaption></figure></div>

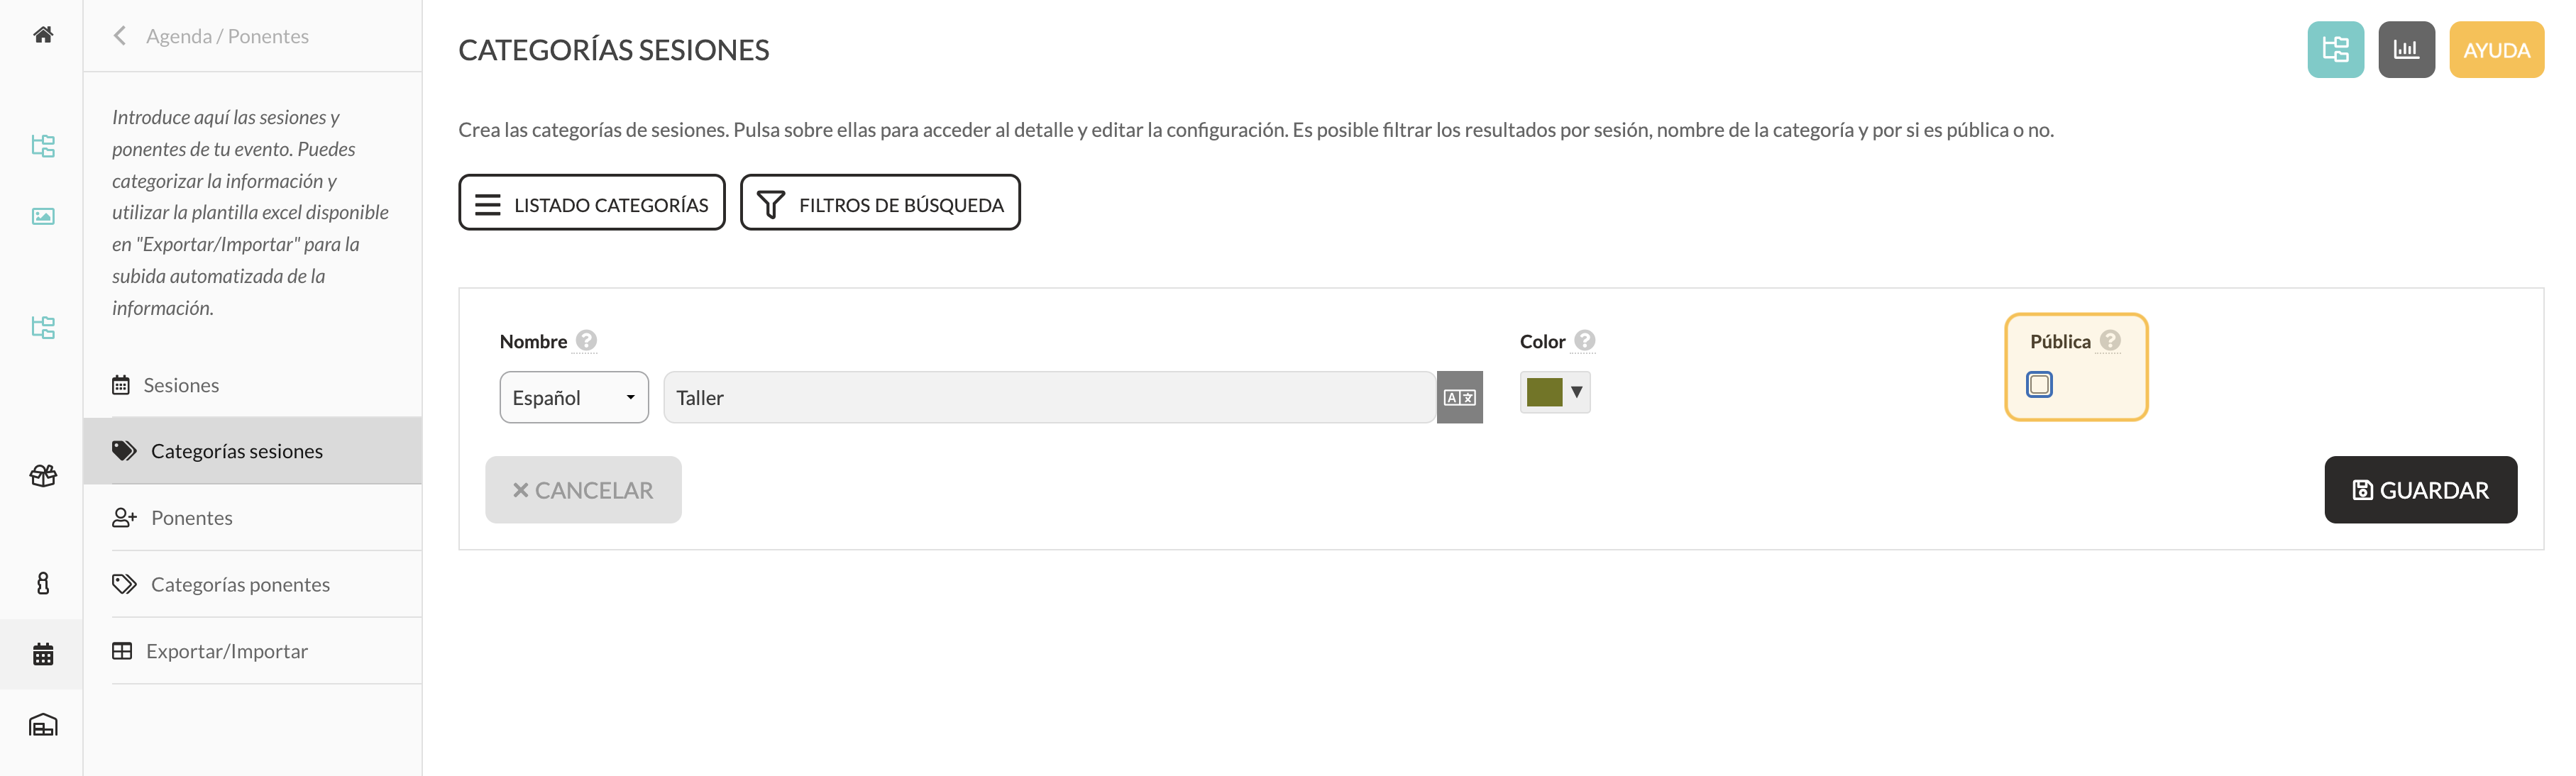
* Define whether they are public (visible to the user) or private (for internal use only).

<div align="left"><figure><img src="https://content.gitbook.com/content/8g1s4Beg4BZdw3Dp6hLd/blobs/3QPnZwNUE94Nkj2I1mni/agendas%209.png" alt=""><figcaption></figcaption></figure></div>

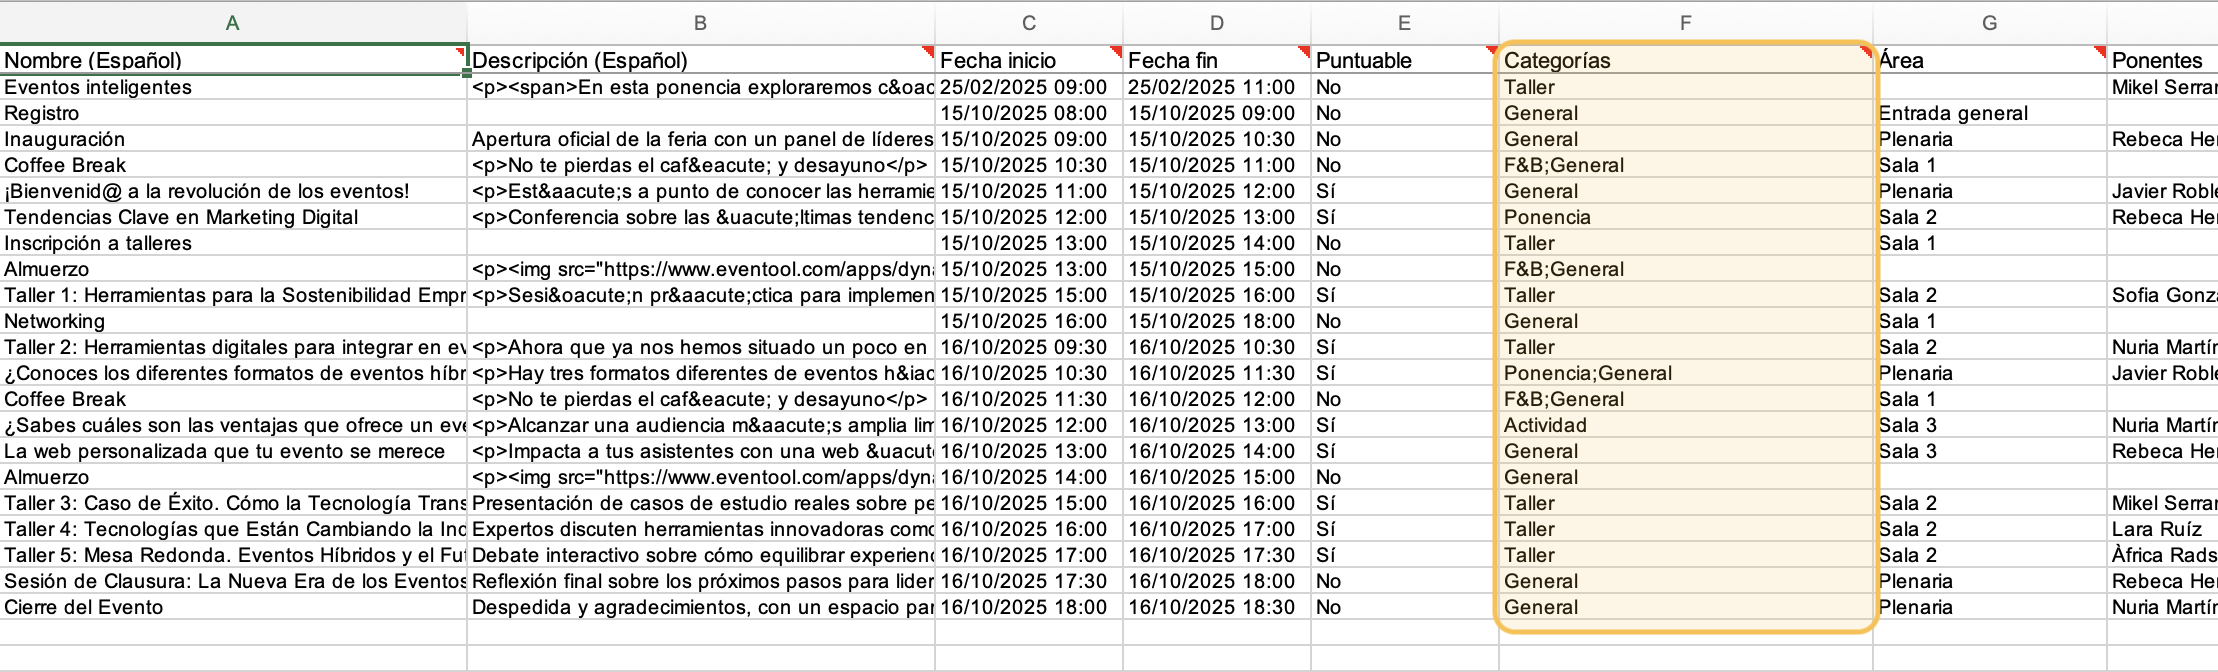
📌 If you are using Excel to upload sessions, you can directly include the category in each row. The system will automatically create them in the panel during import. Just ensure you use exactly the same name if you have already created them previously.

***

### 3. Link categories to sessions

Each session must be associated with a category so that it can then be displayed in the corresponding section of the app. You can do this:

* From the panel, editing each session.
* From Excel, using the ‘Category’ column.

<div align="left"><figure><img src="https://content.gitbook.com/content/8g1s4Beg4BZdw3Dp6hLd/blobs/gLCVZAmcp8Ic4oOFi7Jm/agendas%208.png" alt=""><figcaption></figcaption></figure></div>

This way, each session will be correctly labelled.

***

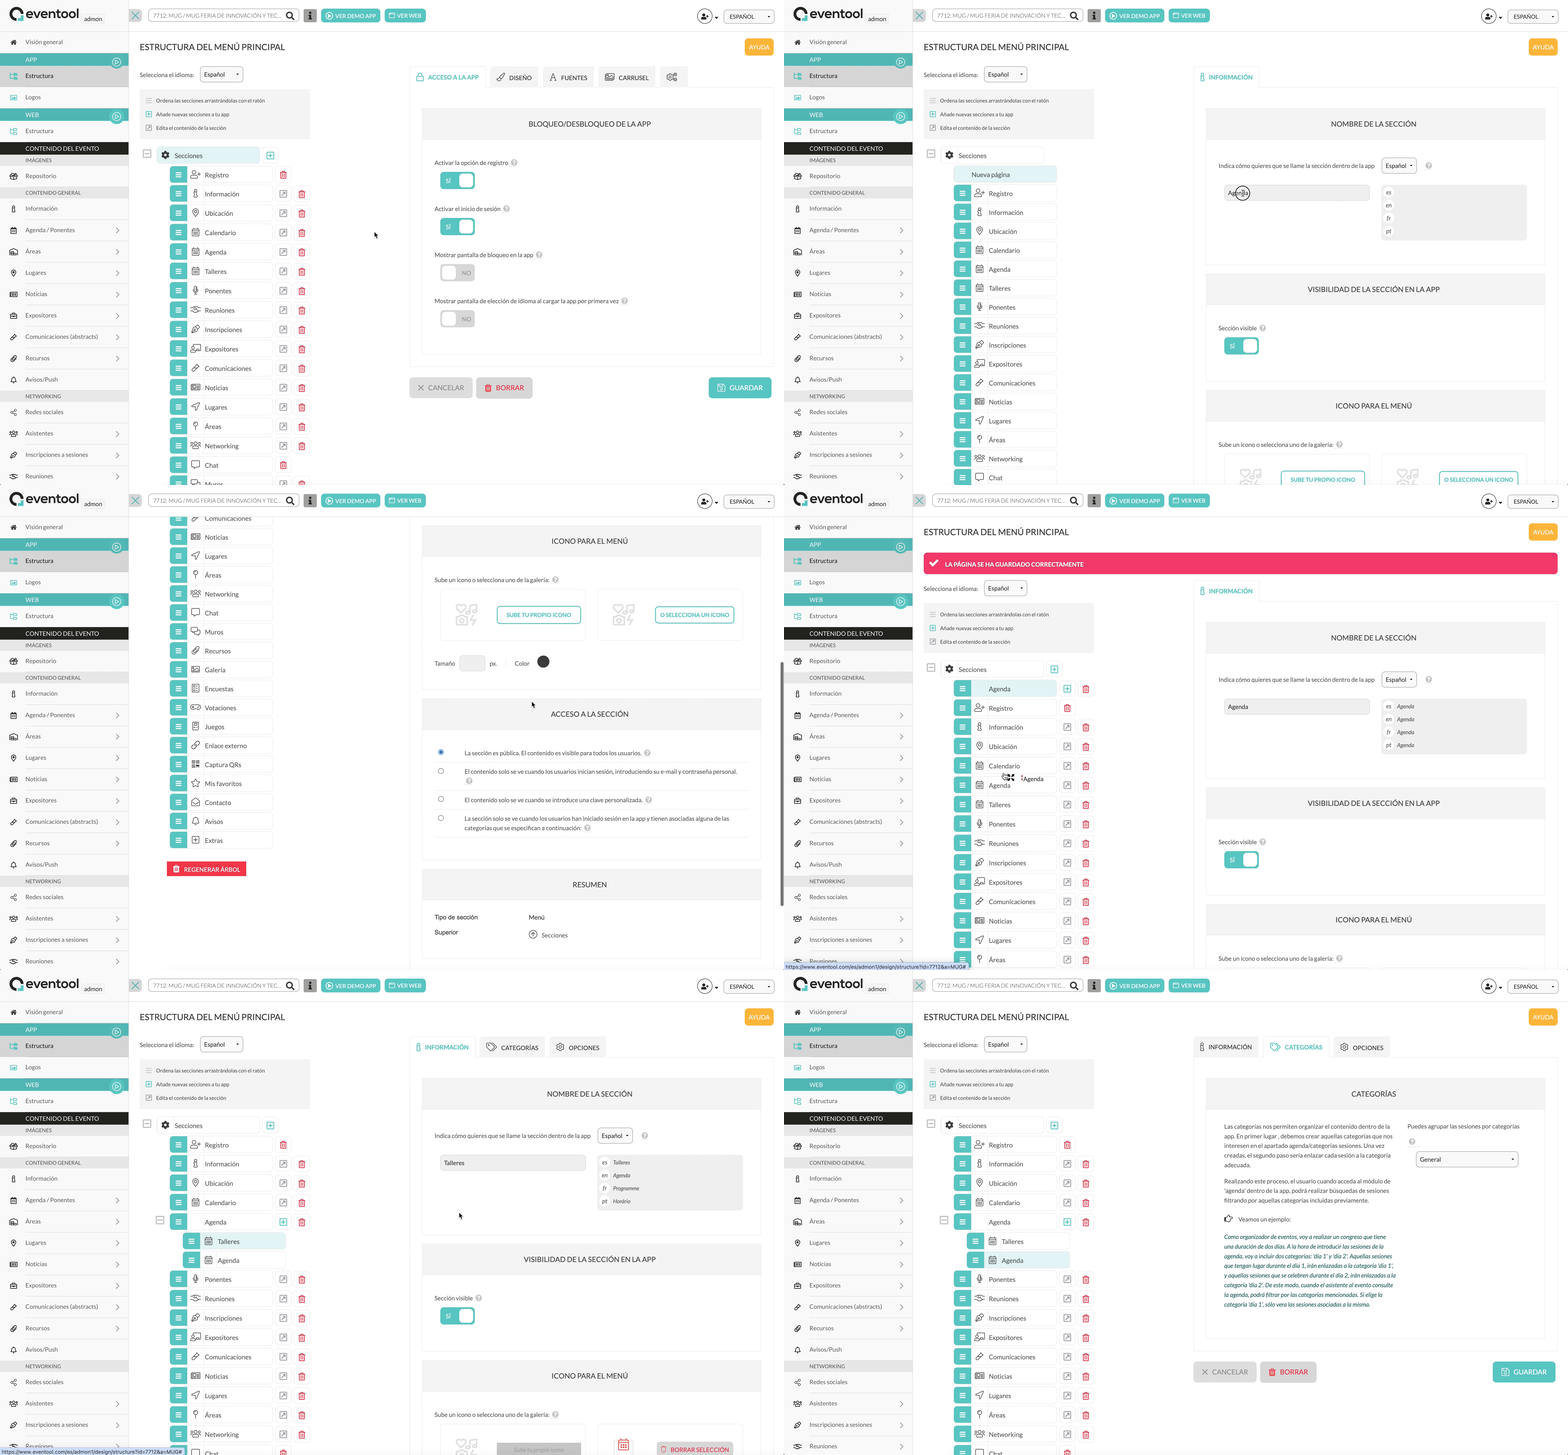
### 4. Create customised diary sections

Now it is time to **create the agenda sections** that the user will see in the app. We will do this from:

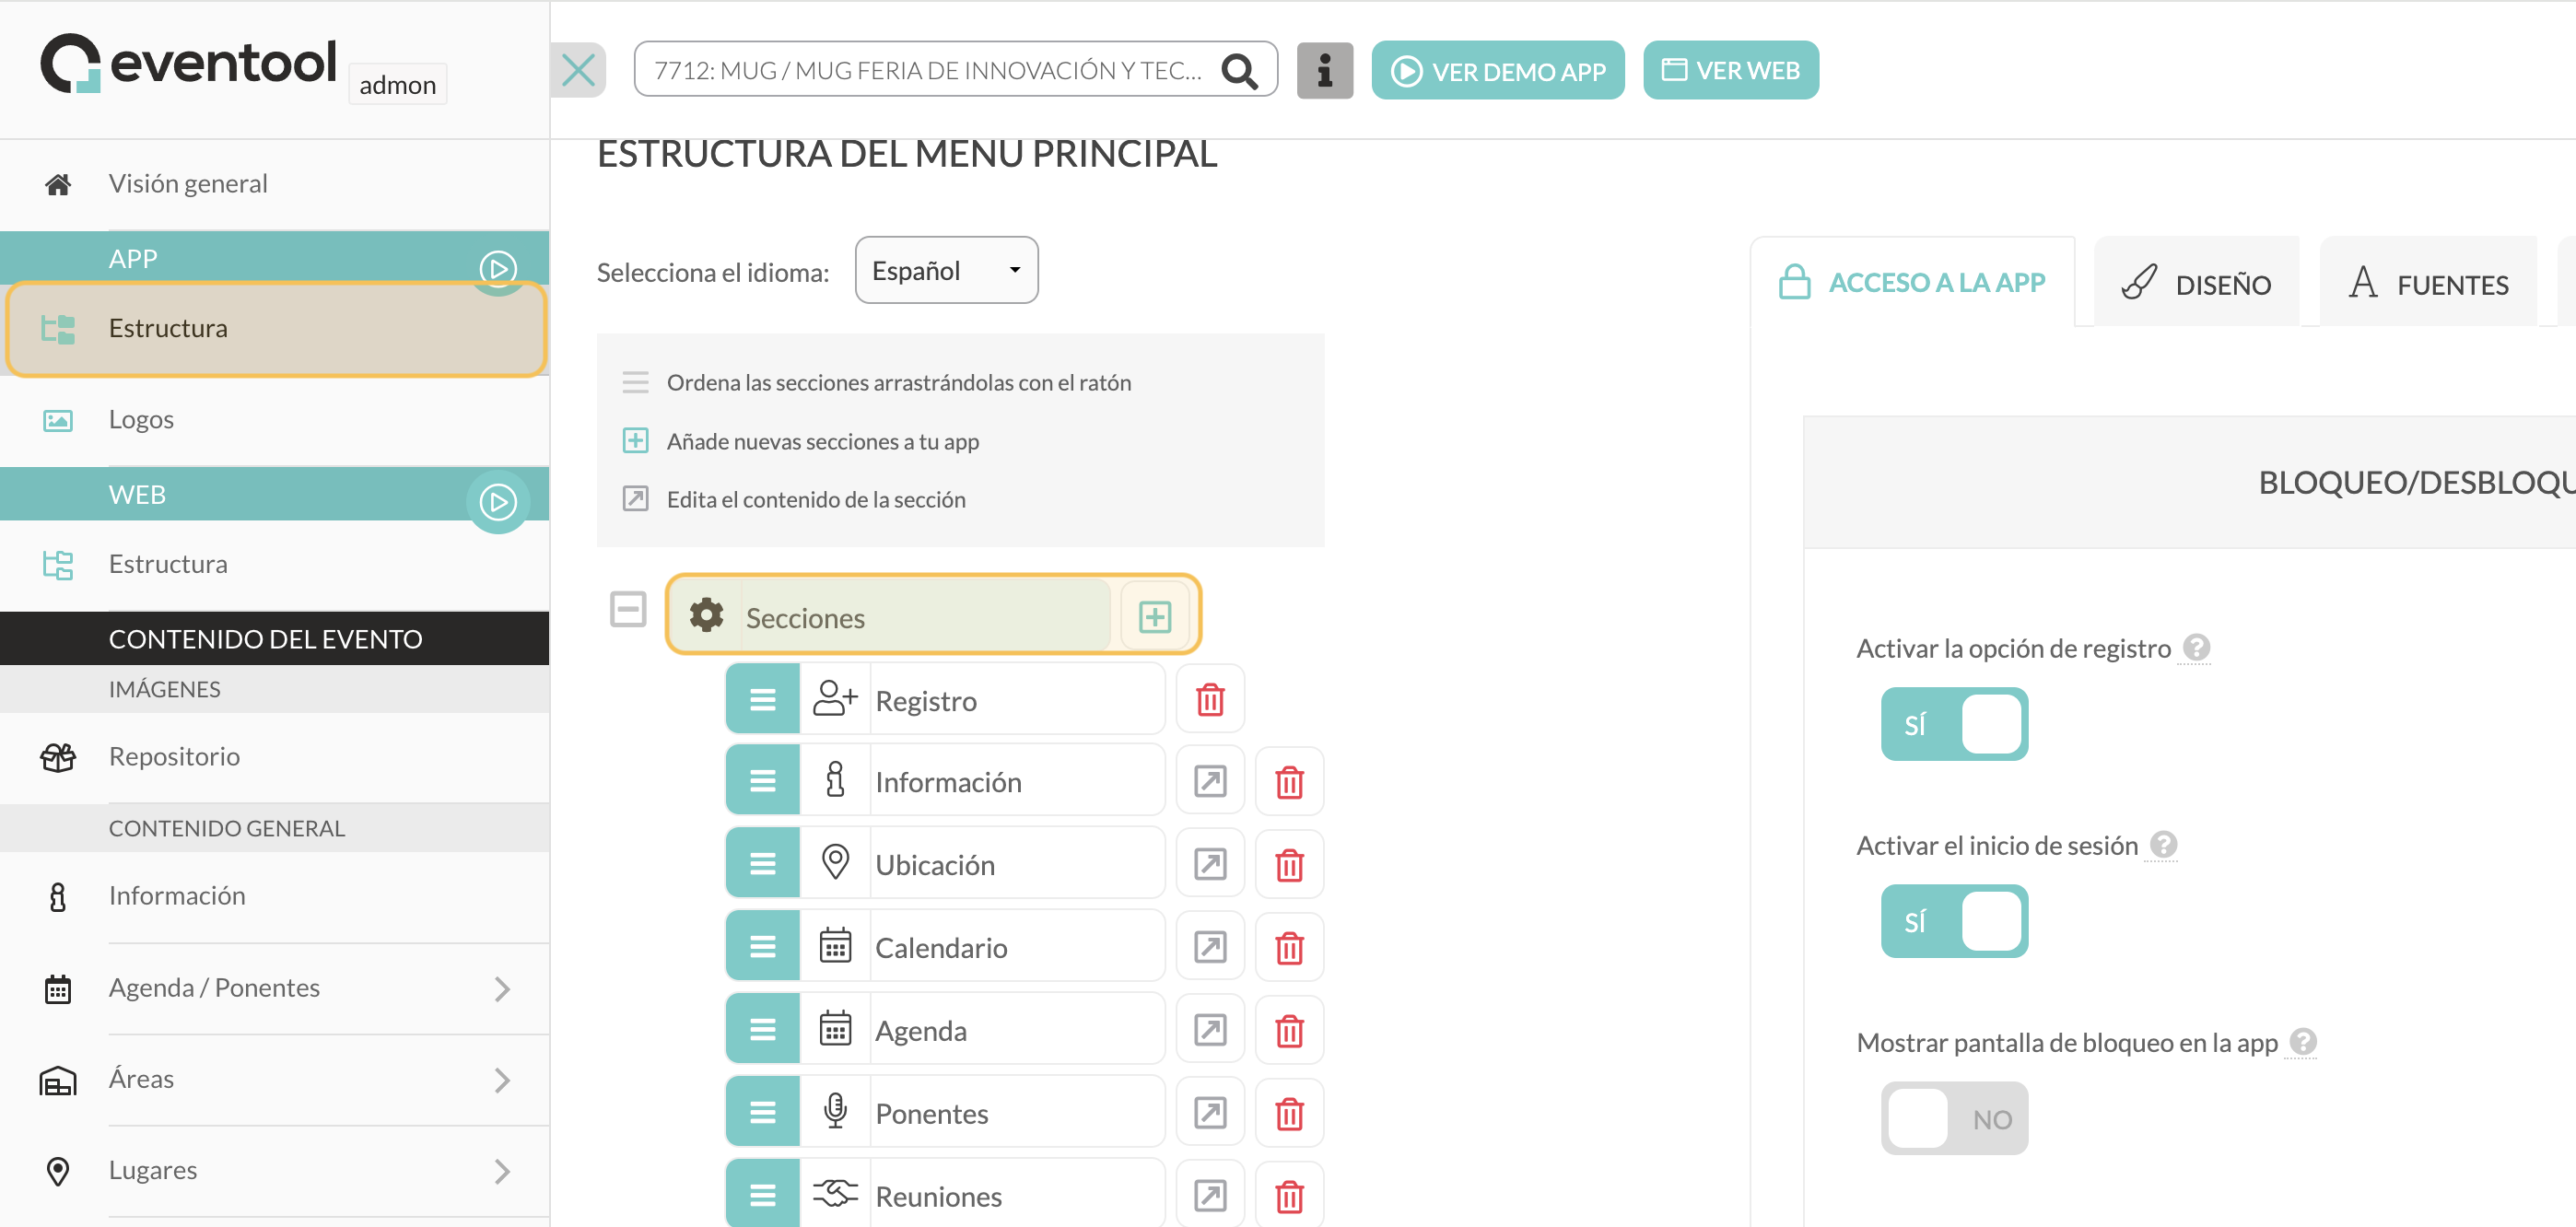
**Panel > Structure > Sections**

<div align="left"><figure><img src="https://content.gitbook.com/content/8g1s4Beg4BZdw3Dp6hLd/blobs/ha0yIbSBlUywal3KYcOE/agendas%2010.png" alt=""><figcaption></figcaption></figure></div>

#### Option 1: Use an existing agenda section

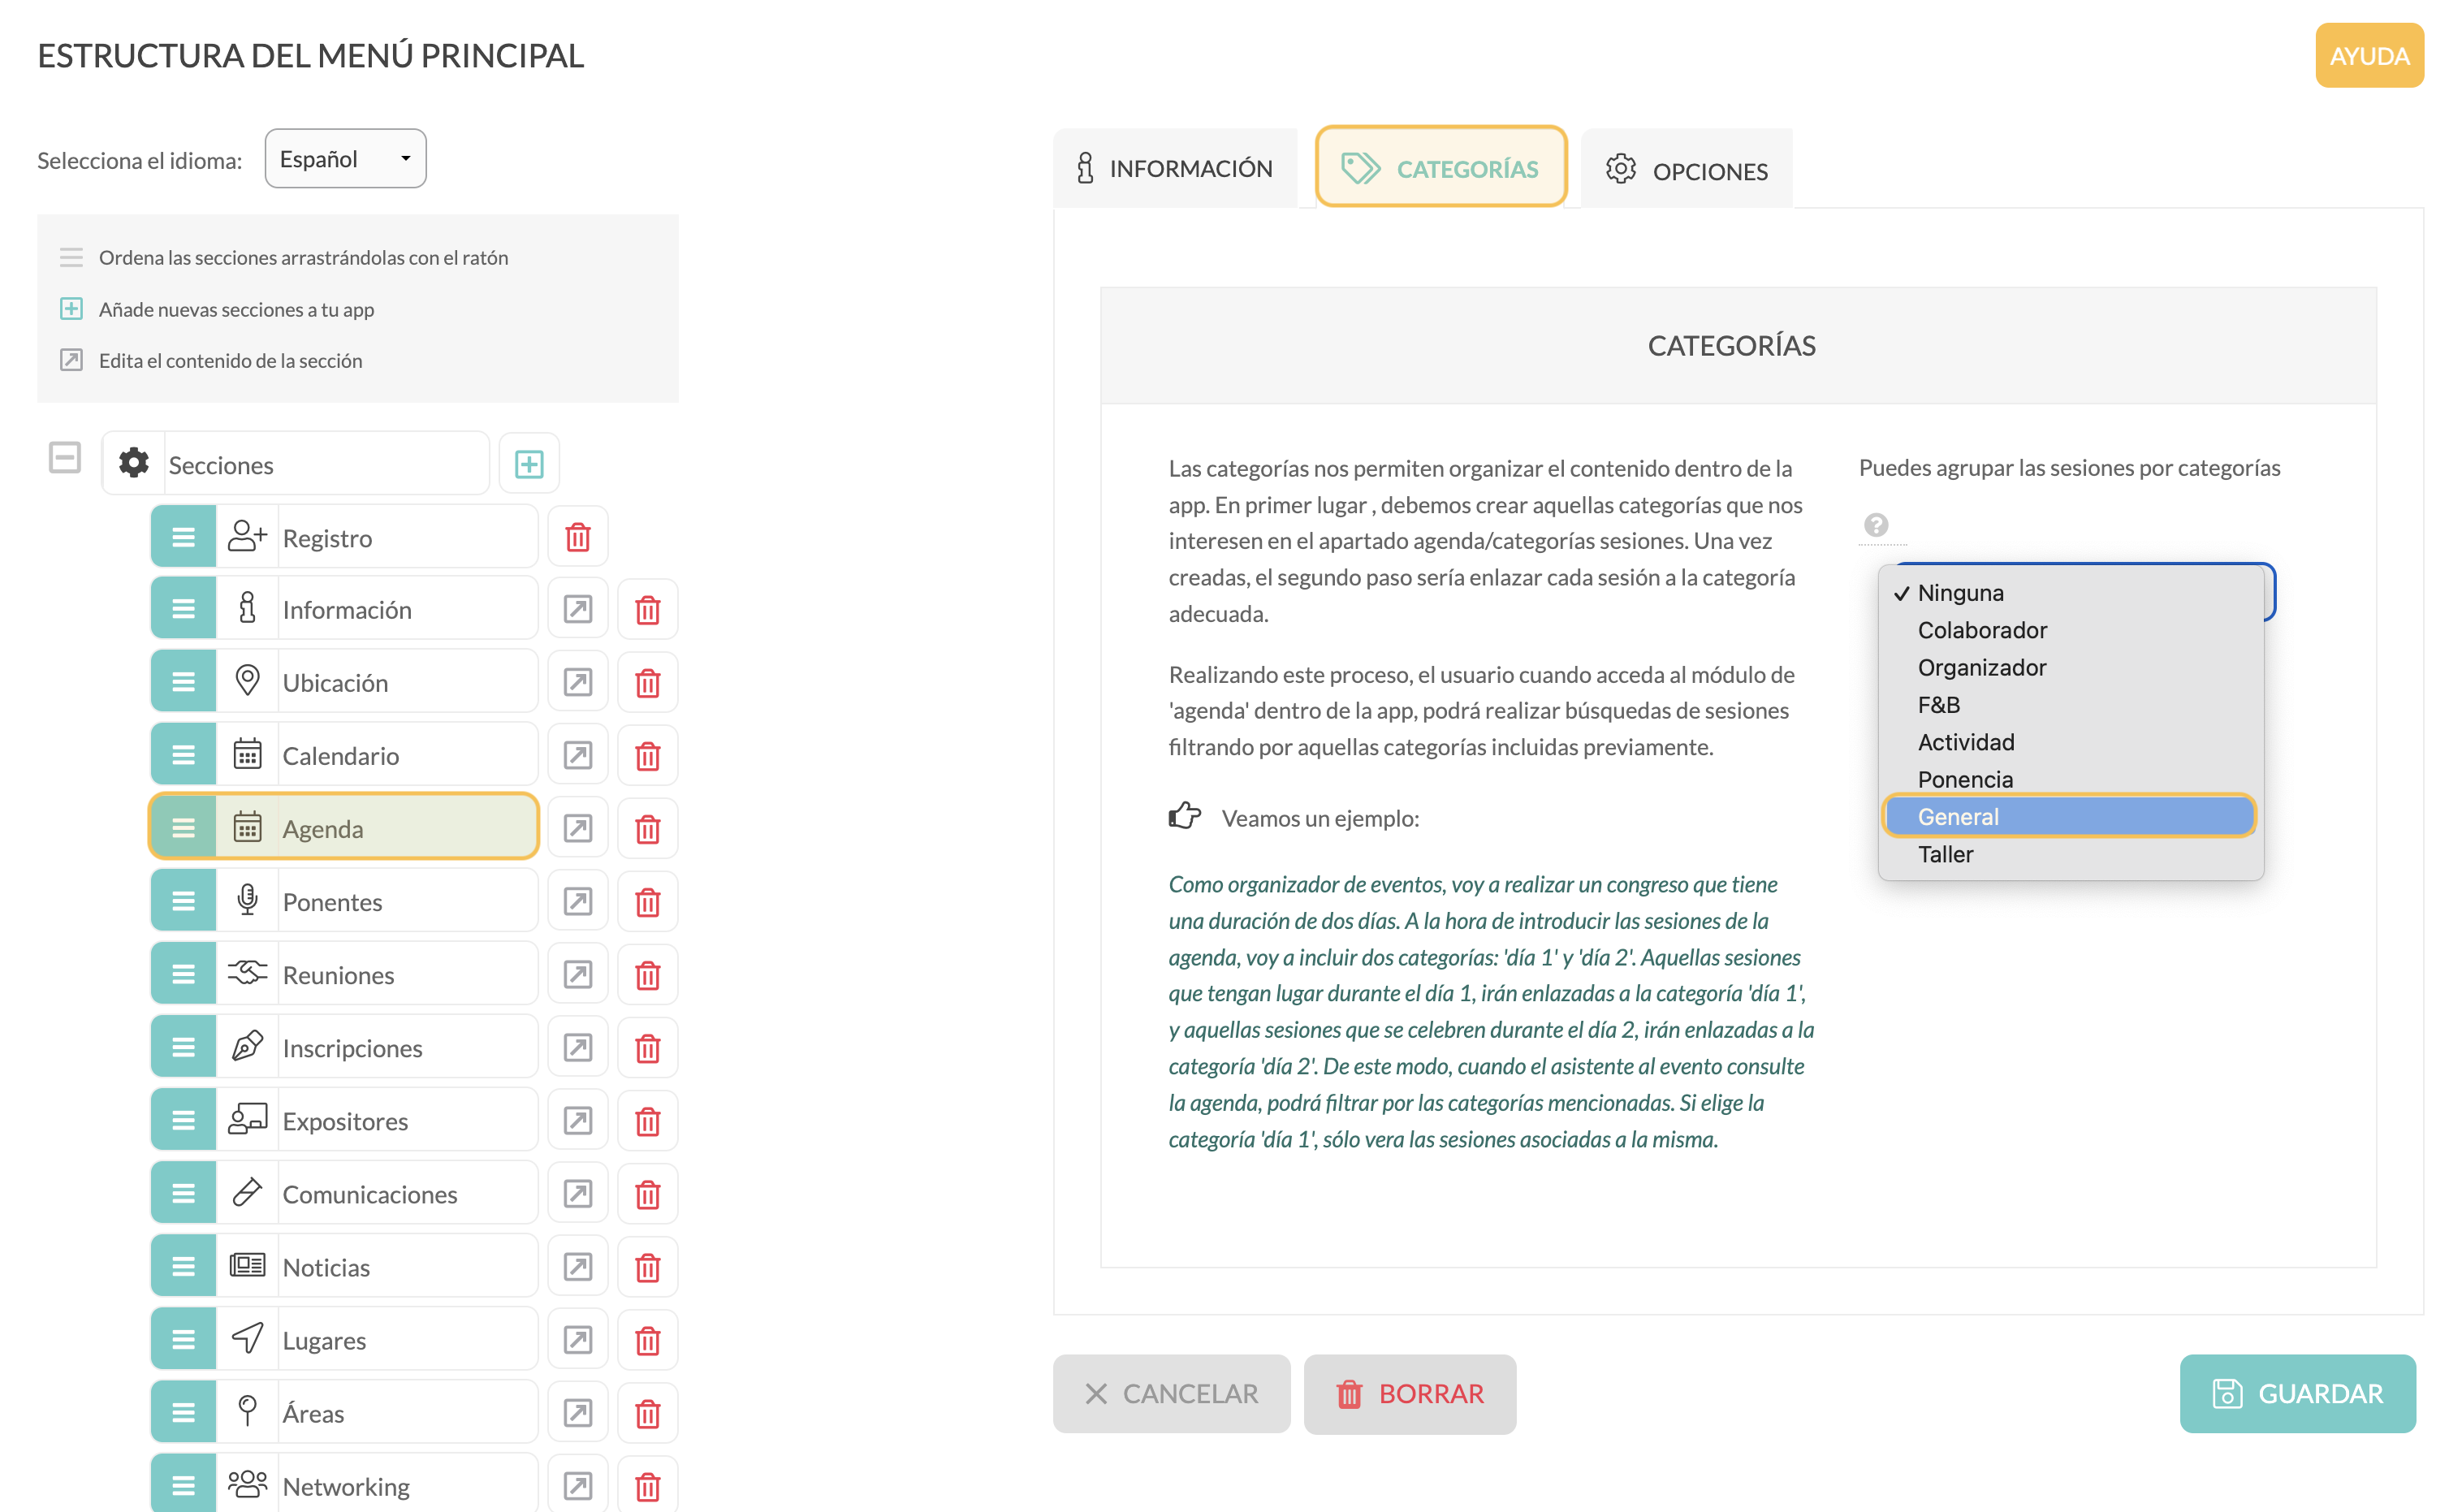
If you already have an Agenda-type section created, you can use it as a base. In that case:

* Enter the section.
* Go to the *Categories* tab.
* Select the category you want to display (for example, ‘General’).
* Save the changes.

<div align="left"><figure><img src="https://content.gitbook.com/content/8g1s4Beg4BZdw3Dp6hLd/blobs/iGghug7mD2zpj5Q03jEg/agendas%2011.png" alt=""><figcaption></figcaption></figure></div>

#### Option 2: Create a new agenda section

To display another category (for example, ‘Workshops’), we will create a new section:

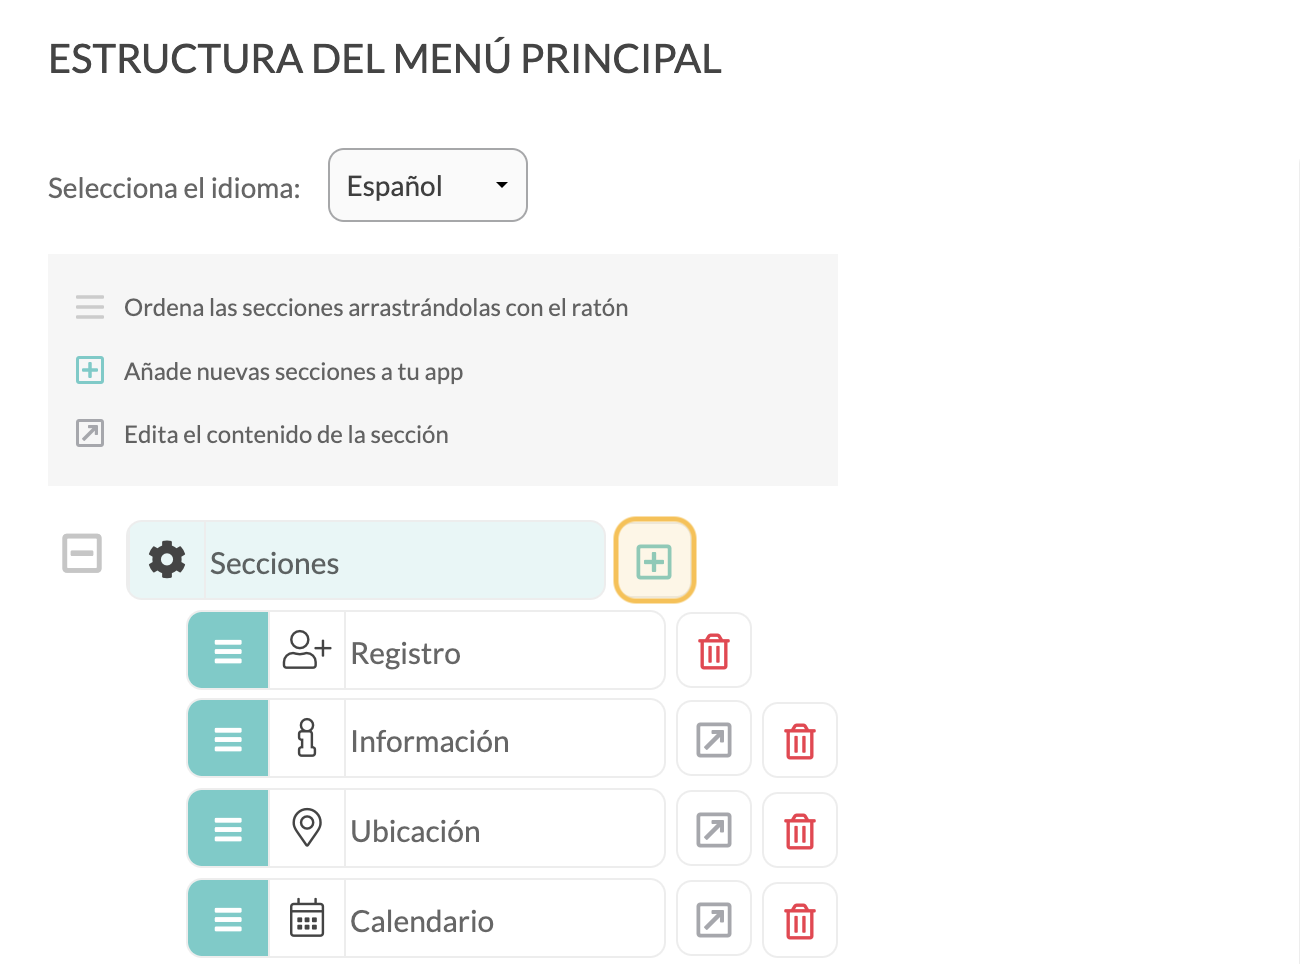
1. In *Structure* > *Sections*, click the ‘**+**’ button.

<div align="left"><figure><img src="https://content.gitbook.com/content/8g1s4Beg4BZdw3Dp6hLd/blobs/34VcI5MZih4V8f6mEj7X/agendas%2012.png" alt="" width="563"><figcaption></figcaption></figure></div>

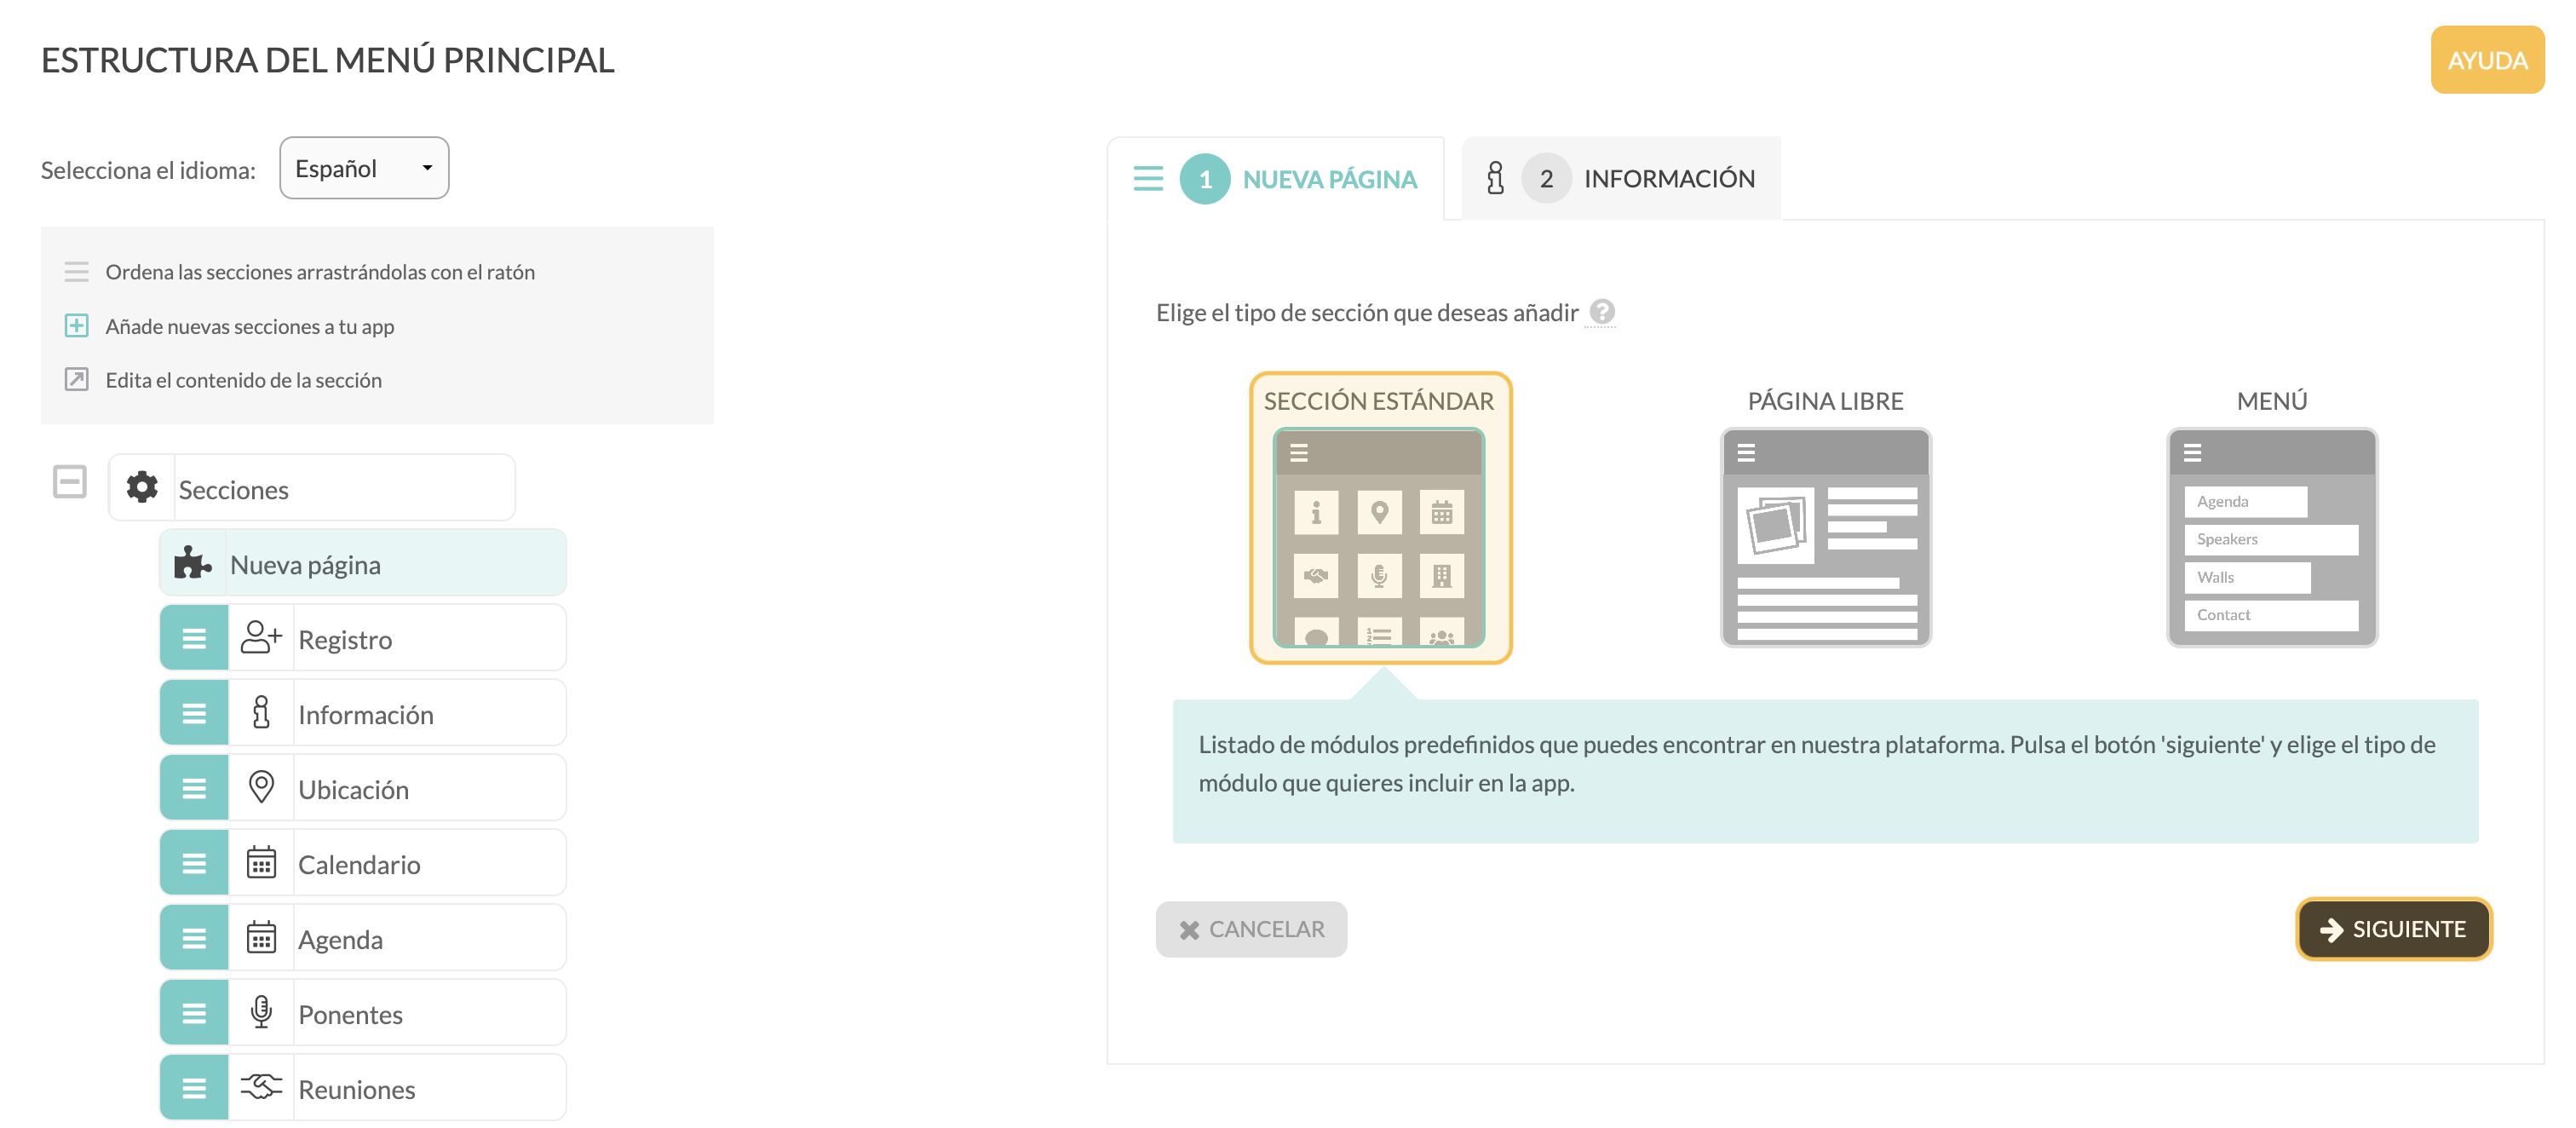
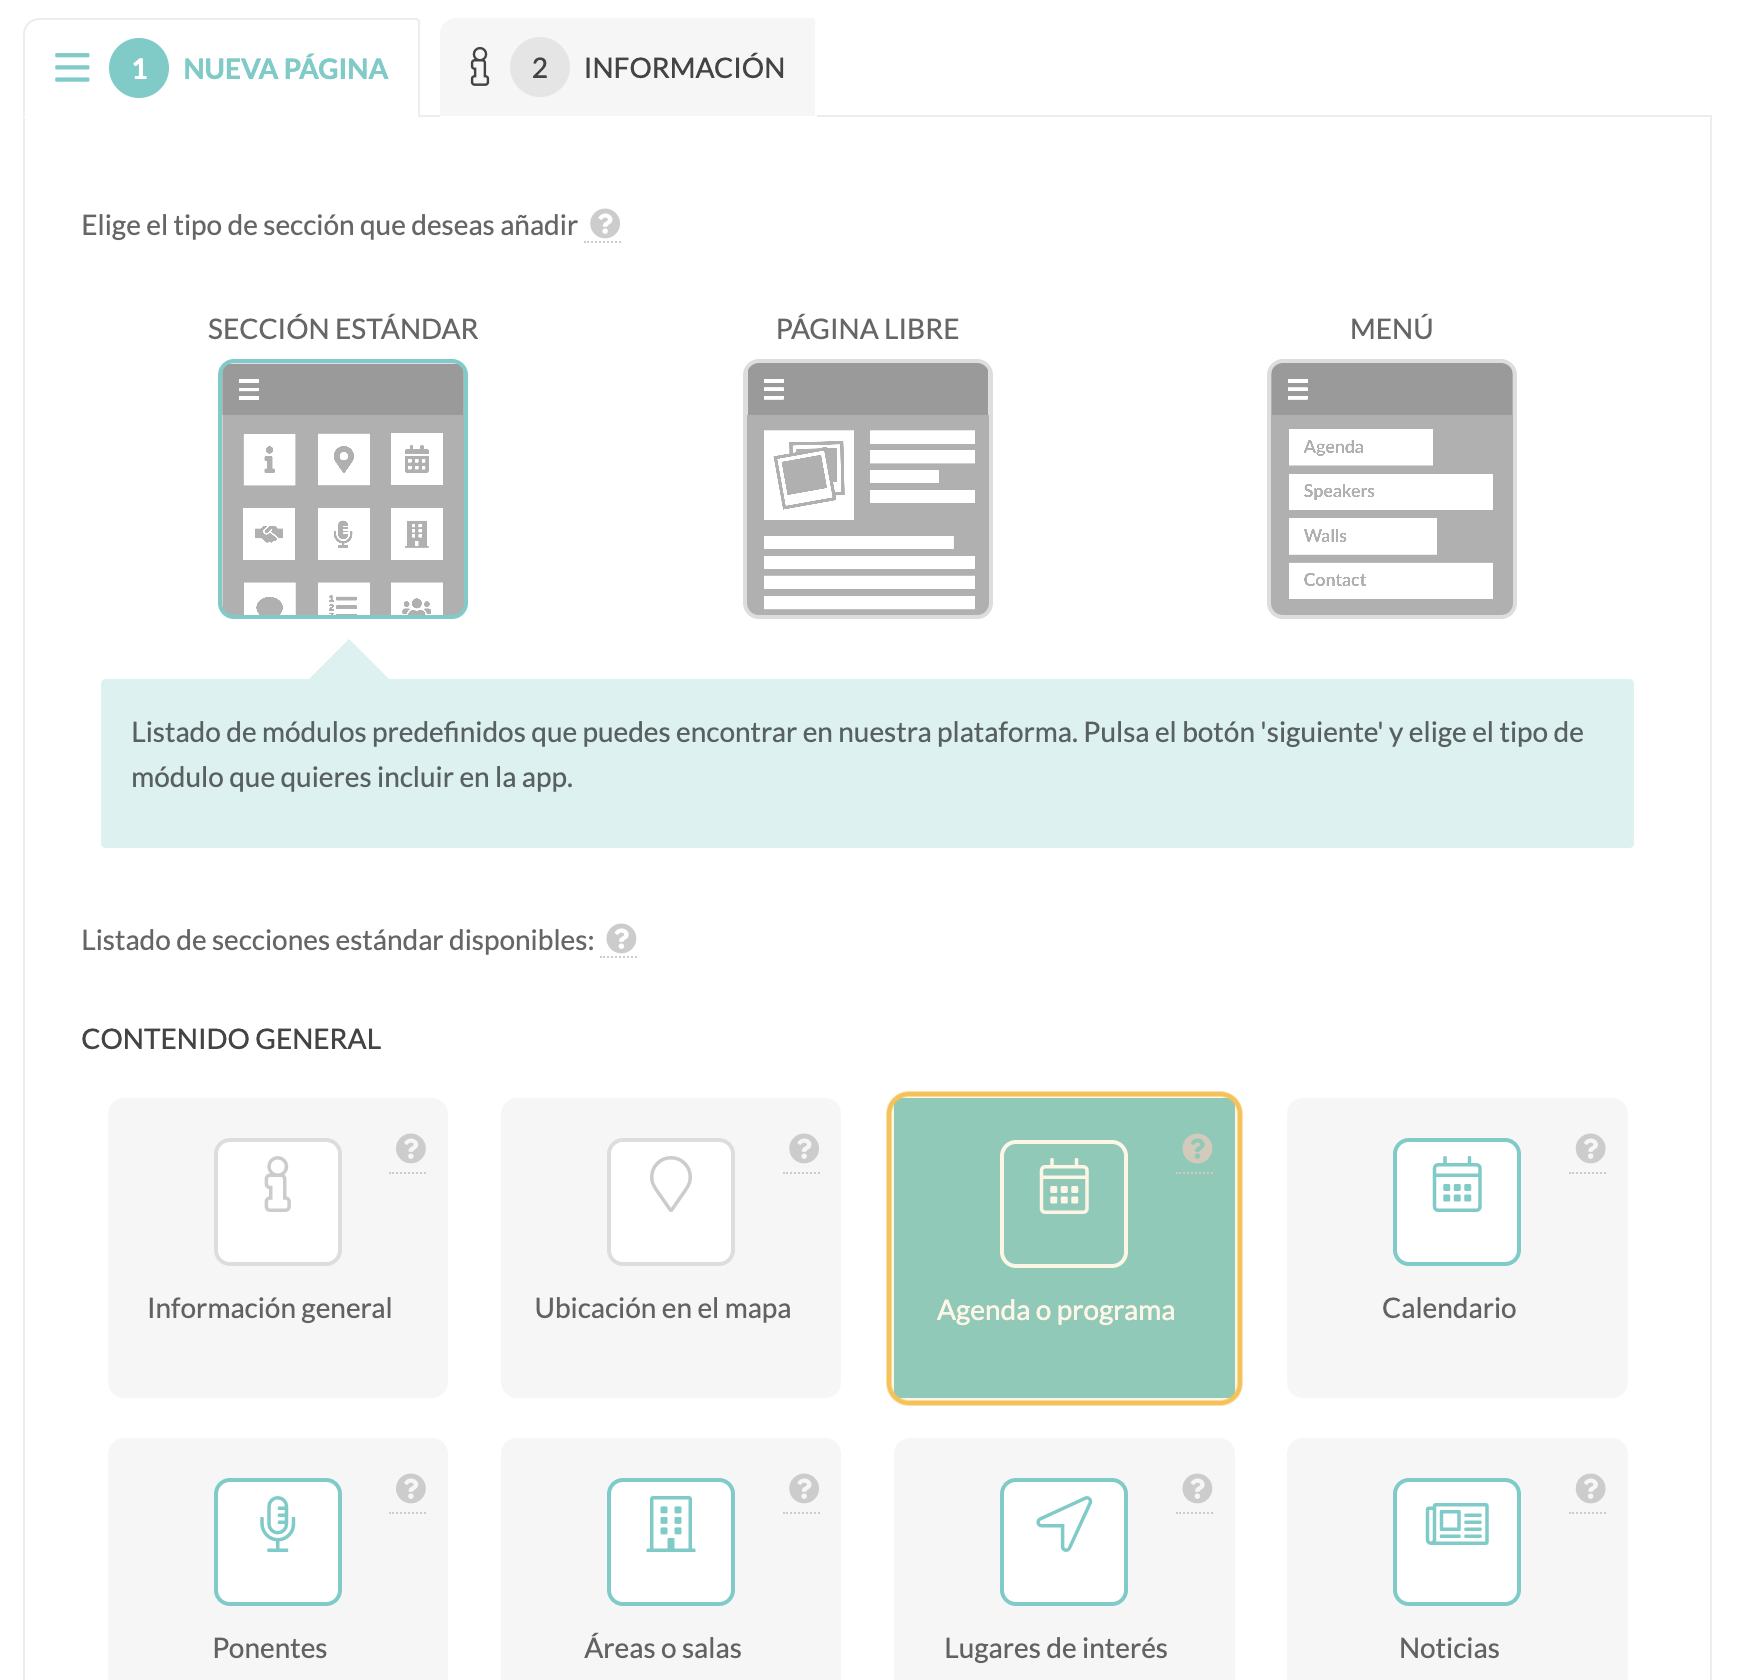
2. Select Standard Section and click ‘**Next**’.

<div align="left"><figure><img src="https://content.gitbook.com/content/8g1s4Beg4BZdw3Dp6hLd/blobs/Bj3SDTMJlrHP4Mdao8Y3/agendas%2013.png" alt=""><figcaption></figcaption></figure></div>

3. Select the *Agenda type* and continue.

<div align="left"><figure><img src="https://content.gitbook.com/content/8g1s4Beg4BZdw3Dp6hLd/blobs/zKWvj26P8Eh7TfqGiq2U/agendas%2014.png" alt="" width="563"><figcaption></figcaption></figure></div>

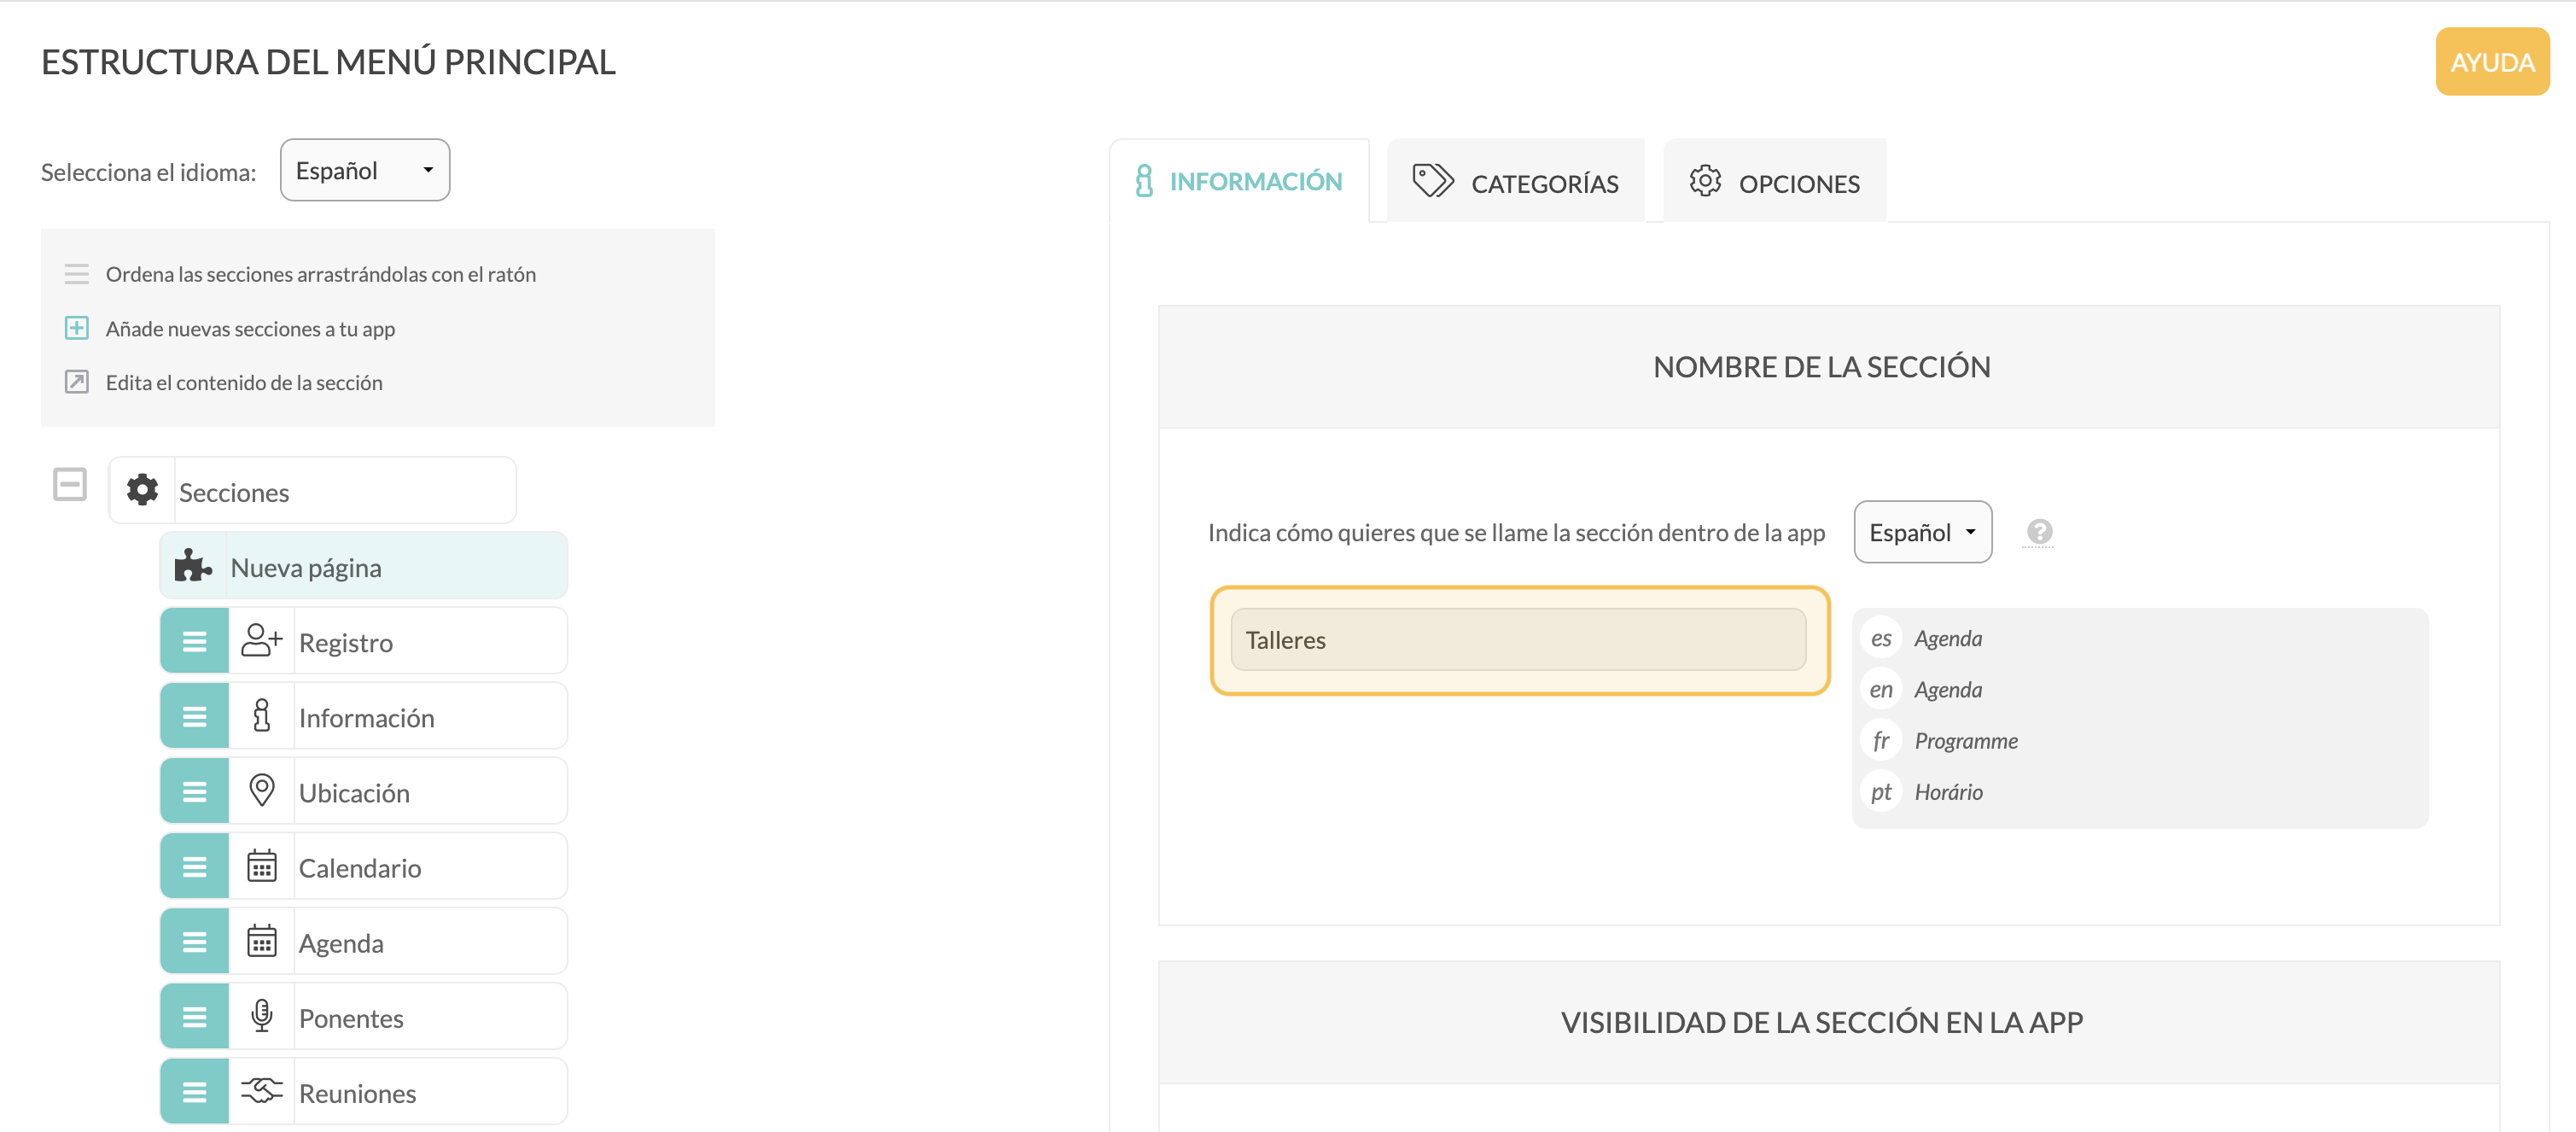
4. Give it an identifying name and configure the desired options.

<div align="left"><figure><img src="https://content.gitbook.com/content/8g1s4Beg4BZdw3Dp6hLd/blobs/t3gq6G13YyaPeSATuKJA/agendas%2015.png" alt=""><figcaption></figcaption></figure></div>

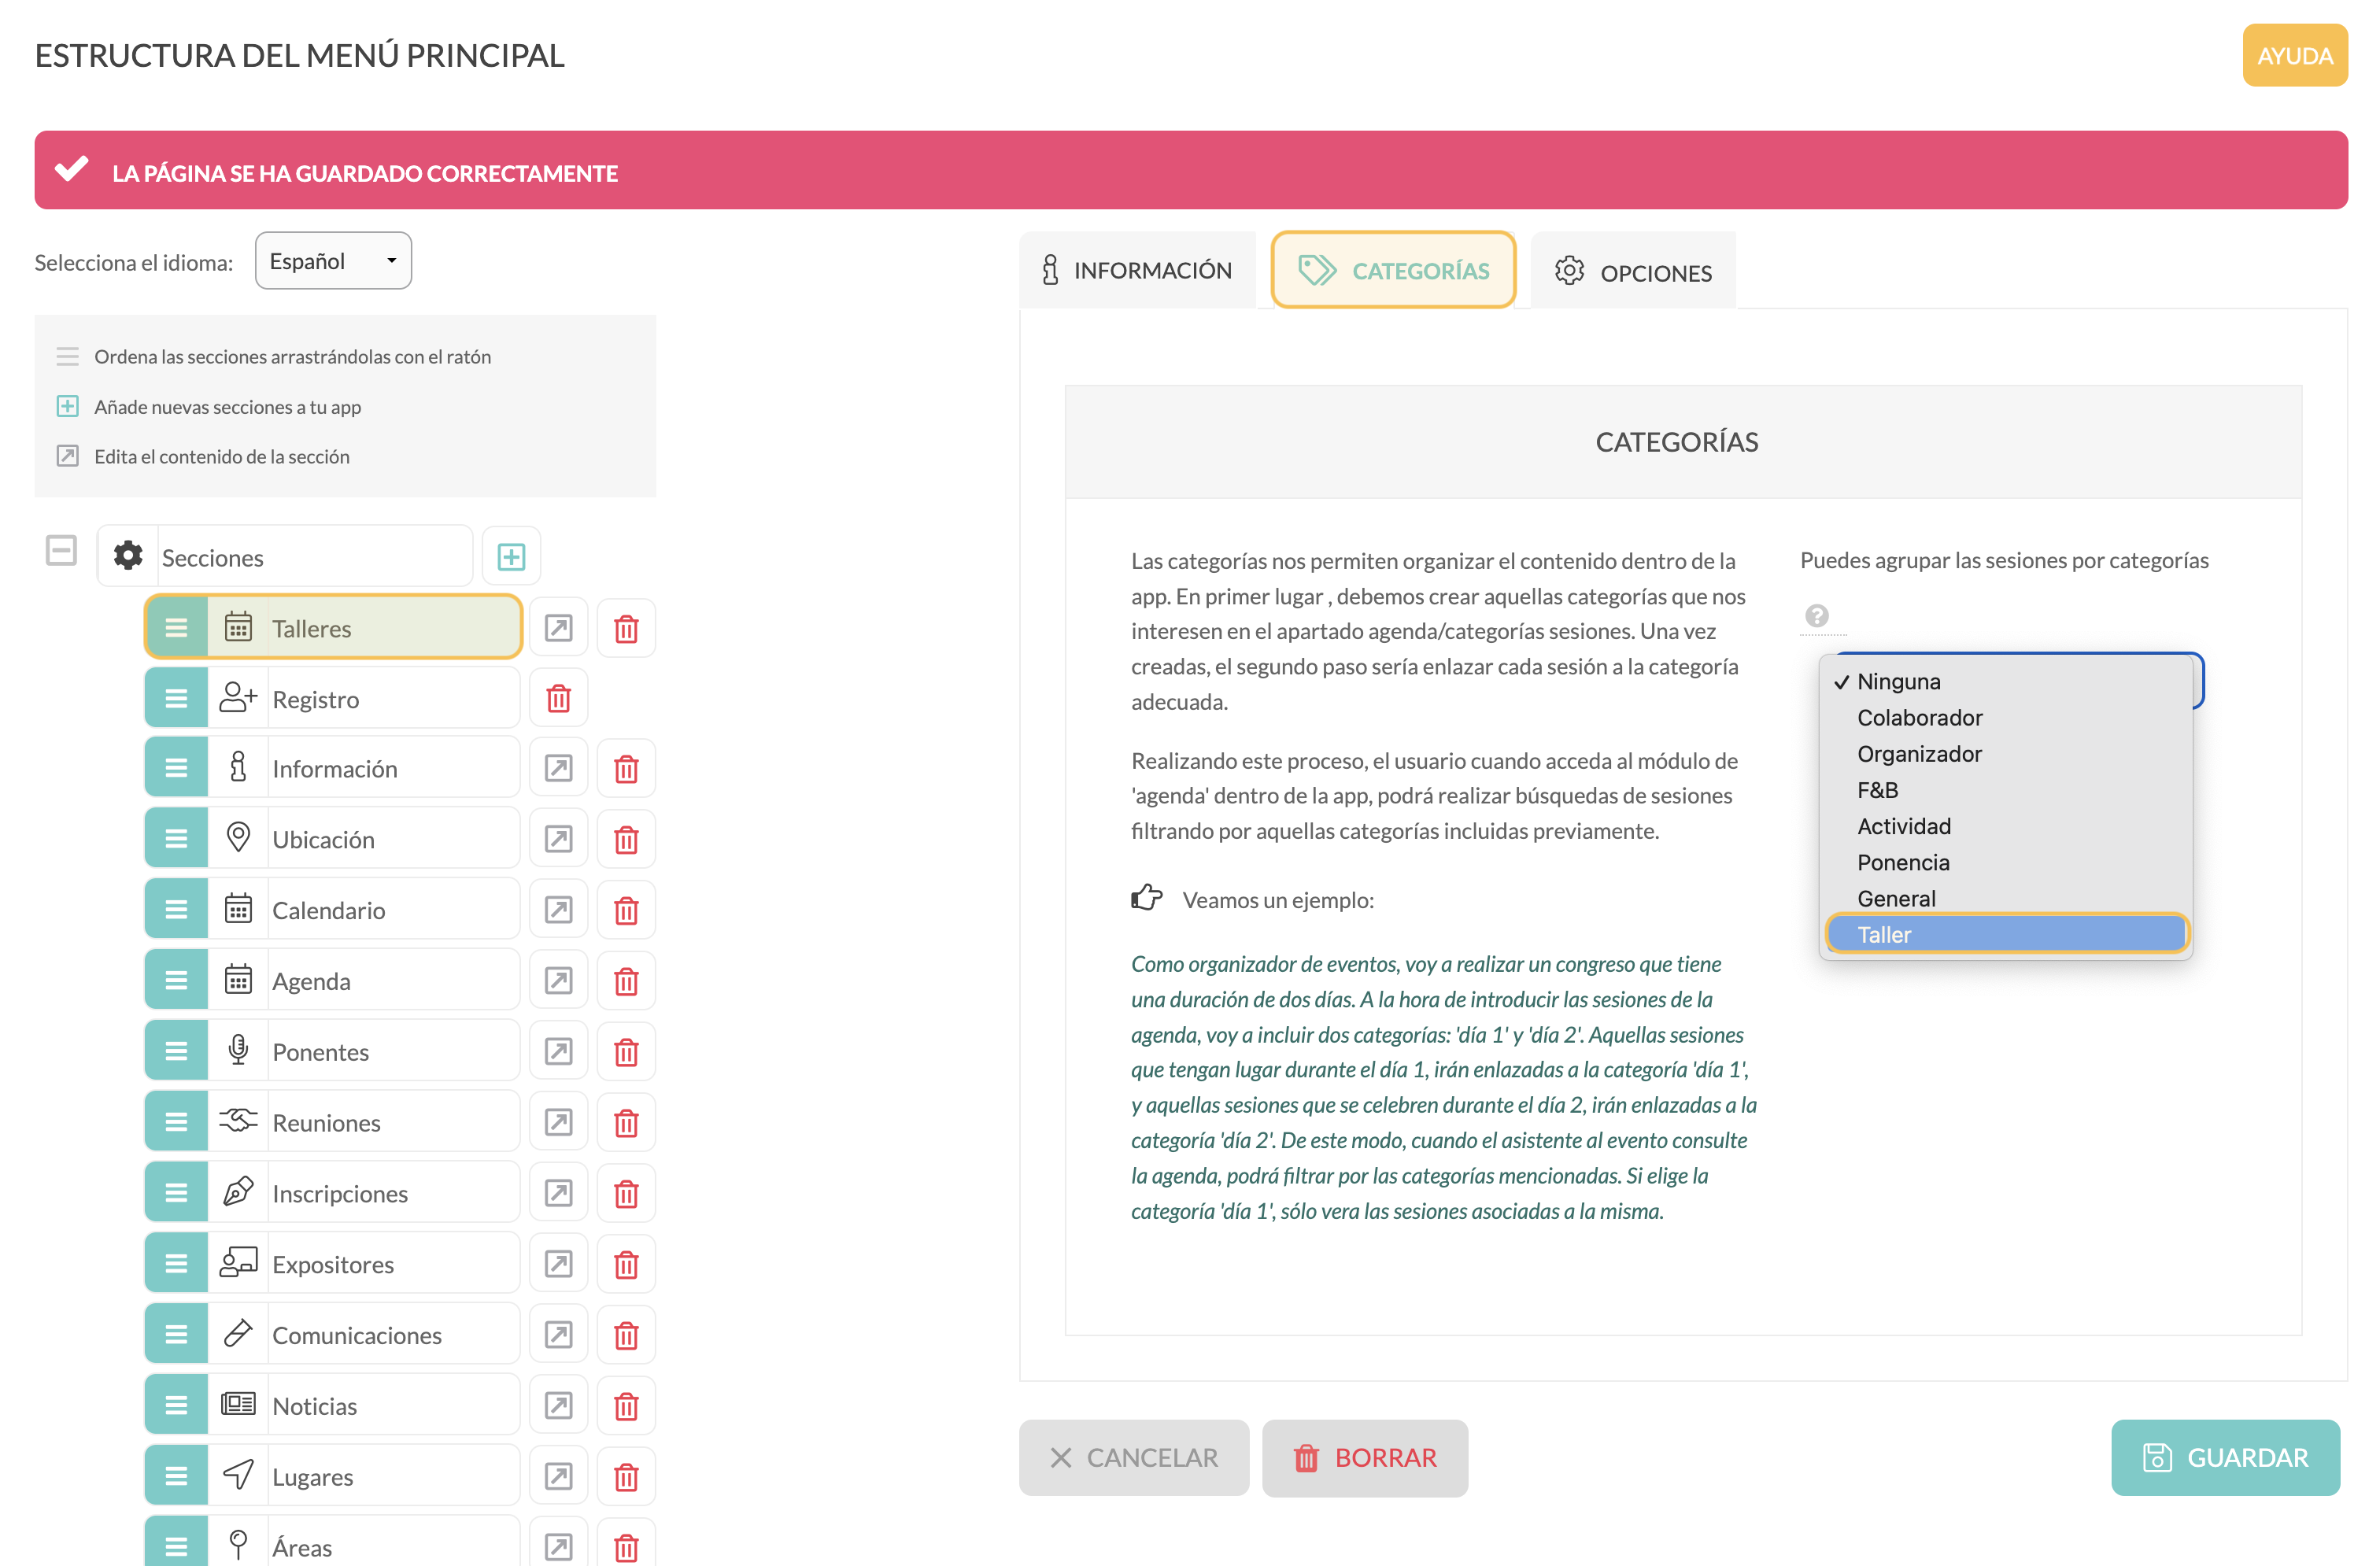
5. In the *Categories tab*, select the category you want to display (in this case, ‘*Workshop*’).

<div align="left"><figure><img src="https://content.gitbook.com/content/8g1s4Beg4BZdw3Dp6hLd/blobs/59f9oEaRJ4iC09MdQwS8/agendas%2016.png" alt=""><figcaption></figcaption></figure></div>

***

### 5. Organise the sections in the app

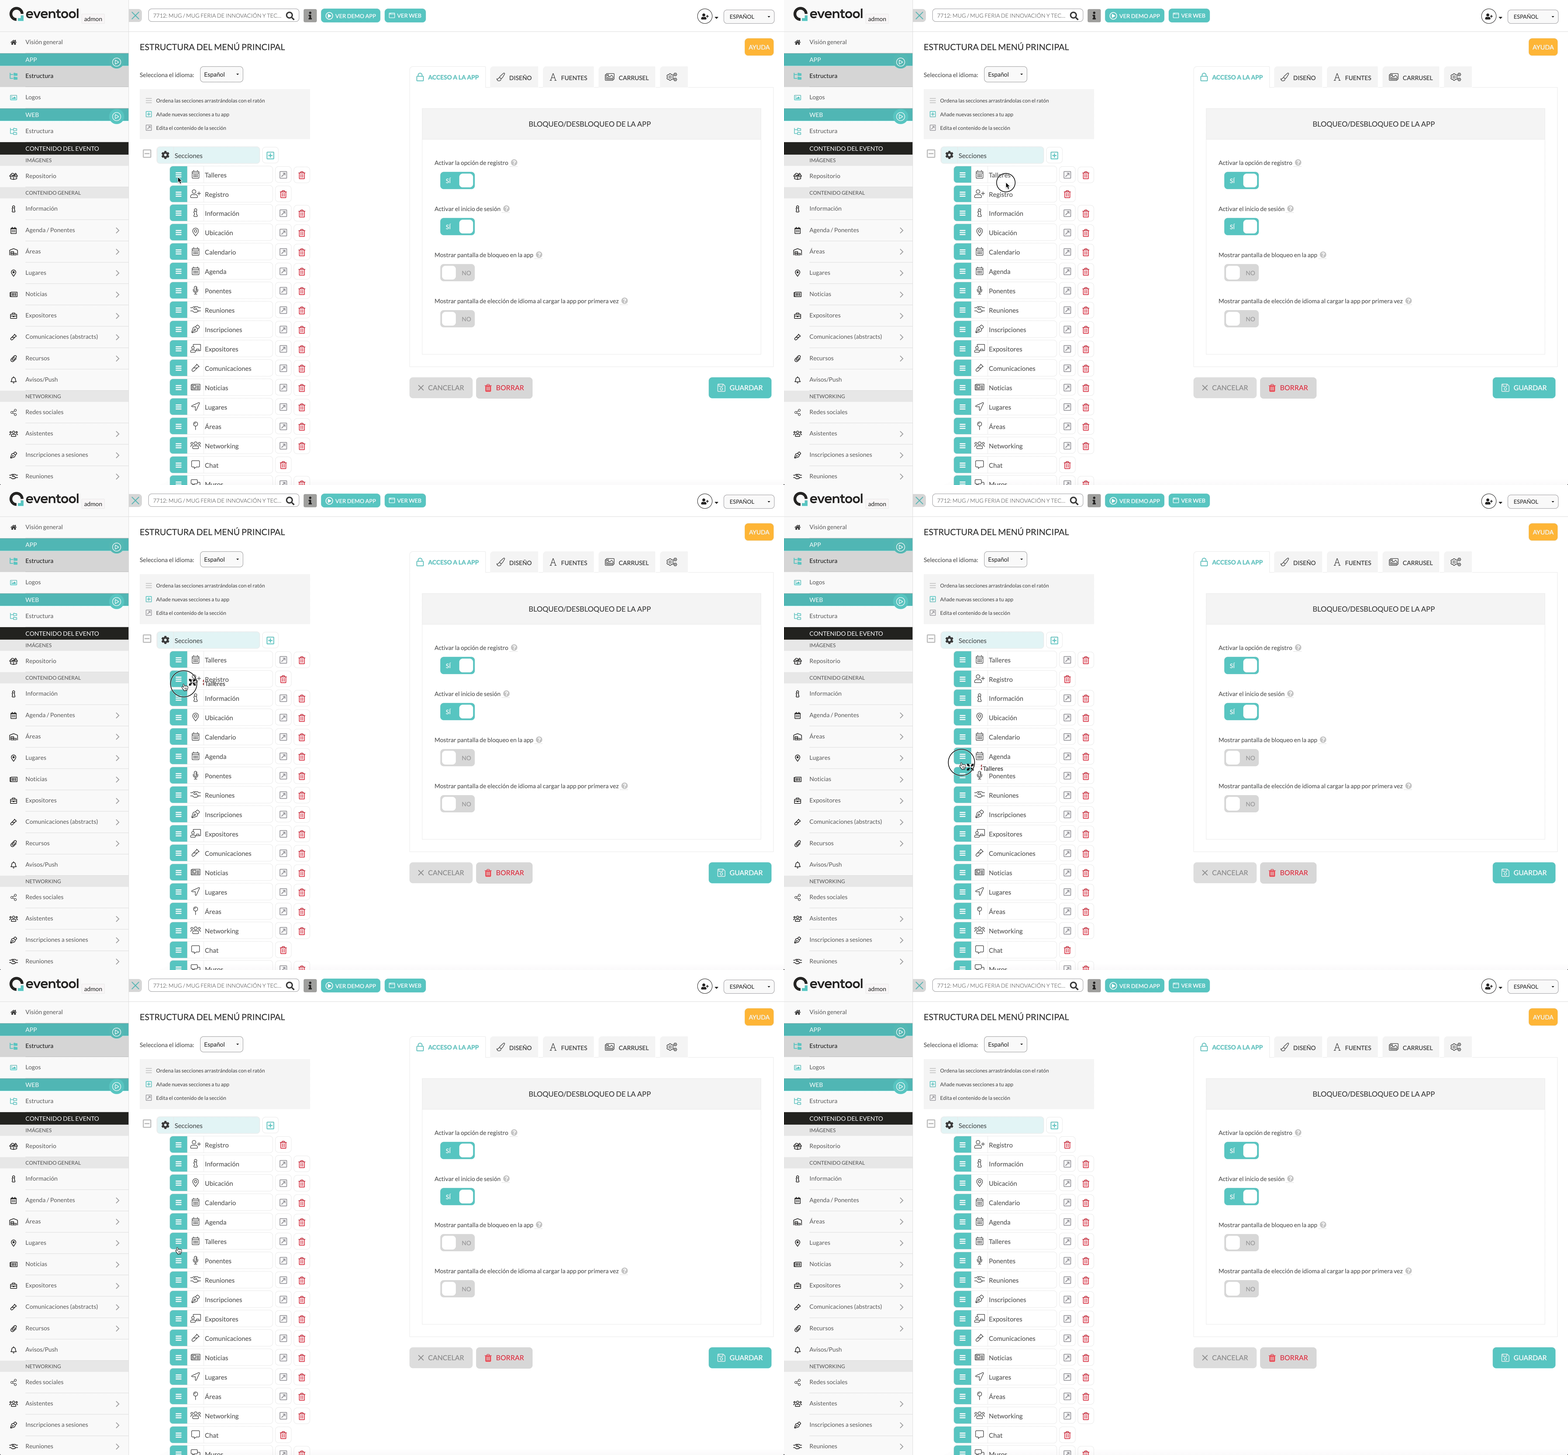
From the *Structure* section, you can **arrange the modules** according to how you want them to be displayed in the app, simply by dragging them.

<figure><img src="https://content.gitbook.com/content/8g1s4Beg4BZdw3Dp6hLd/blobs/0TuKSqxy4ex8lkPjrjBX/agendas%2017.gif" alt=""><figcaption></figcaption></figure>

🎥 You can also create a *Menu* section to group both agenda sections (for example, ‘Programme’) and include ‘General Agenda’ and ‘Workshops’ within it.

<figure><img src="https://content.gitbook.com/content/8g1s4Beg4BZdw3Dp6hLd/blobs/FPu4A1esHlQ8fZGDugPt/agendas%2018.gif" alt=""><figcaption></figcaption></figure>

***

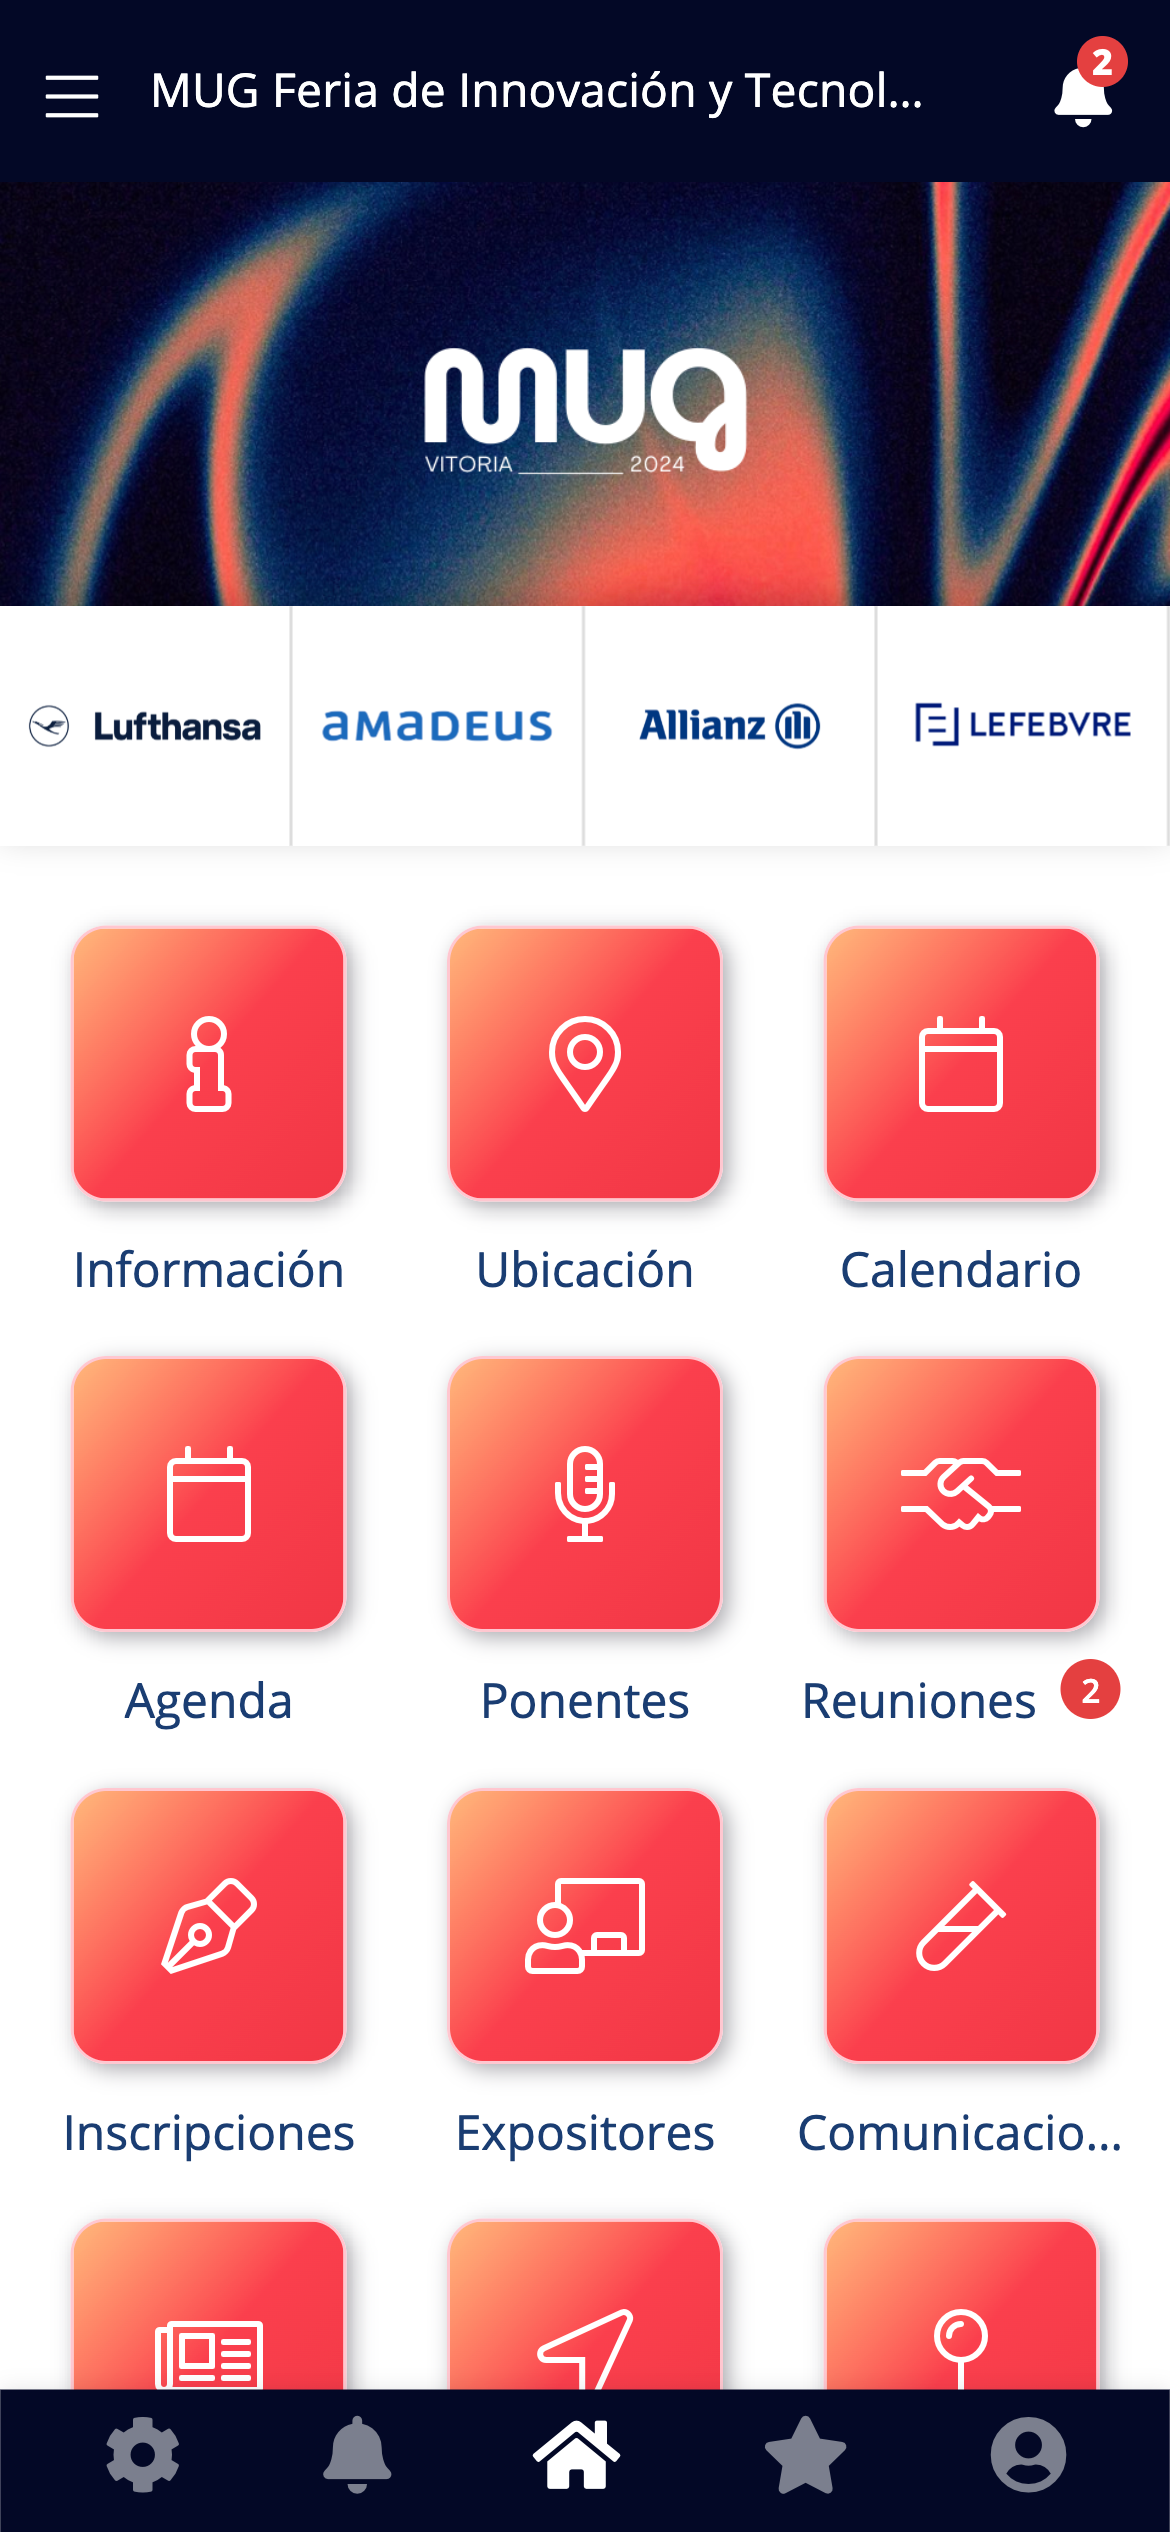
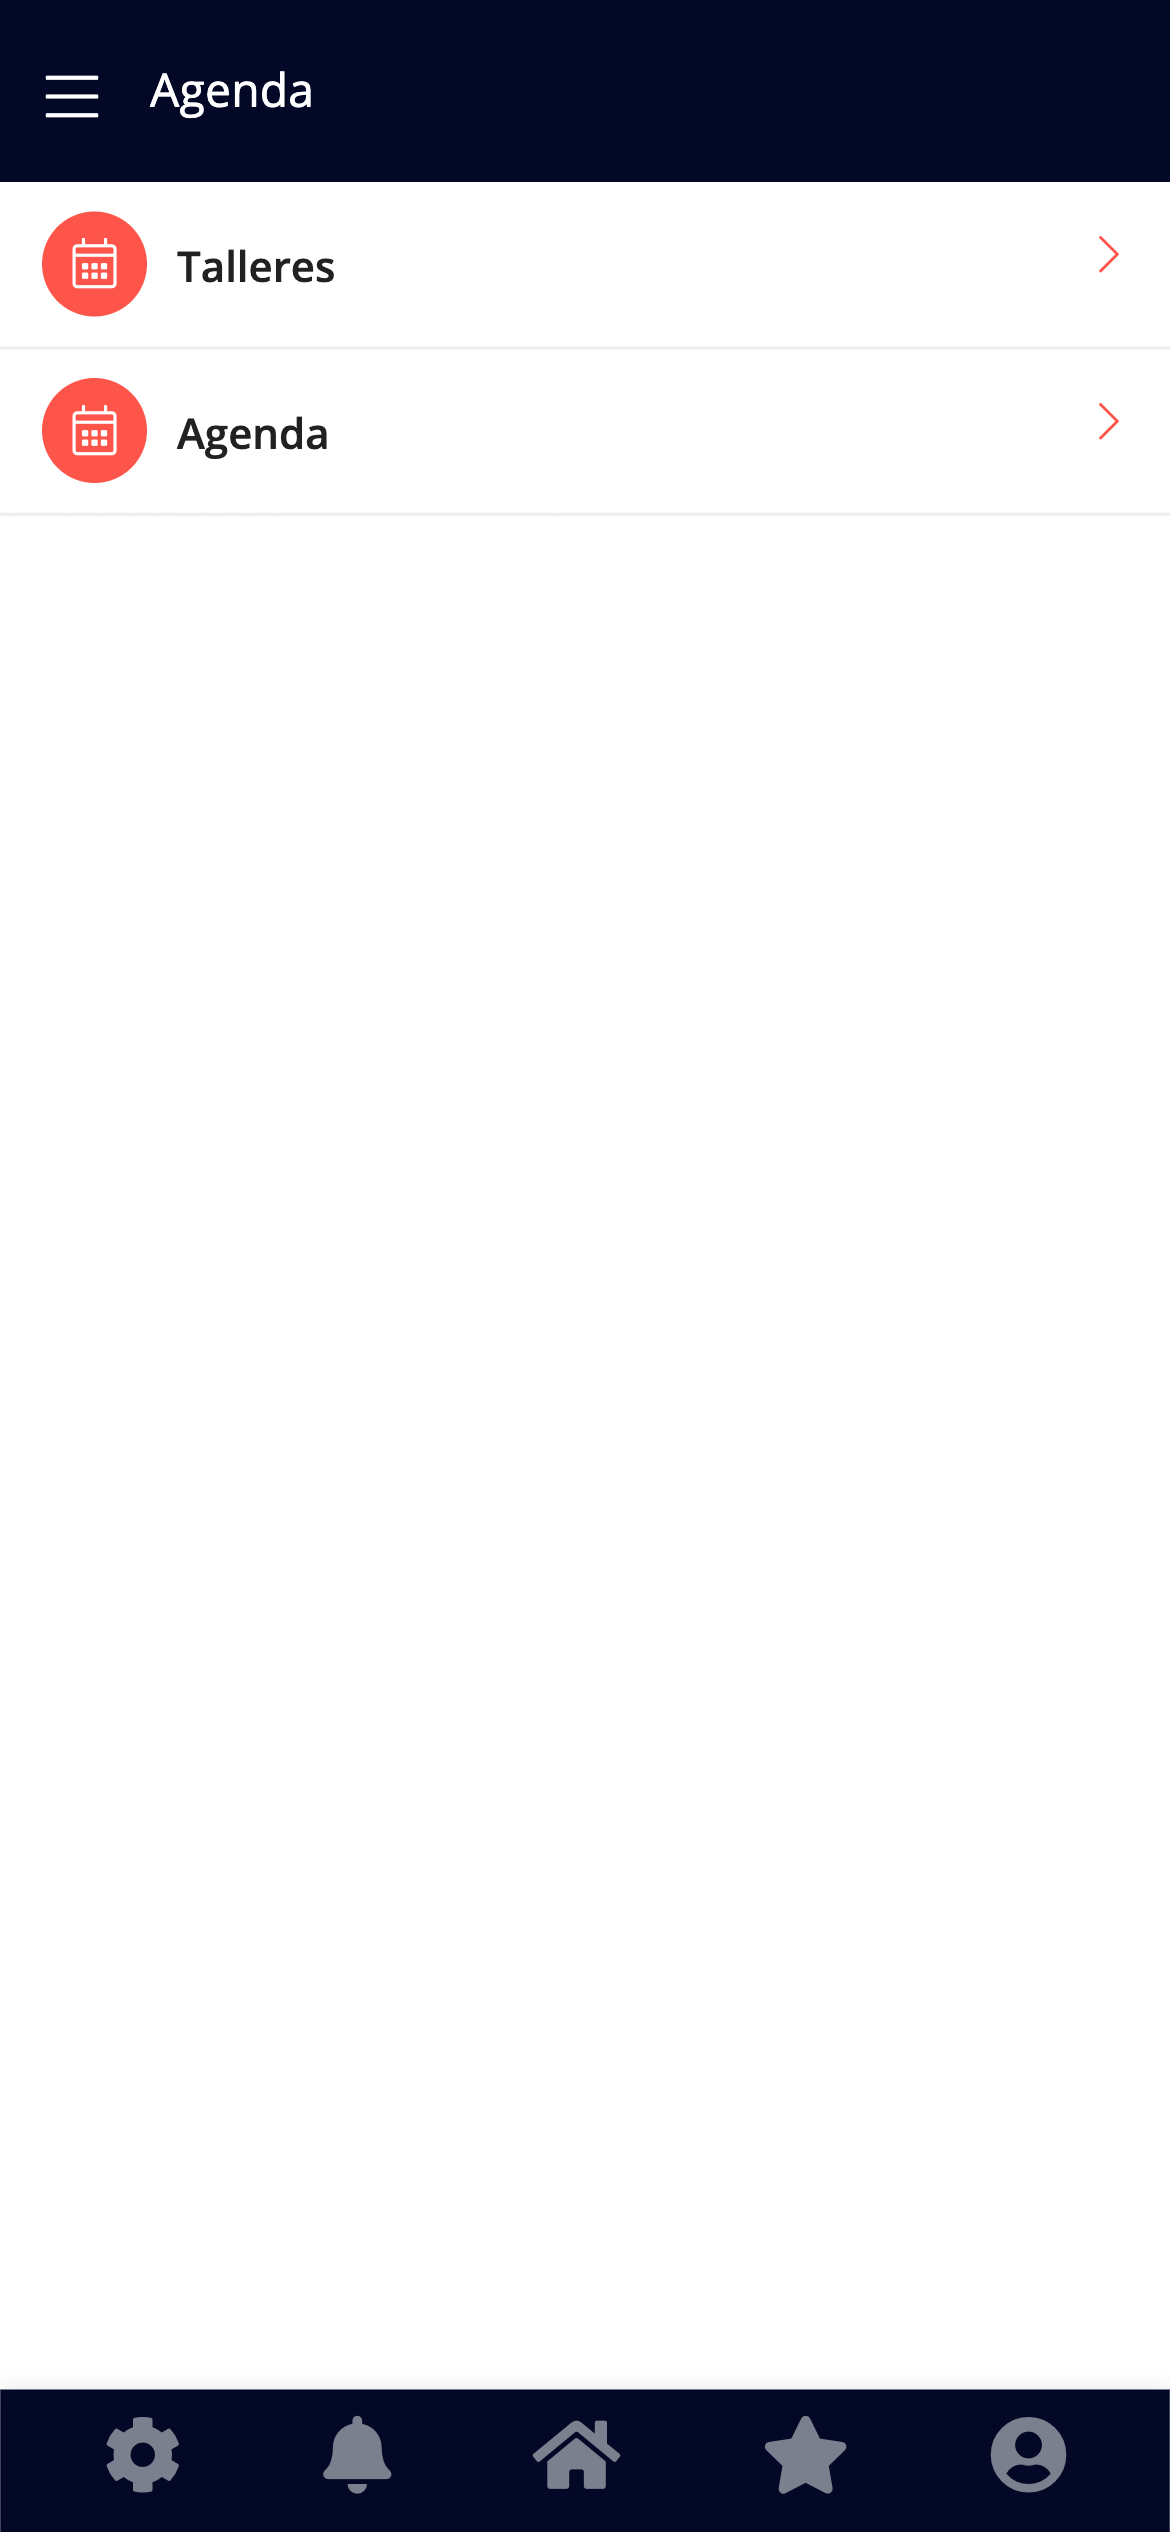
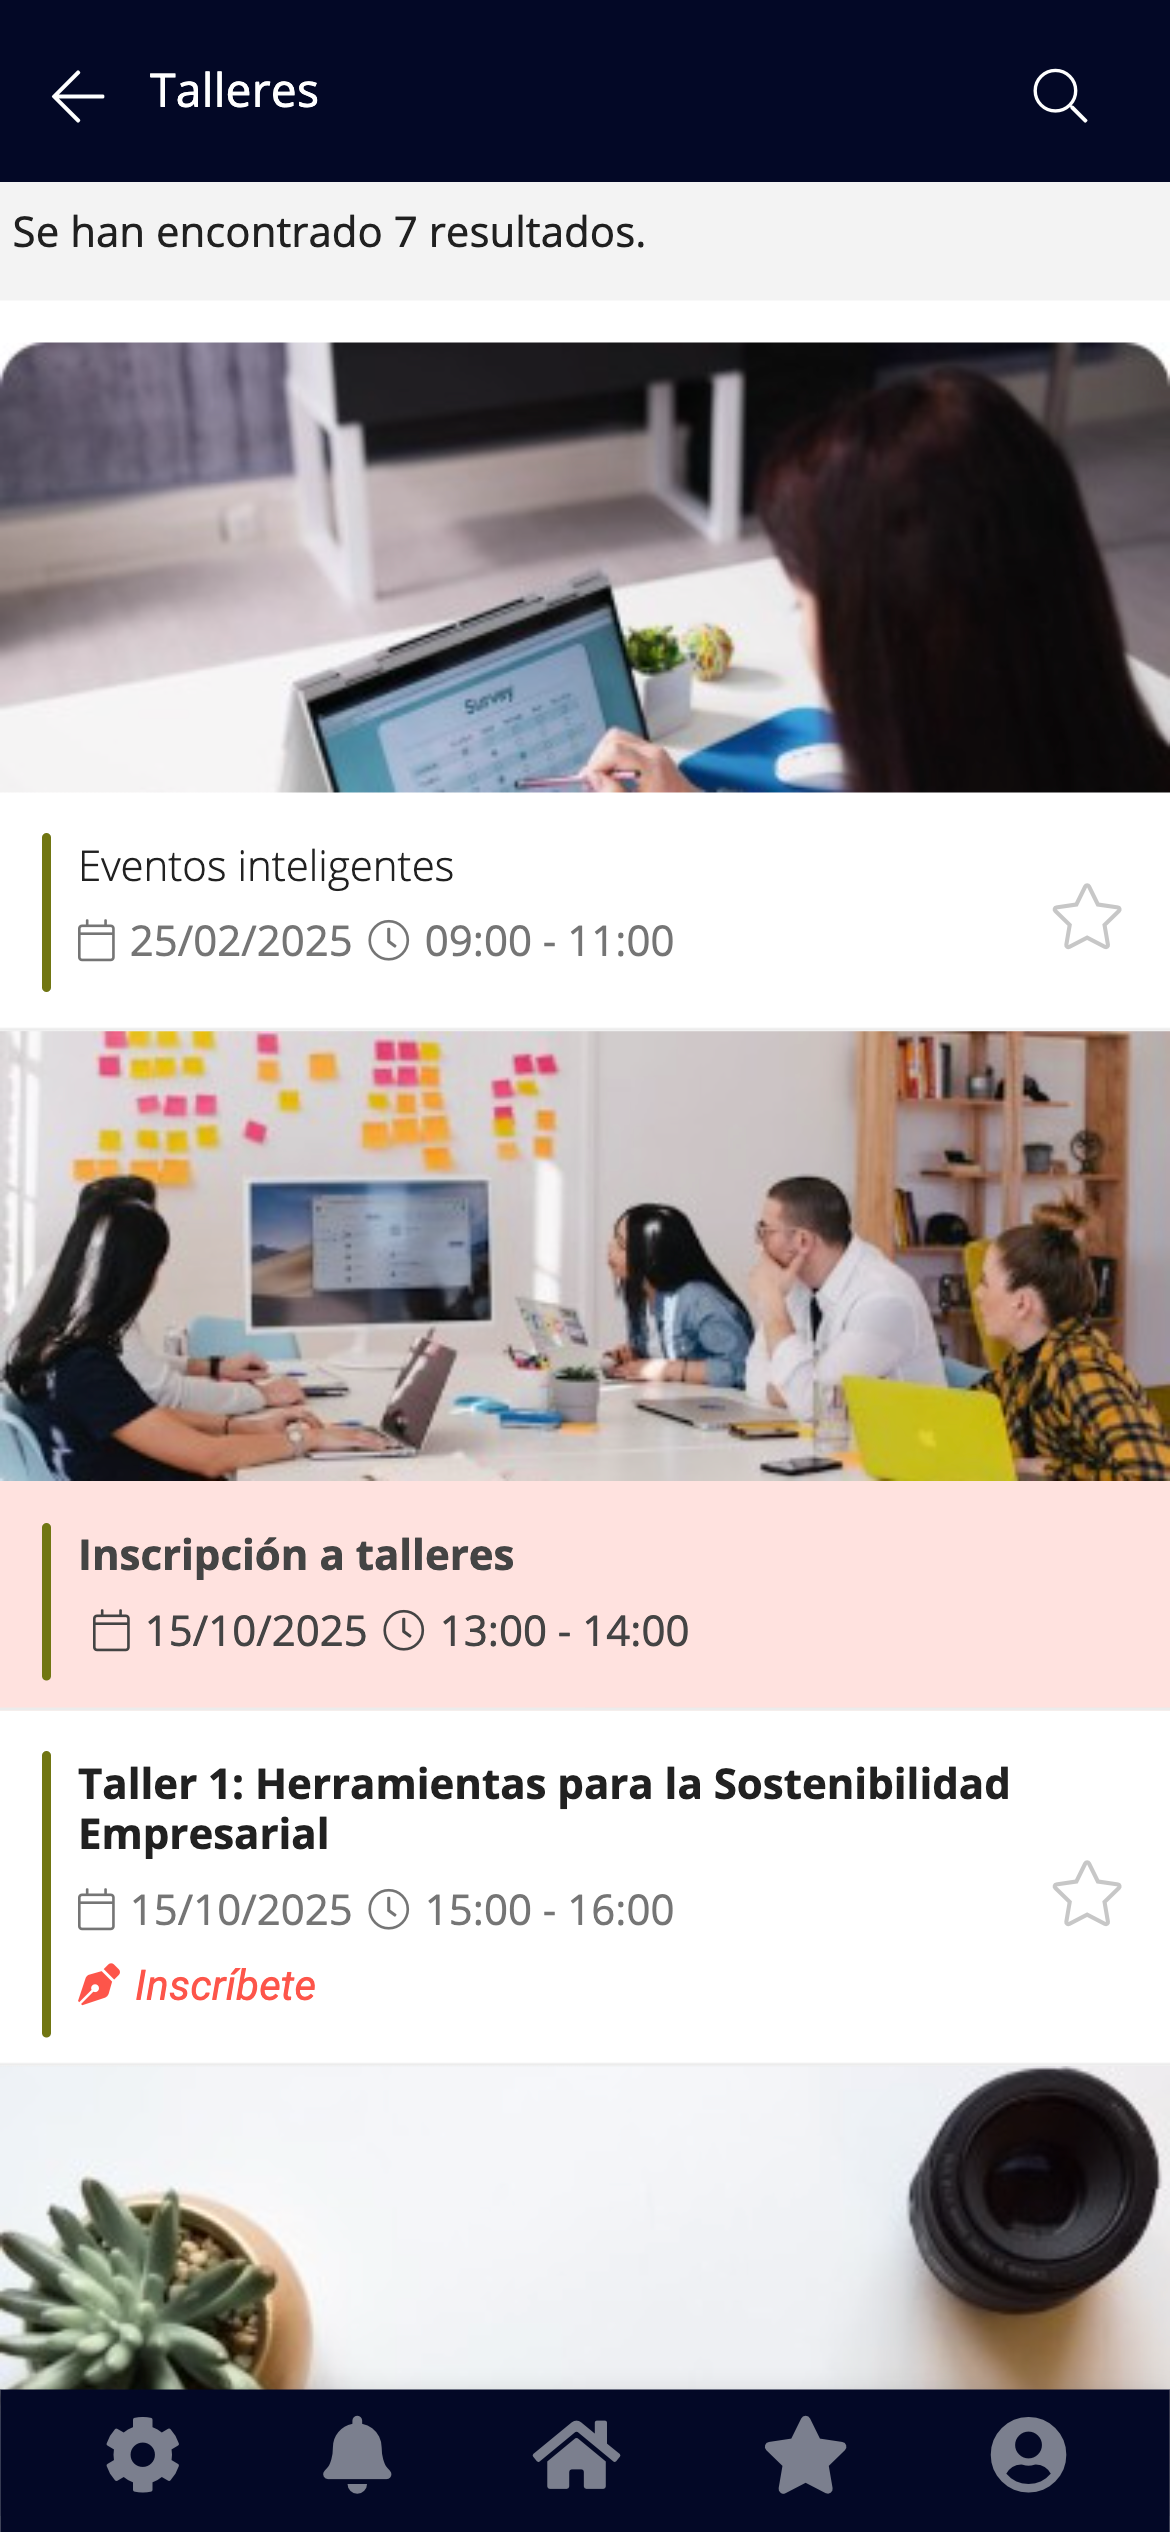
### 6. Result in the app

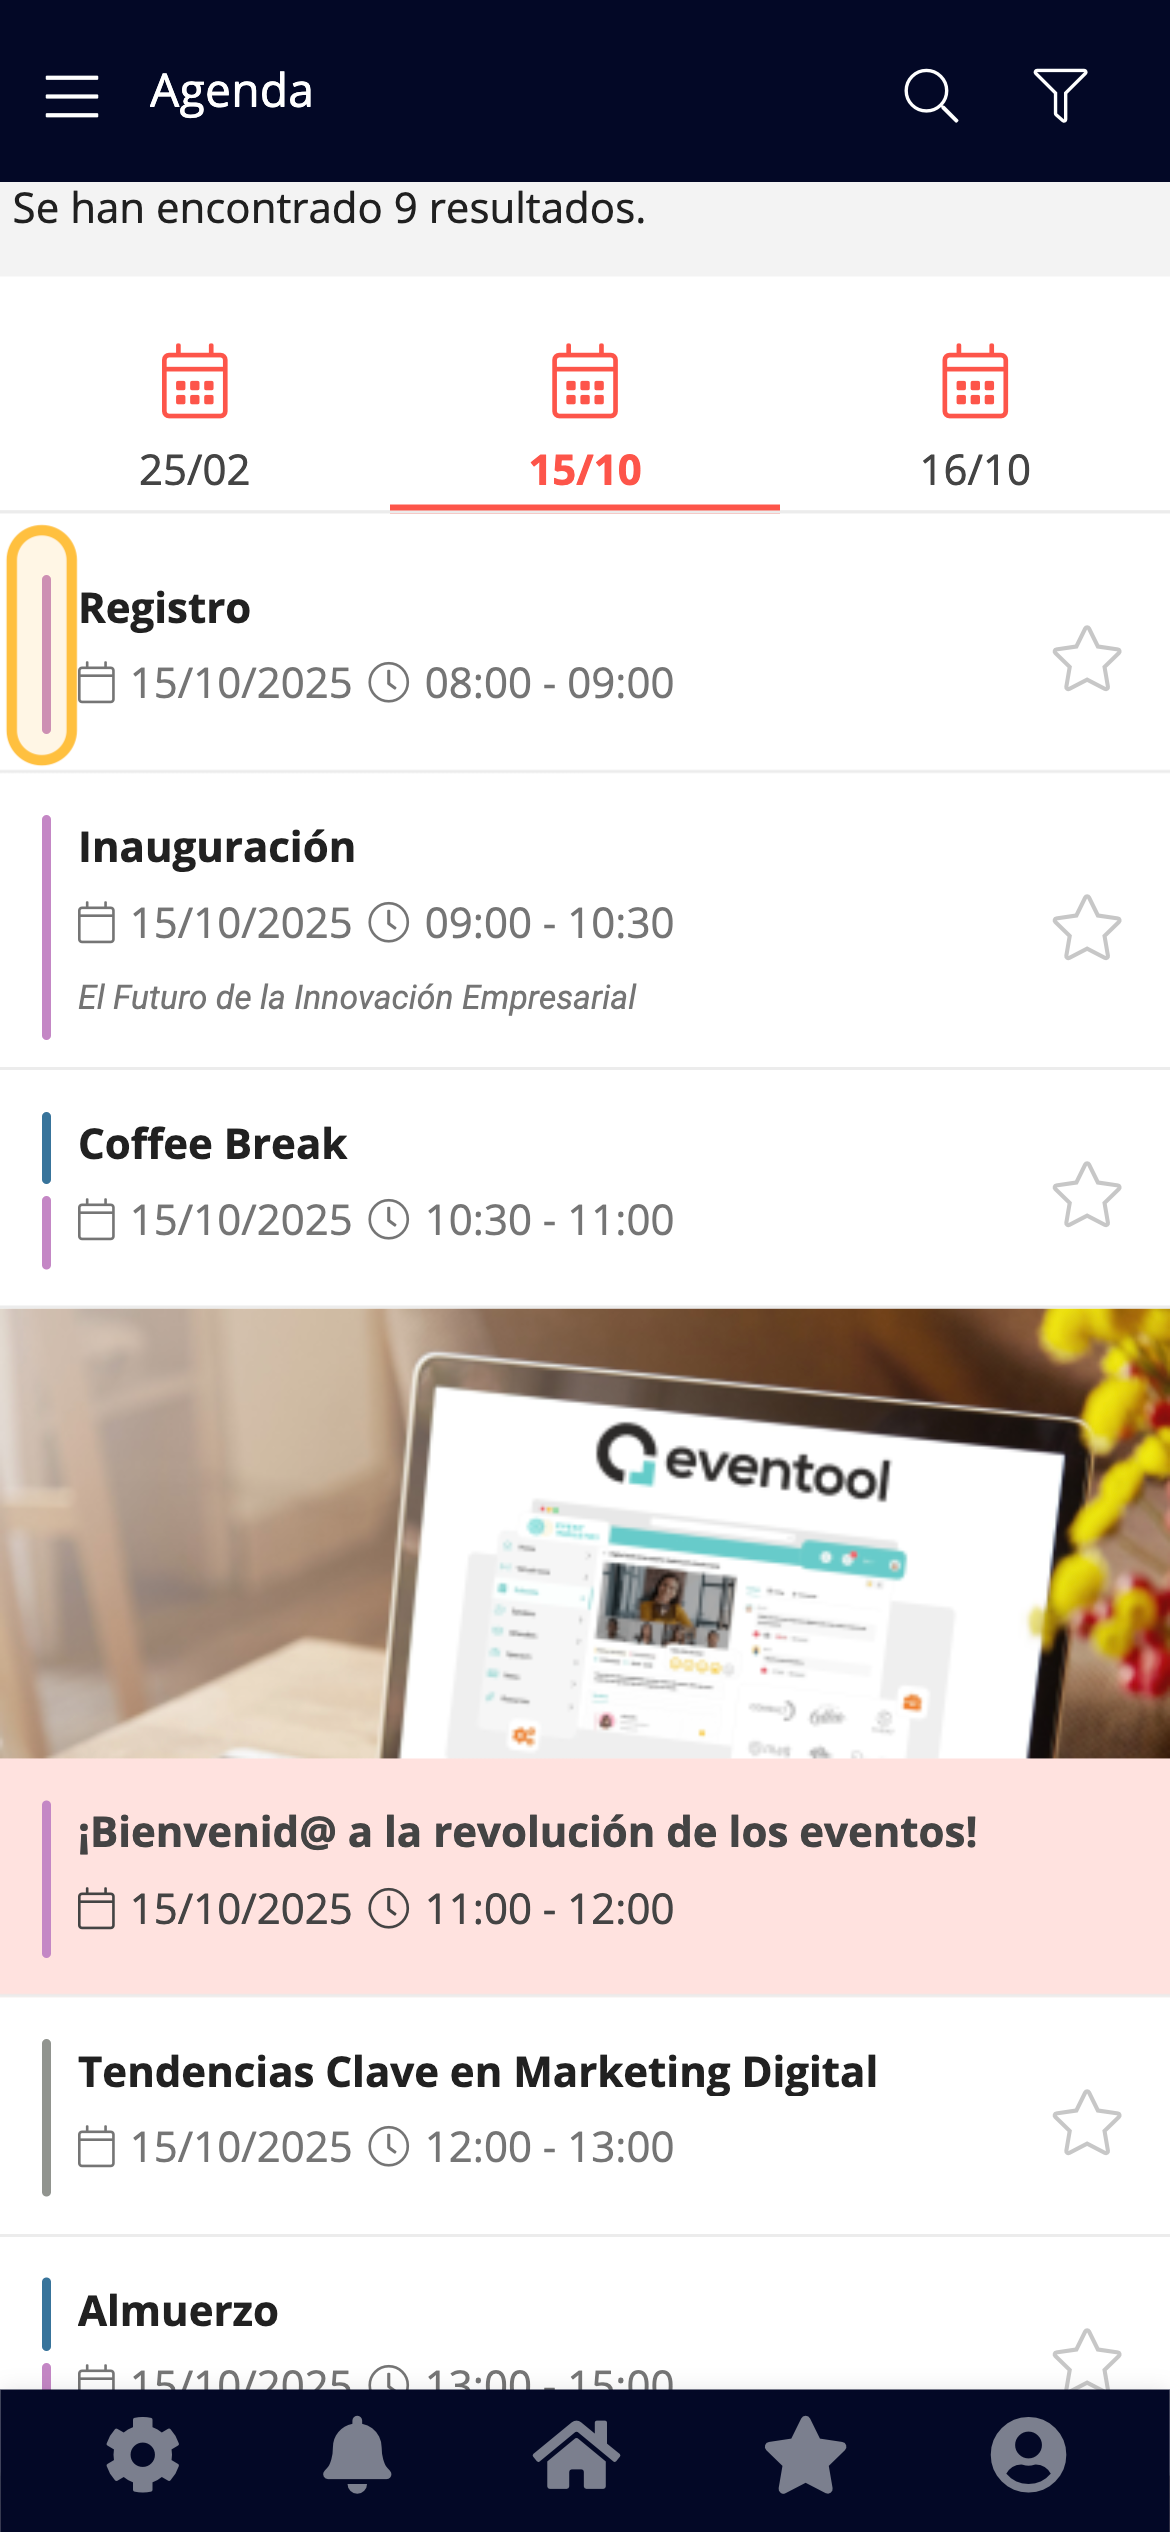
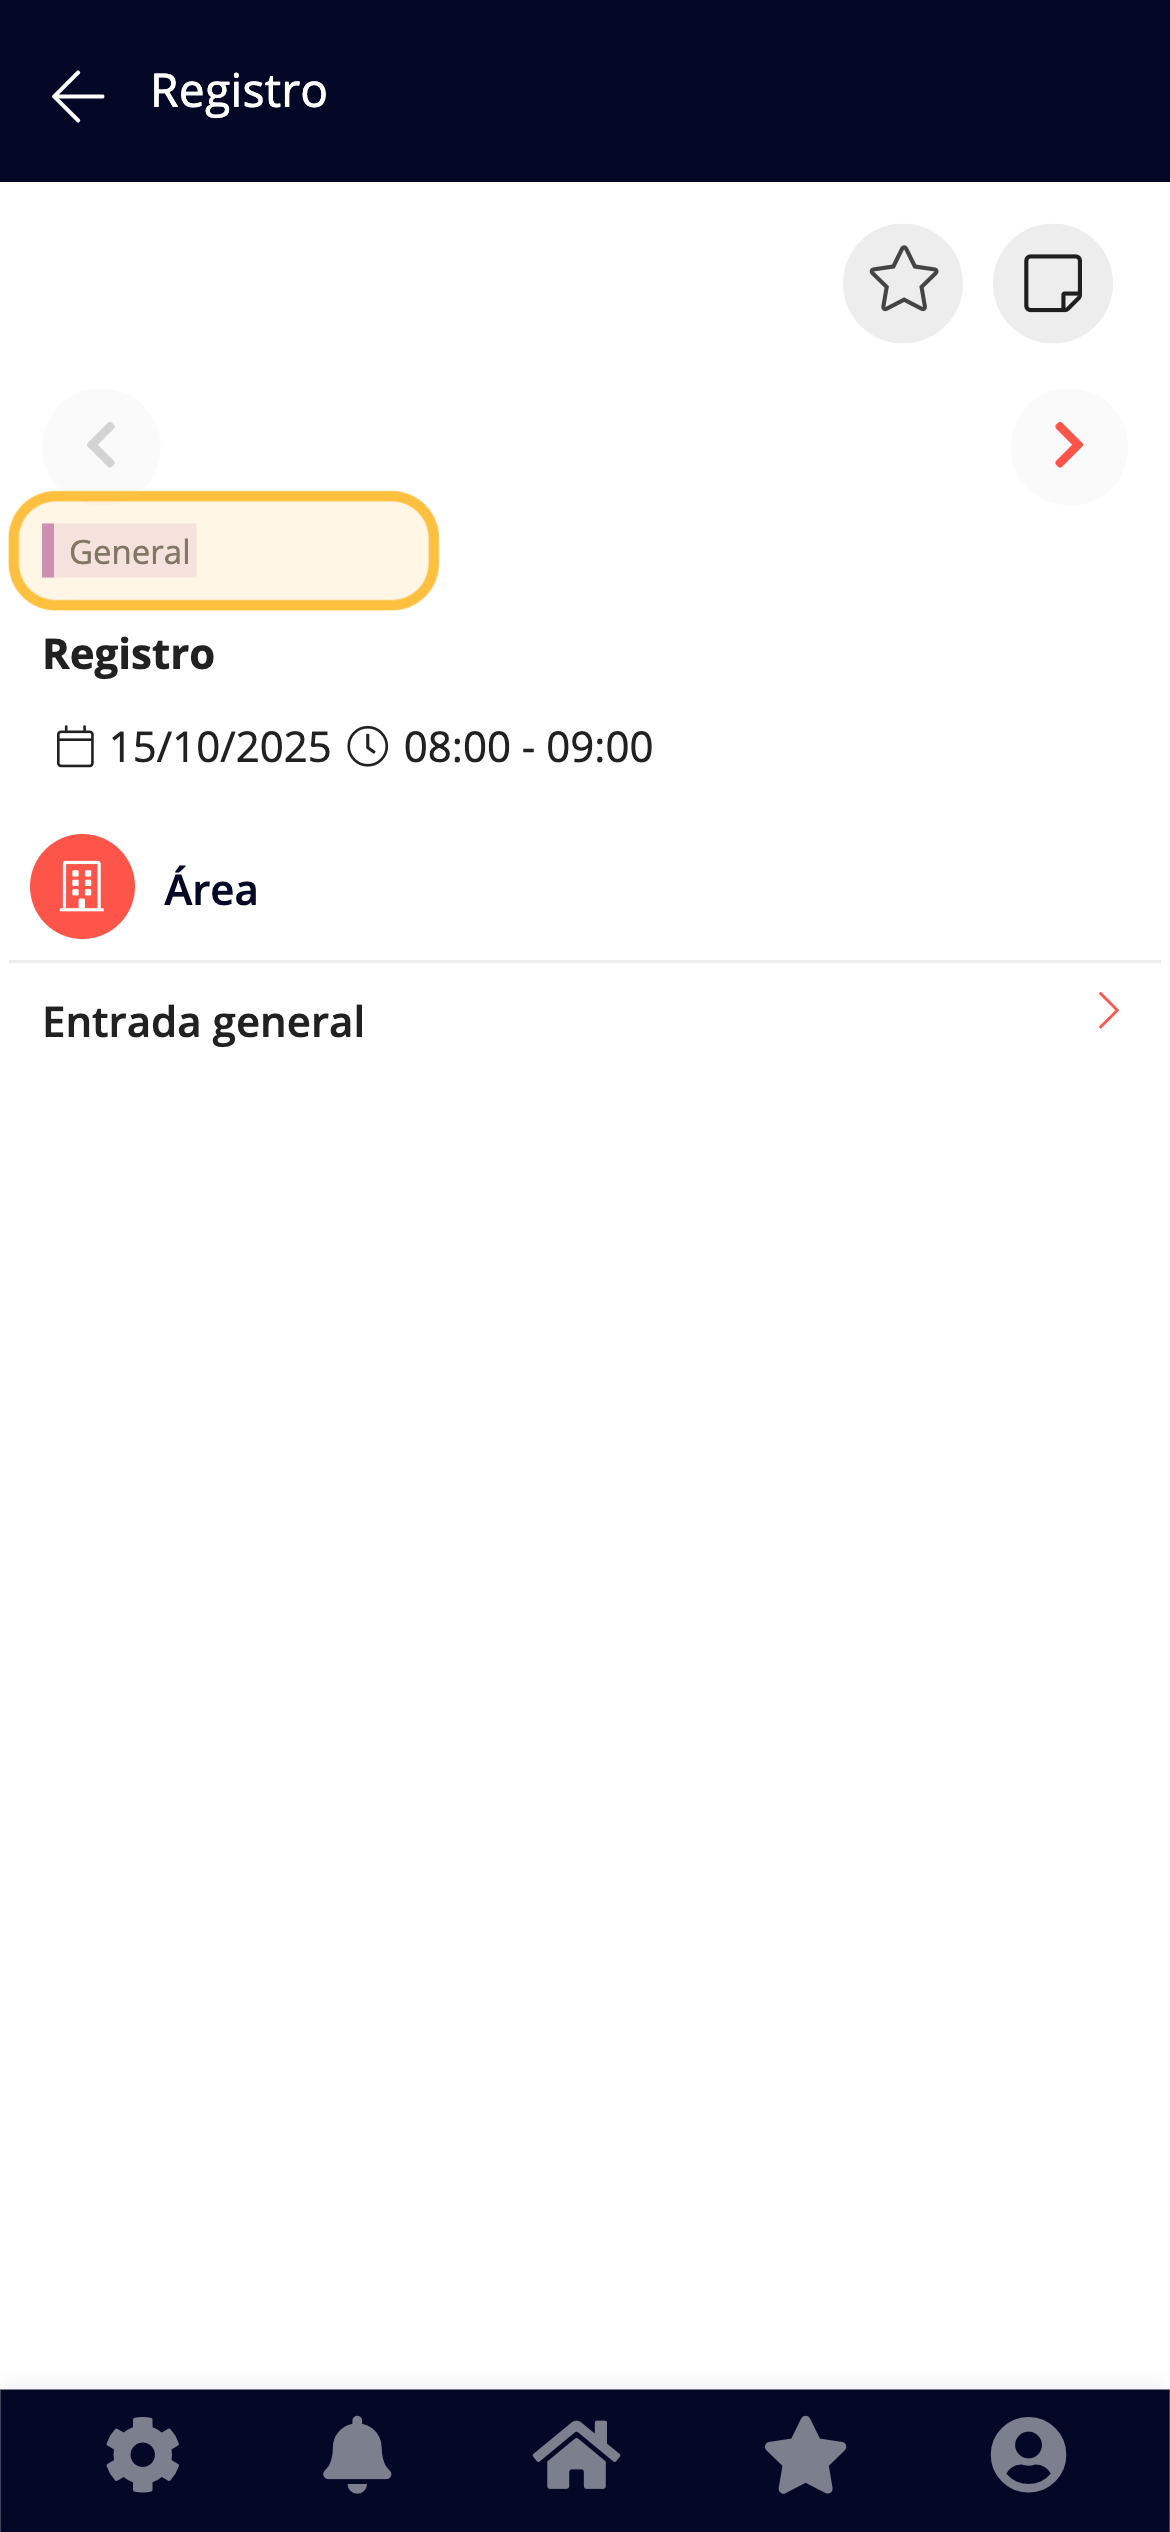
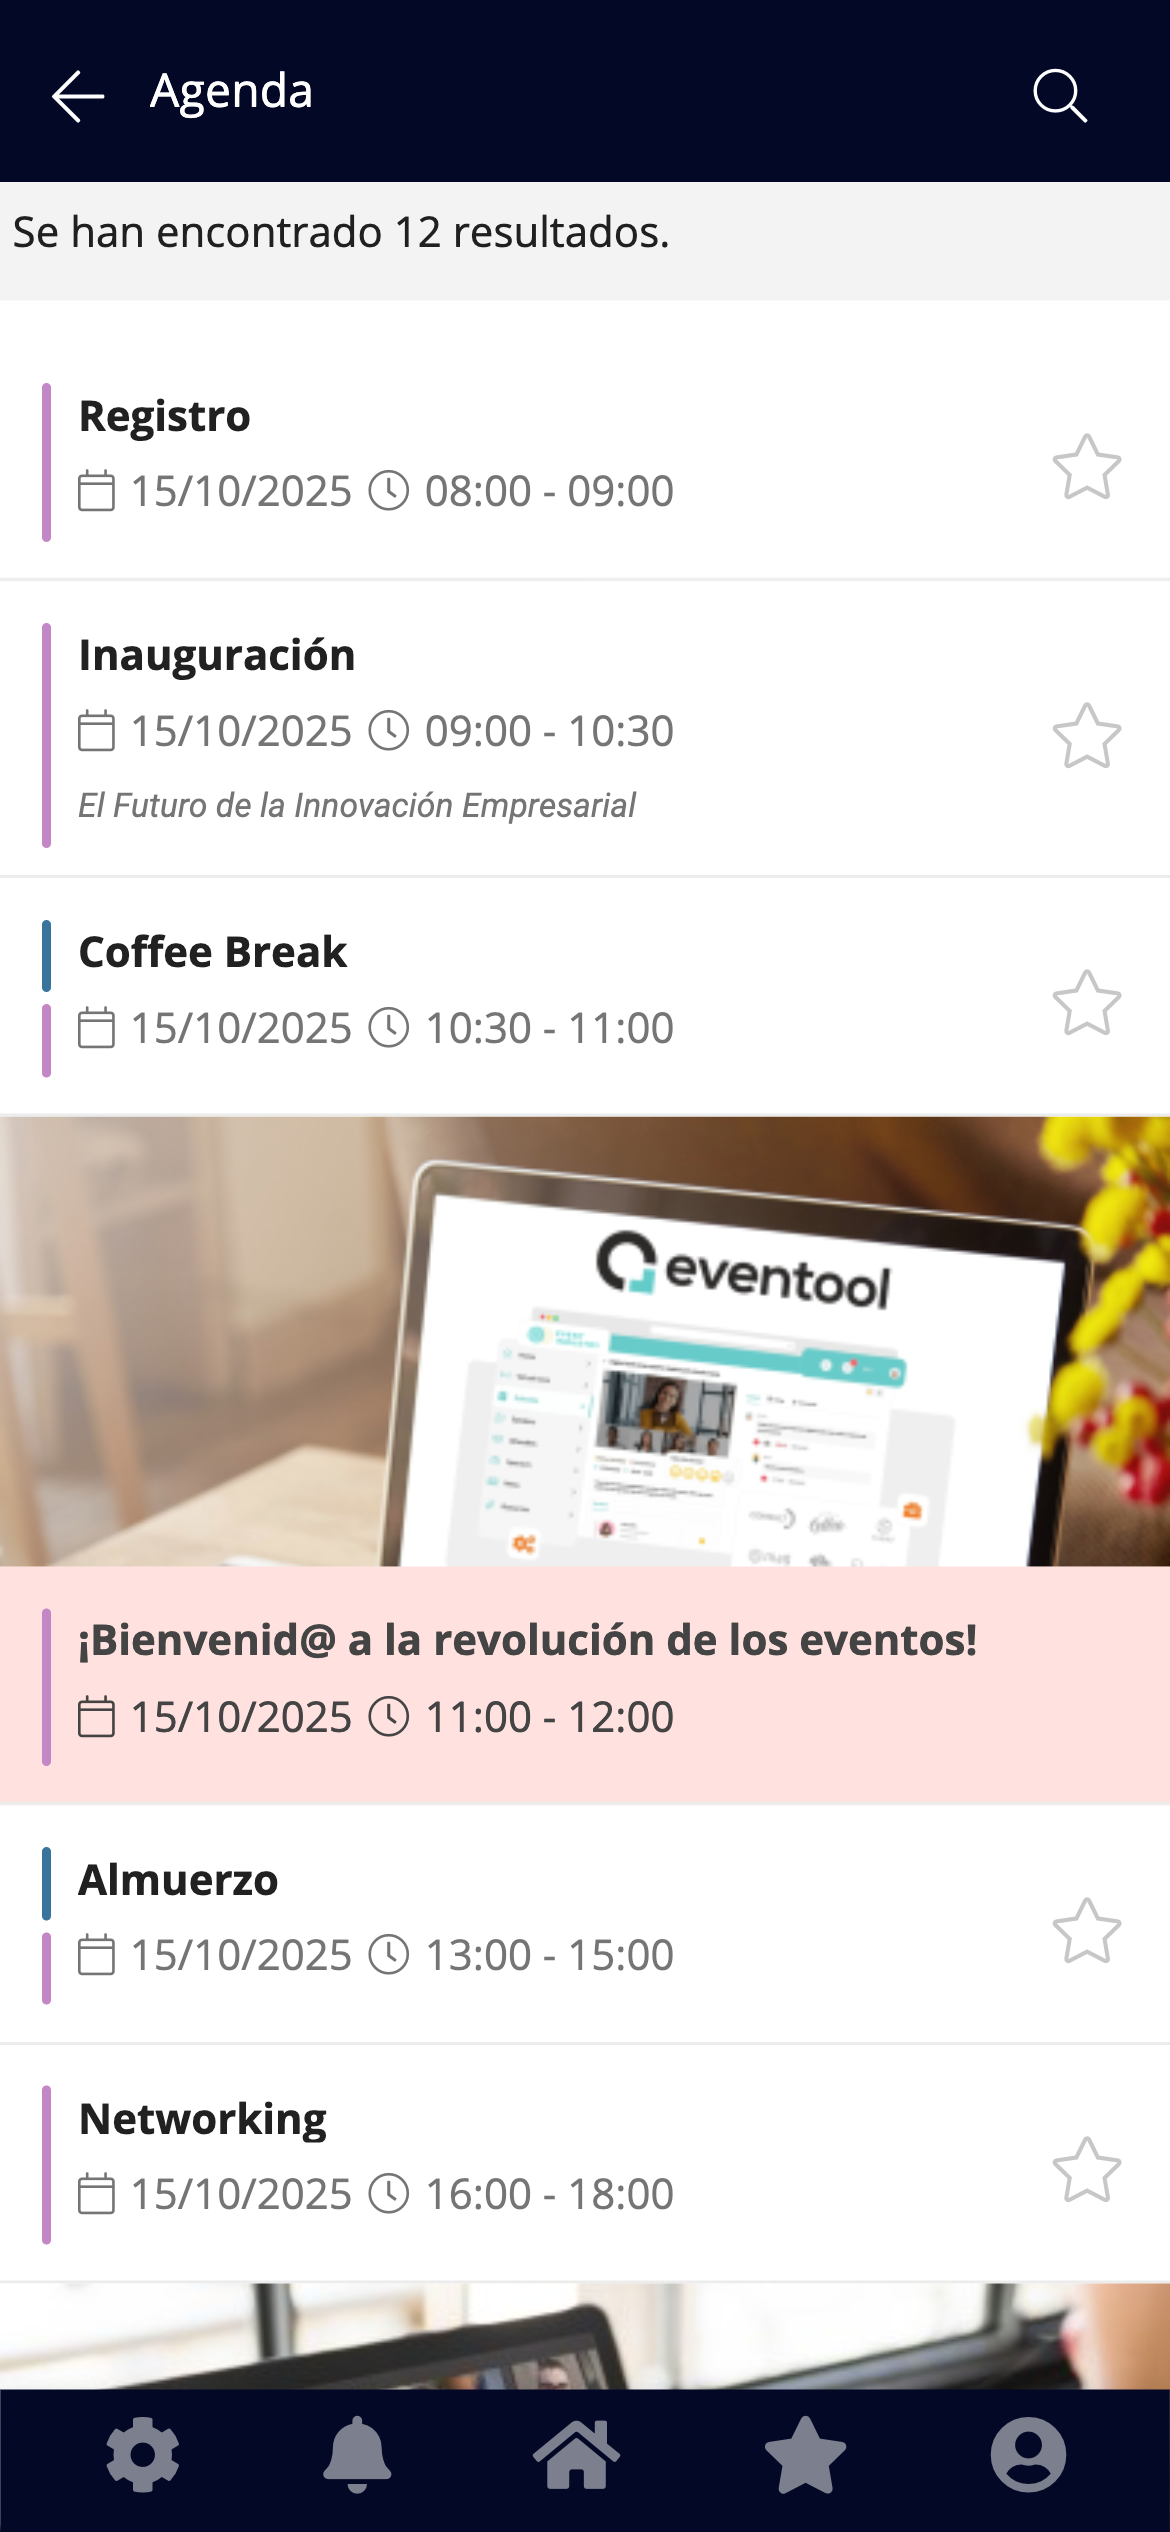
Once all this is done, app users will see the agenda sections differentiated according to the categories you have configured. This will allow them to easily navigate between the different event contents.

Here is an example of how it is displayed:
<div><figure><img src="https://content.gitbook.com/content/8g1s4Beg4BZdw3Dp6hLd/blobs/bsHW8nRKy56hkdlyagmA/agendas%2019.png" alt=""><figcaption></figcaption></figure> <figure><img src="https://content.gitbook.com/content/8g1s4Beg4BZdw3Dp6hLd/blobs/AygFrWrITFLdbAHyy10a/agendas%2020.png" alt=""><figcaption></figcaption></figure> <figure><img src="https://content.gitbook.com/content/8g1s4Beg4BZdw3Dp6hLd/blobs/dxL2oSqtkipA2N7ADAmj/agendas%2021.png" alt=""><figcaption></figcaption></figure> <figure><img src="https://content.gitbook.com/content/8g1s4Beg4BZdw3Dp6hLd/blobs/eKO80d6rIailbrmUYDM0/agendas%2022.png" alt=""><figcaption></figcaption></figure></div>