> For the complete documentation index, see [llms.txt](https://help.eventool.com/llms.txt). Markdown versions of documentation pages are available by appending `.md` to page URLs; this page is available as [Markdown](https://help.eventool.com/en/app/access-to-the-app/how-do-i-activate-attendee-registration.md).
# How do I activate attendee registration?
In Eventool, you can activate a registration form in your app so attendees can sign up directly. Below, we explain how to activate this feature and customize the options to suit your needs.
### Step 1. Activate registration in the app
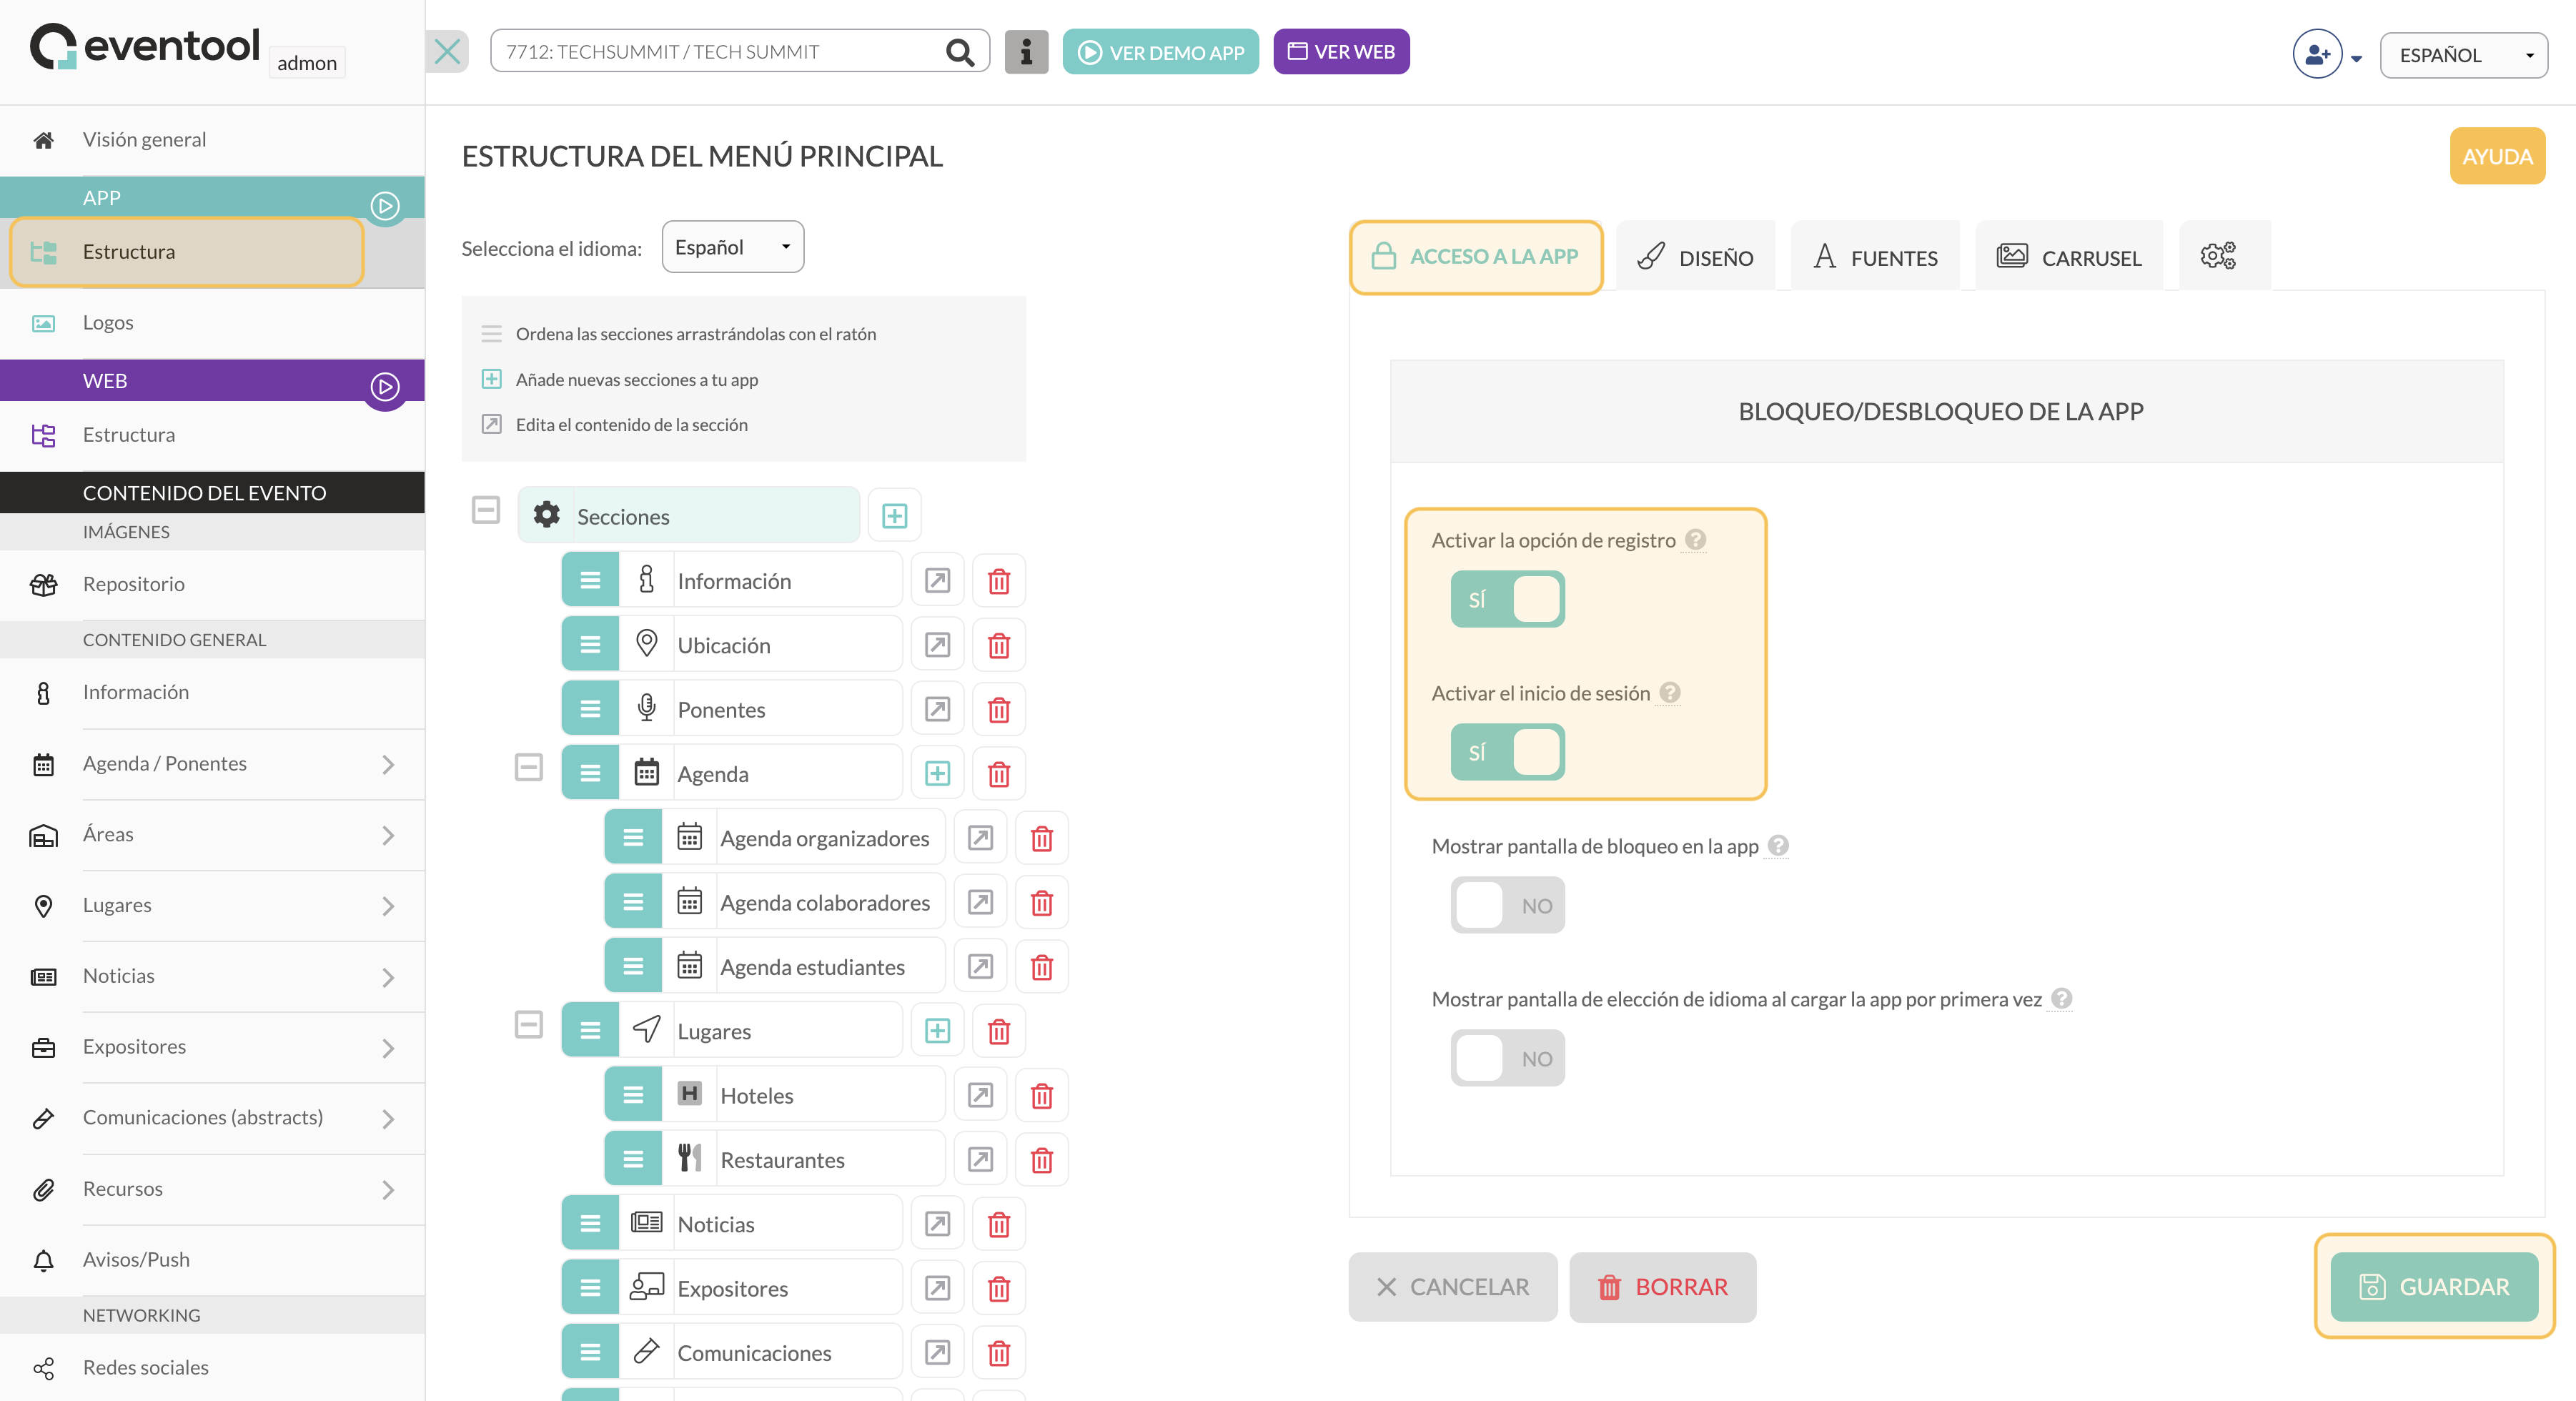
1. Access your event's administration panel and select the "**Structure**" tab in the side menu.
2. Within the "**APP ACCESS > APP LOCK/UNLOCK**" section, activate the following options:
* "**Activate the registration option**": This will allow attendees to register directly from the app.
* **"Enable login**": Make sure to enable this option if you want users to be able to log in with custom credentials after registering.
3. Click the "**Save**" button to apply the changes.
{% hint style="info" %}
**Note**: If you wish to display a language screen when loading the app for the first time, you can also enable the corresponding option in this same section.
{% endhint %}
### Step 2. Add the sign-up/registration section to the app structure
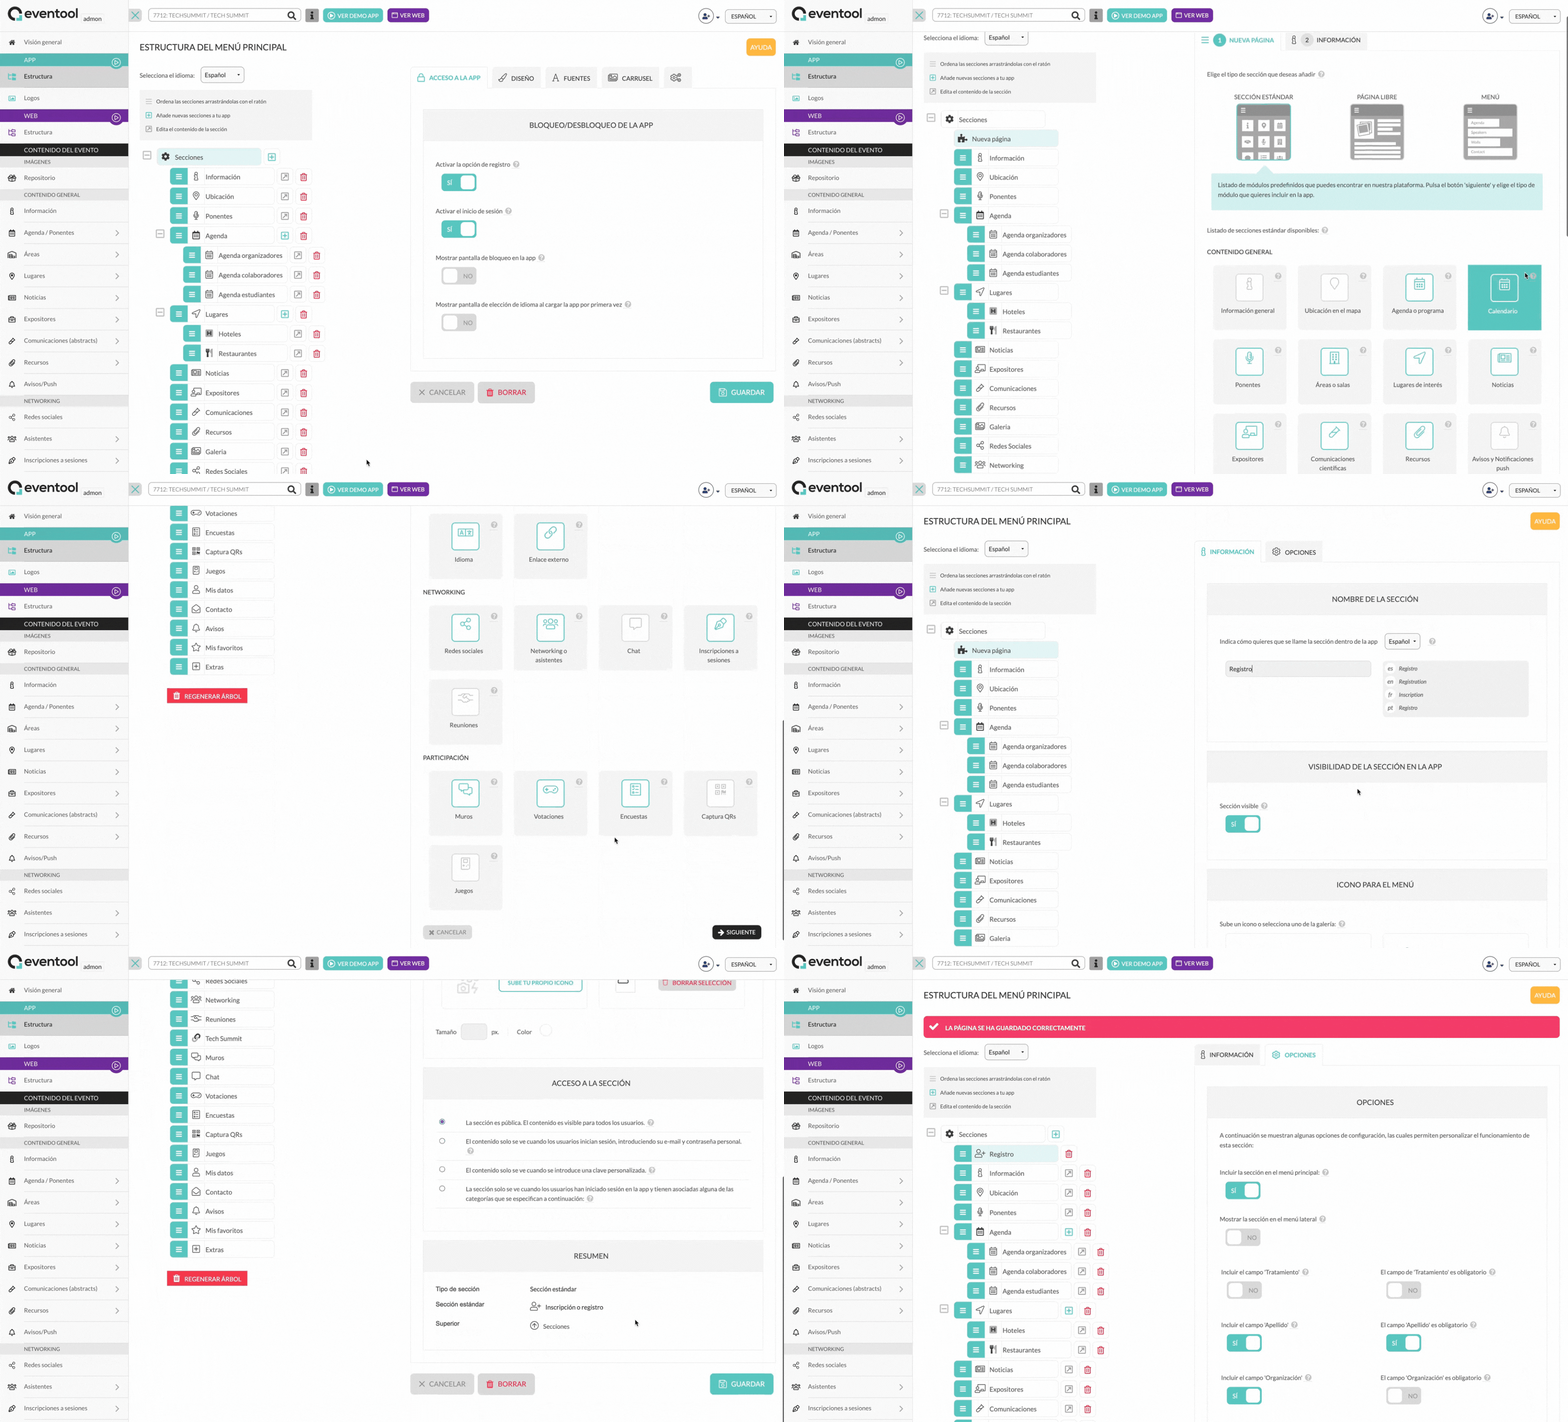
1. Go to the left side menu, select "**Structure**" under the "**APP**" category.
2. Click on "**Add new section**".
3. In the list of available modules, select the "**Registration or enrollment**" module.
4. Give the section a name (for example, "Record") and save it.
### Step 3. Configure the registration form options
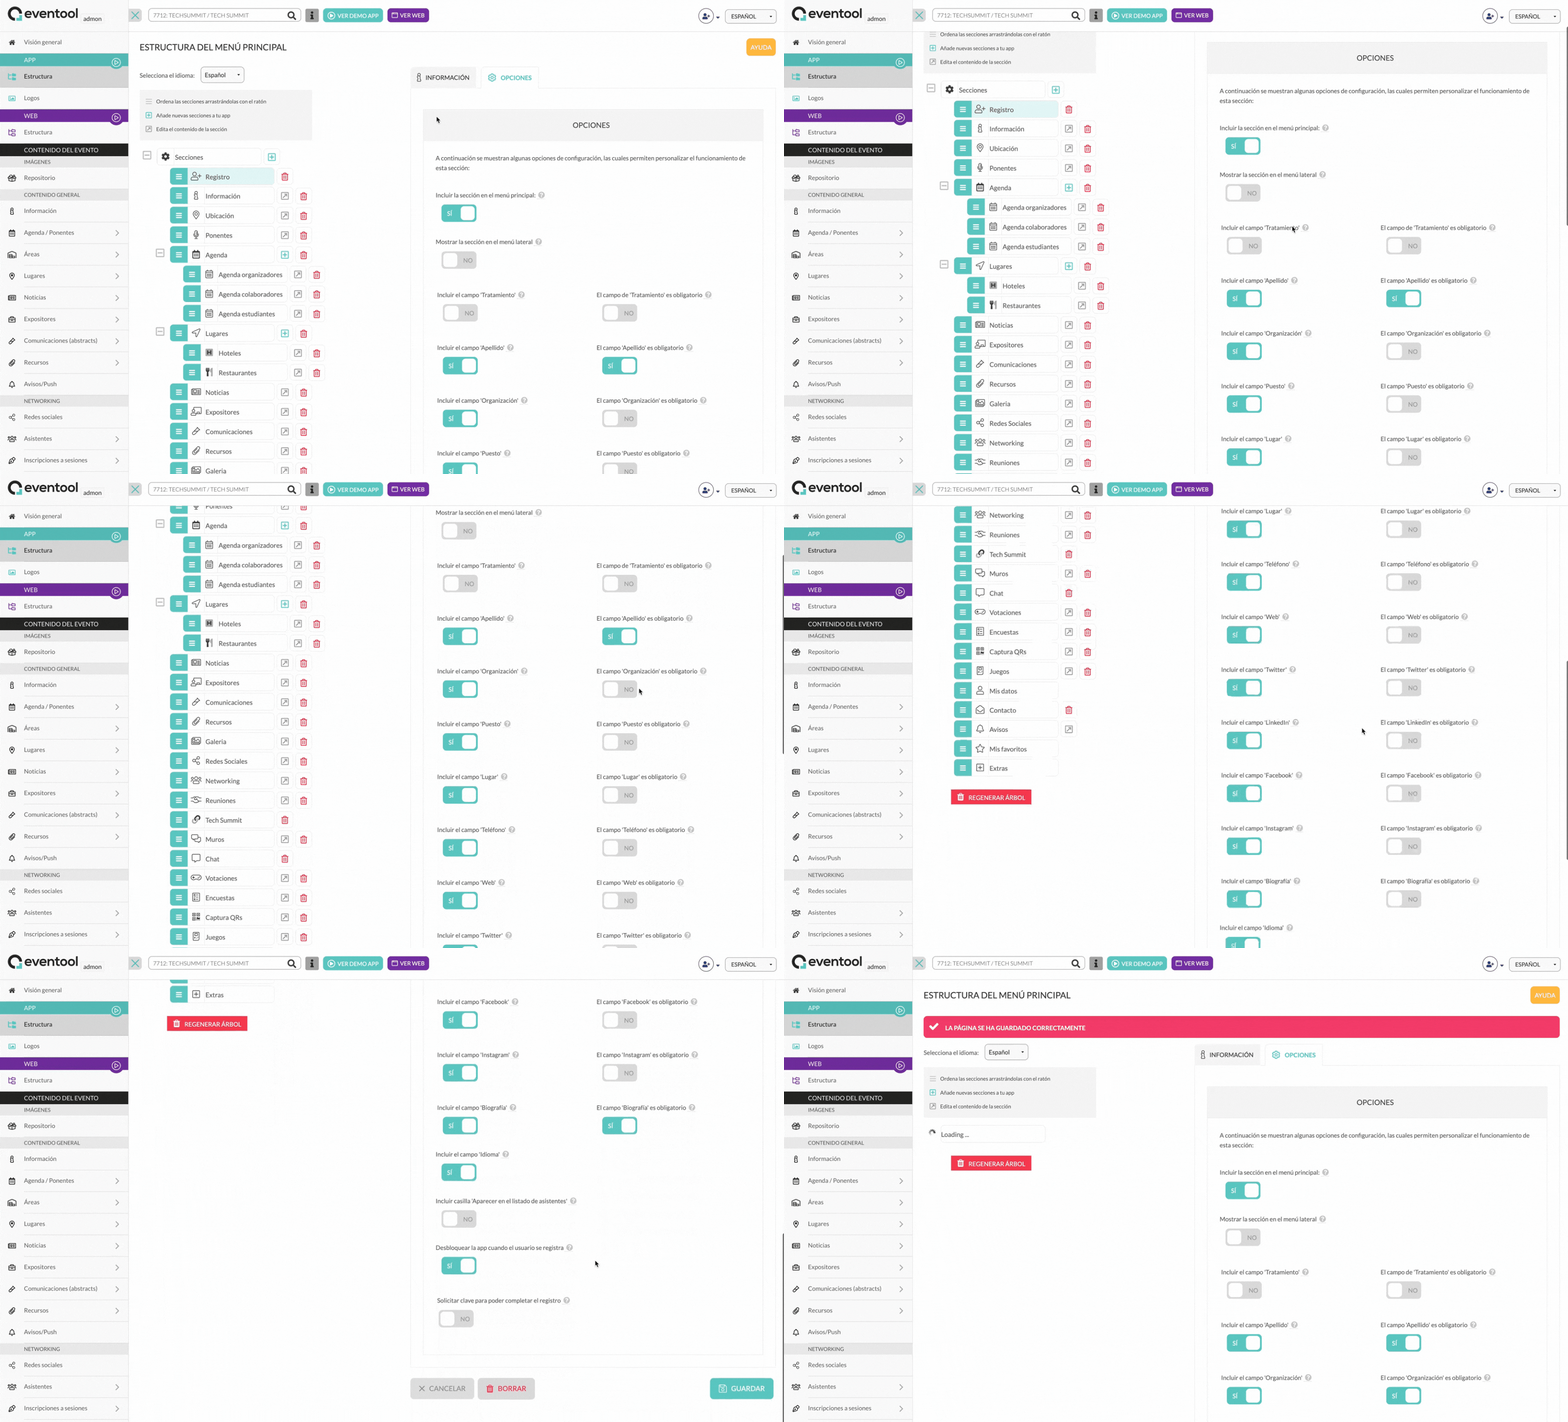
1. Once you have added the registration module, select the section in your app's structure.
2. Go to the "**Options**" tab to customize the fields that will appear on the form. Available settings include:
* Include the "**Surname**" field: Activate this option if you want this field to be visible and required.
* **Include the "Organization"** **field**: ideal if you need to know which company or institution the assistant belongs to.
* **Include the "Position"** **field**: useful for gathering information about the user's role or position.
* Other options such as "Treatment" or "Venue", depending on the needs of your event.
3. Customize which fields are **required** or only optional by checking the corresponding box in each setting.
4. Click "**Save**" to finish.
### Step 4: Preview and testing
To verify that everything is working correctly:
1. Click the "**View Demo App**" button at the top of the panel.
2. Navigate to the registration section to see how the configured fields are displayed.
3. Perform a registration test to validate that the functionality is active.
.gif)